Handle Curves, Corners, and Sloped Areas
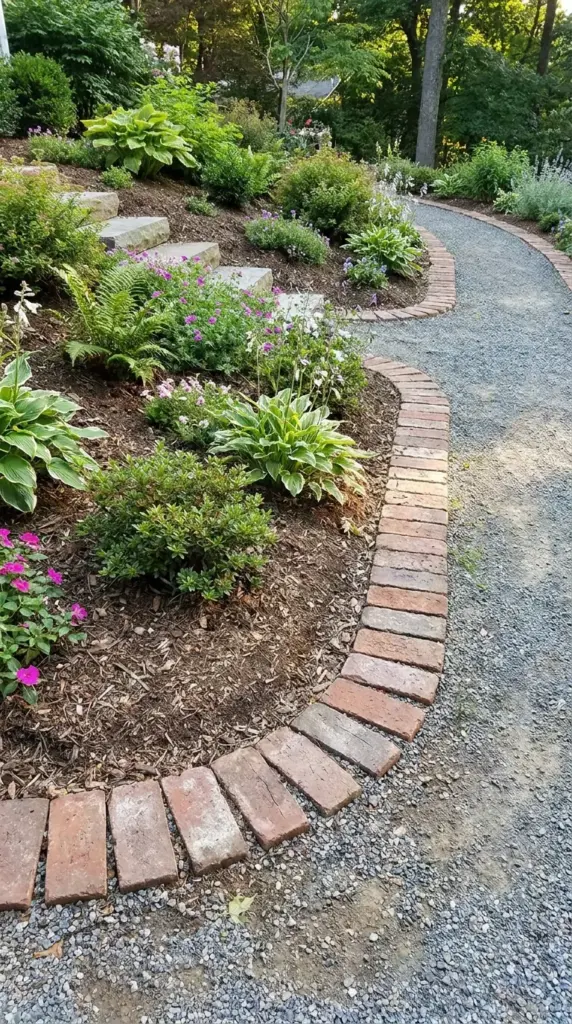
Lay bricks on gentle curves
For soft curves, fan the bricks slightly so the joints widen a hair on one side. This is normal and usually looks better than forcing perfectly tight joints.
Gentle curves are the sweet spot for lawn edging bricks. They feel natural and hide tiny spacing changes well.
Tackle corners and transitions
At corners, dry-fit several bricks before setting them. You may want a mitered look, a simple butt joint, or a slightly wider transition that blends into a walkway edging brick area.
Take your time here. Corners are like eyeliner for the yard—when they’re off, everybody notices.
Install on a slope without gaps
On a mild slope, step the bricks gradually or follow the slope with even reveal. The important thing is consistency, not forcing every brick to the exact same exposed height.
On steeper grade changes, shorter sections often look cleaner than one long awkward run.
Cut bricks only when needed
If a curve is tight, cutting a few bricks may help. But often, slight spacing adjustments are enough and save time, dust, and frustration.
I avoid cuts unless the fit really bugs me. Hit the next button below, because the next step is how you lock the border in place without touching concrete.


GIPHY App Key not set. Please check settings