Set Posts the Right Way for Strength and Straightness
Hole depth, width, and drainage
A common rule is to bury about one-third of the post, with adjustments for frost depth and local code. Holes should also be wide enough to support the post and allow backfill or concrete properly.
Add gravel at the bottom for drainage. Wet soil sitting around wood is just rot with a countdown timer.
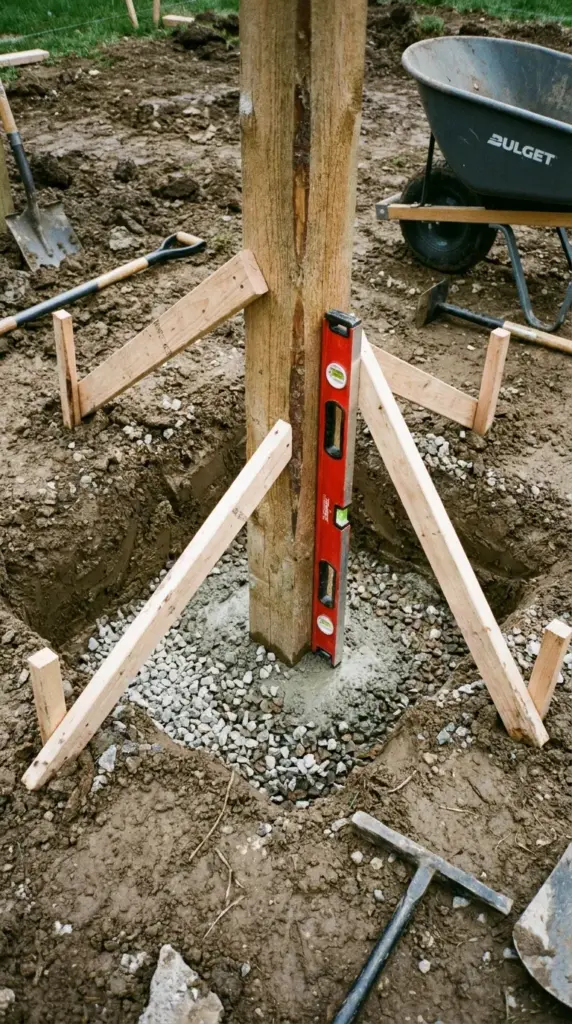
Keep every post plumb
Set each post and check it from two sides with a level. Brace it before the mix sets so it doesn’t drift while you move on.
This part tests your patience, not gonna lie. But a crooked post at the start creates a chain reaction of annoying fixes later.
Mistakes that lead to leaning fences
The big ones are shallow holes, poor drainage, rushing the layout, and not checking alignment as you go. Another sneaky issue is using wet, warped posts that move as they dry.
A fence rarely fails all at once. It usually starts with one lazy shortcut.
Timing tips that help
Avoid setting posts in a downpour or in soggy soil if you can help it. Give posts time to cure and settle before hanging too much weight on them.
Slow and steady really does win here. Up next, I’ll show you how to build the rail system that gives your DIY fence project its backbone.

GIPHY App Key not set. Please check settings