The Ground Prep Nobody Warns You About
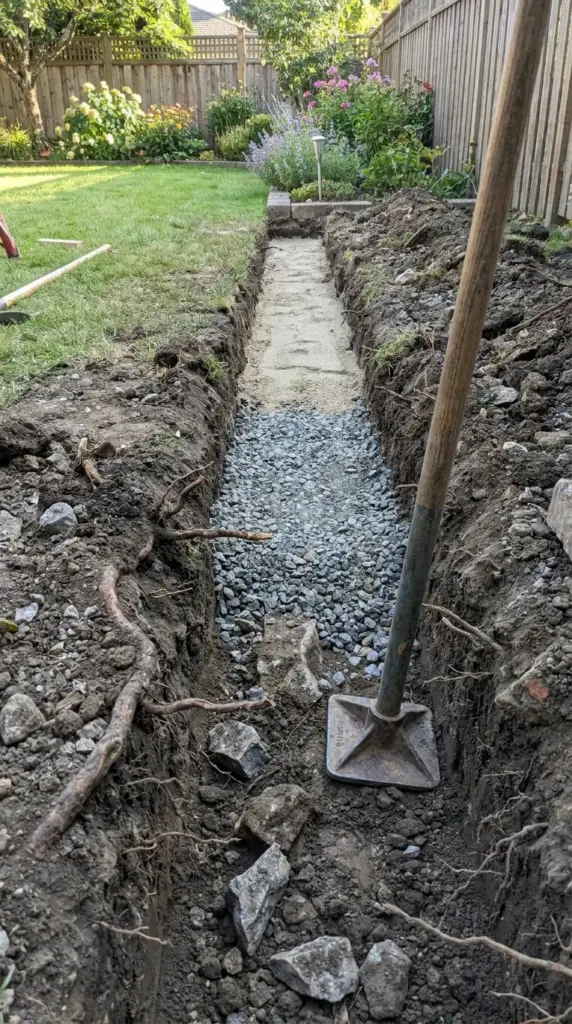
Digging depth makes or breaks the border
If you don’t dig deep enough, the bricks sit too high and feel unstable.
For most garden border installation jobs, I want room for the brick plus a compacted base layer. Exact depth depends on brick thickness and soil, but “barely scratched the surface” is never enough.
Roots and rocks will test your patience
This is the part nobody posts on social media.
You’ll hit old roots, hidden stones, dense clay, and random construction debris if your yard has history. I once found a bent spoon, a chunk of tile, and what looked like ancient mystery gravel all in one bed.
Base prep is not optional
A layer of paver base or compacted gravel under the border helps stop sinking and shifting.
Then a bit of leveling sand on top helps you fine-tune height and alignment. Skip this, and your brick lawn edging may look great for about five minutes.
Compaction is the unglamorous hero
You need to tamp the base well, especially in soft or recently disturbed soil.
That one step helps reduce wobble, uneven settling, and future callbacks from your own annoyed self. But even a perfect base can fail if water starts causing trouble, so hit the next button below.

GIPHY App Key not set. Please check settings