4. Using Dirty or Dull Pruning Tools
I’ll never forget the summer I accidentally turned my beautiful lavender garden into a disease-ridden mess. All because I was too lazy to clean my pruning shears between plants.
What started as a simple afternoon of deadheading turned into watching half my lavender collection slowly die from some mysterious ailment. Turns out, my “convenient” dirty tools were basically disease delivery systems moving from plant to plant.
How Contaminated Tools Become Plant Killers
Dirty pruning tools are like using the same tissue for multiple sick people – they spread problems faster than you can imagine. I learned this when a fungal infection jumped from one struggling plant to five healthy ones in a matter of weeks.
Plant diseases love to hitchhike on pruning tools. Bacteria, fungi, and viruses can survive on metal surfaces way longer than I ever thought possible.
One infected cut can contaminate your entire tool, and then you’re basically inoculating every plant you touch afterward. It’s like being a disease delivery service without realizing it.
My neighbor (who’s a retired botanist) explained that some plant pathogens can live on tools for months if conditions are right. That really put my casual cleaning habits into perspective.
The Crushing Problem with Dull Blades
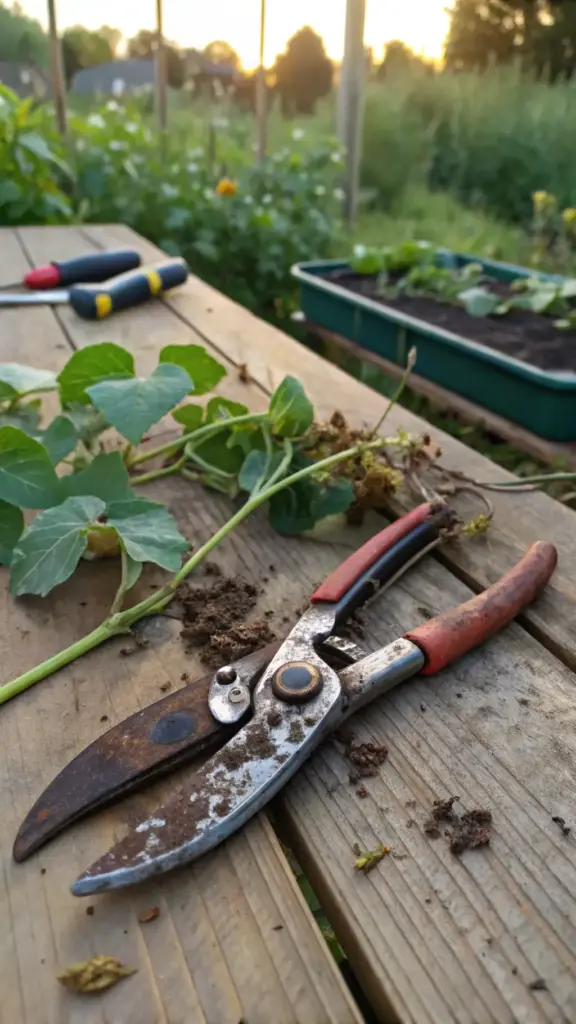
Dull pruning shears don’t cut – they crush and tear. I used to think my old, beat-up shears were “good enough” until I saw what they were actually doing to my plants.
Instead of clean cuts that heal quickly, dull blades create ragged wounds that take forever to close up. These messy cuts are basically open invitations for disease and pests.
Crushed stem tissue dies back further than clean cuts, which means you end up removing more of the plant than you intended. I’ve seen stems die back 2-3 inches from a bad cut made with dull tools.
It’s like the difference between a surgeon’s scalpel and a butter knife. Your plants deserve better than my old, neglected shears were giving them.
Essential Tool Maintenance for Healthy Cuts
Sharp tools are non-negotiable – I replace or sharpen my pruning shears at least twice per growing season now. The difference in cut quality is absolutely dramatic.
I test sharpness on a piece of paper before each major pruning session. If the shears can’t make a clean cut through paper, they’re not touching my plants.
Oiling the pivot point keeps the action smooth and prevents the blades from binding during cuts. A drop of 3-in-1 oil every few uses makes a huge difference.
I also wipe down the blades after each use to prevent sap buildup and corrosion. Clean, dry tools last way longer than ones left dirty in the shed.
Best Pruning Tools for Different Lavender Varieties
Bypass pruners work best for most lavender varieties because they make cleaner cuts than anvil-style pruners. I use Felco #2s for almost everything now.
For delicate French lavender varieties, I actually prefer small floral snips – they give me better control and don’t crush the tender stems. Regular pruning shears can be too aggressive for these softer varieties.
English lavender with thicker stems can handle standard bypass pruners just fine. The stems are sturdy enough that you don’t need to worry about crushing damage as much.
I keep three different tools in my garden caddy now – small snips for delicate work, medium bypass pruners for most jobs, and larger loppers for the occasional thick, woody stem.
My Cleaning Protocol That Actually Works
Rubbing alcohol in a spray bottle is my go-to cleaning solution. I spray the blades between every single plant now – no exceptions, even if they look healthy.
It takes literally 10 seconds per plant, but it’s saved me from so many disease problems. 70% isopropyl alcohol kills most plant pathogens on contact.
I also carry disinfecting wipes for quick cleanups when I’m moving between different garden areas. The convenience factor makes me way more likely to actually do the cleaning.
At the end of each session, I do a thorough cleaning with soap and water followed by the alcohol spray. Then everything gets dried completely before storage.
I learned to think of tool cleaning like washing hands between patients – it’s just basic hygiene that prevents way bigger problems down the road.
Ready for the mistake that stumped me for three years running? Click next to discover why I kept killing the same lavender varieties over and over again – and the simple variety guide that finally helped me match the right pruning technique to each type of lavender in my garden.

GIPHY App Key not set. Please check settings