Finish the Border So It Looks Clean and Professional
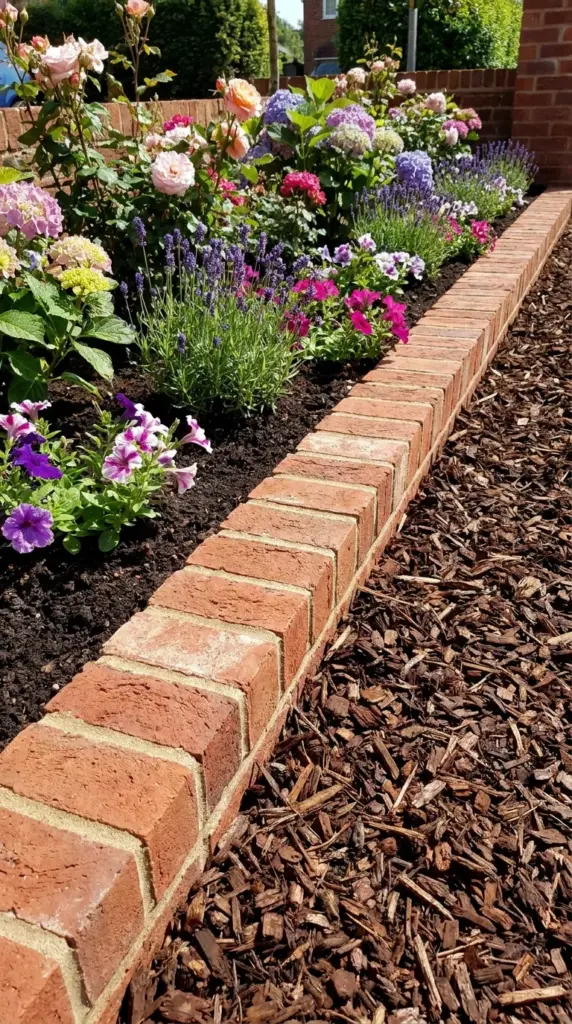
Backfill to lock the bricks in place
After the bricks are set, backfill soil on the bed side and tamp lightly. On the outside edge, use soil, gravel, or mulch depending on the look you want.
This step helps create a stable garden bed definition line. It also reduces wobble and makes the border feel built-in.
Add mulch or stone for contrast
Fresh mulch makes brick color pop right away. White stone or pea gravel gives a brighter, more modern contrast if that fits your style.
This is one reason mulch and brick edging is such a popular combo. It looks finished fast, even if the plants themselves are still filling in.
Sweep sand into gaps if needed
If your layout has visible joints, brush dry sand into the spaces. It helps stabilize the pattern and creates a cleaner appearance.
Don’t overdo it if you want a looser, rustic look. Some designs are better with a little imperfection.
Do one final visual check
Step back and look for low spots, tilting bricks, or awkward gaps. Make tiny corrections now before everything settles and the bed gets planted.
That ten-minute final check can save you a whole second Saturday later. Hit the next button below, because a few common mistakes can wreck a good border, and they’re easier to avoid than to fix.

GIPHY App Key not set. Please check settings