Mark and Prep the Border Area the Right Way
Map the edge before you dig
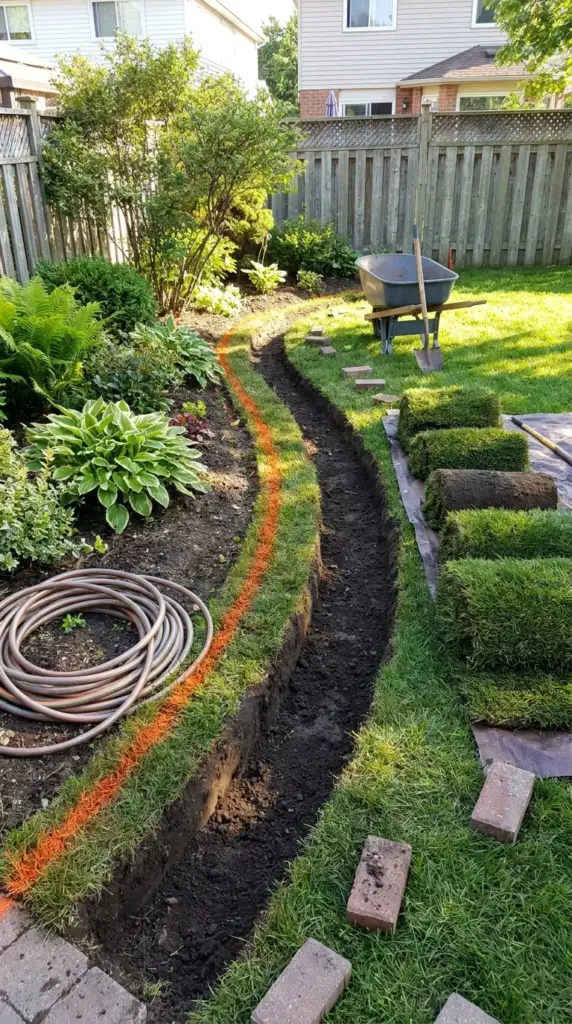
Use a garden hose for curves or a string line layout for straight sections. Once it looks right, mark the line with spray paint marking or a spade.
Stand back and look at it from the street and the porch. A border can look very different from ten feet away than it does up close.
Dig the trench to the right size
For most simple borders, dig a trench slightly wider than the brick and deep enough for your base plus about half the brick height. That helps create a stable edging trench without burying too much of the border.
If your soil is soft, go a bit deeper and use more gravel. If it’s compact and well-drained, you can usually keep it simpler.
Remove grass, roots, and loose soil
Clear everything from the trench so the base sits on firm ground. Grass and roots left underneath can decay and cause uneven settling later.
This is the part I’m always tempted to rush. Every single time I rush it, the border tattles on me later.
Prep is what prevents shifting
Most failed borders aren’t about the brick. They fail because the trench wasn’t deep enough, the soil was loose, or the line wasn’t checked before installation.
A careful prep stage makes the rest of the project almost weirdly easy. Hit the next button below, because the base layer is where real stability happens, especially if you deal with rain or winter freeze-thaw cycles.


GIPHY App Key not set. Please check settings