The Secret Soil Cocktail That Prevents Root Rot Every Time
Let’s be completely honest for a moment: if you plant your succulents directly into a standard bag of “premium potting soil” from the big-box home improvement store, you are essentially signing their death warrant.
I learned this the hard way during my first year of desert landscaping. I couldn’t understand why my plants were turning into black, water-logged mush when I was barely watering them. The problem wasn’t my watering schedule; it was the hidden sponge sitting underneath them.
The Commercial Myth
Standard store-bought potting soil is specifically engineered to hold onto moisture for as long as possible. For moisture-loving ferns or tropical pothos, that’s great. But for arid plants, it is a slow, suffocating death sentence. Succulent roots need to breathe. When they sit in heavy, damp peat moss for days at a time, the roots literally drown, inviting fungal pathogens that rot the plant from the inside out.
Even many commercial “Cactus and Succulent” mixes are still far too dense and contain way too much organic matter. To get that ultra-crisp, high-end look that lasts for years, you have to mix your soil like a professional.
The Pro Ratio
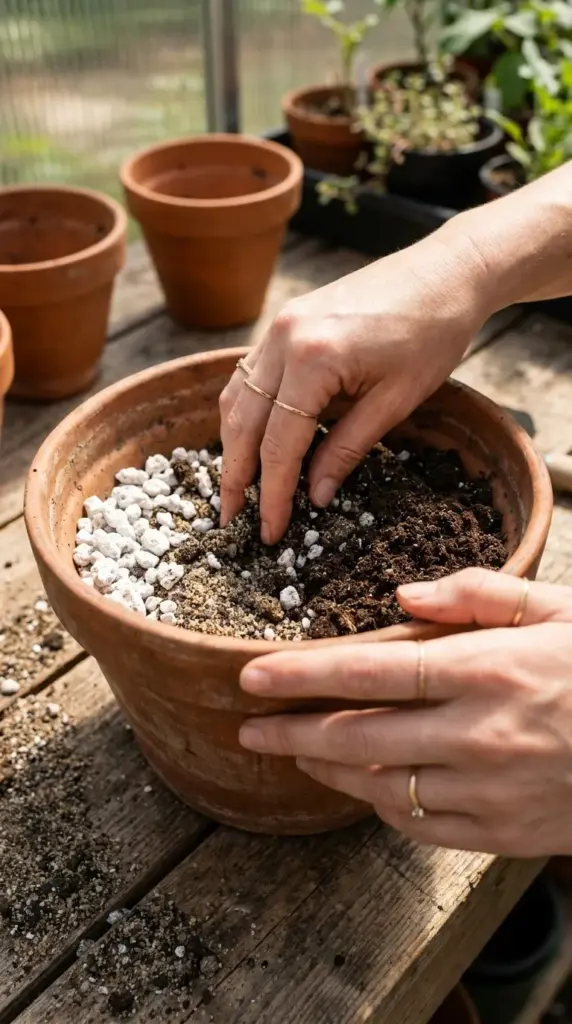
Pro landscapers use a precise three-part cocktail to optimize aeration and ensure that water moves through the root zone like a flash flood in the desert—fast, thorough, and quickly gone. Here is the exact formula I use for every single bed and container I plant:
- 1 Part Pumice or Perlite: This is your primary aeration element. Pumice is the absolute holy grail because it’s heavy enough to keep windy yards from blowing your soil away, and its porous surface holds microscopic pockets of air. (Perlite works too, though it tends to float to the top over time).
- 1 Part Coarse Horticultural Sand: Do not use fine play sand or beach sand, which will pack down like wet concrete. You want gritty, coarse builder’s sand or sharp sand. This breaks up the soil texture and creates macro-channels for water to escape.
- 1 Part Organic Loam or Coconut Coir: This provides just enough nutrients and minimal moisture retention to feed the plant without water-logging the root system.
Mix these three together in a large wheelbarrow or bucket until the texture looks grainy, gritty, and completely uniform.
The 60-Second Drainage Test
Before you let a single one of your expensive new plants touch your newly mixed soil, you need to run the pro-level drainage check.
Take a standard plastic nursery pot with drainage holes and fill it to the brim with your custom soil cocktail. Pour a generous cup of water directly onto the center of the soil.
If the water pools on top for more than two seconds, or takes longer than 60 seconds to completely rush out of the bottom holes, your mix is still too heavy. Add another scoop of pumice and sand, stir, and test again. When done right, the water should sink in almost instantly and run clean out the bottom within a minute, leaving the soil damp but perfectly airy.
Now that we have the ultimate soil base established, we need to talk about how to lay out your plants so they don’t choke each other out. Click that next button below to uncover the strict spacing secrets pros hide from the public!

GIPHY App Key not set. Please check settings