Step-by-Step Guide to Taking and Callusing Your Cutting
Early on in my gardening journey, I made the embarrassing mistake of chopping a pad right through the thickest part of its middle rather than at the joint. It looked absolutely dreadful, mutilated the plant, and took a lifetime to heal properly.
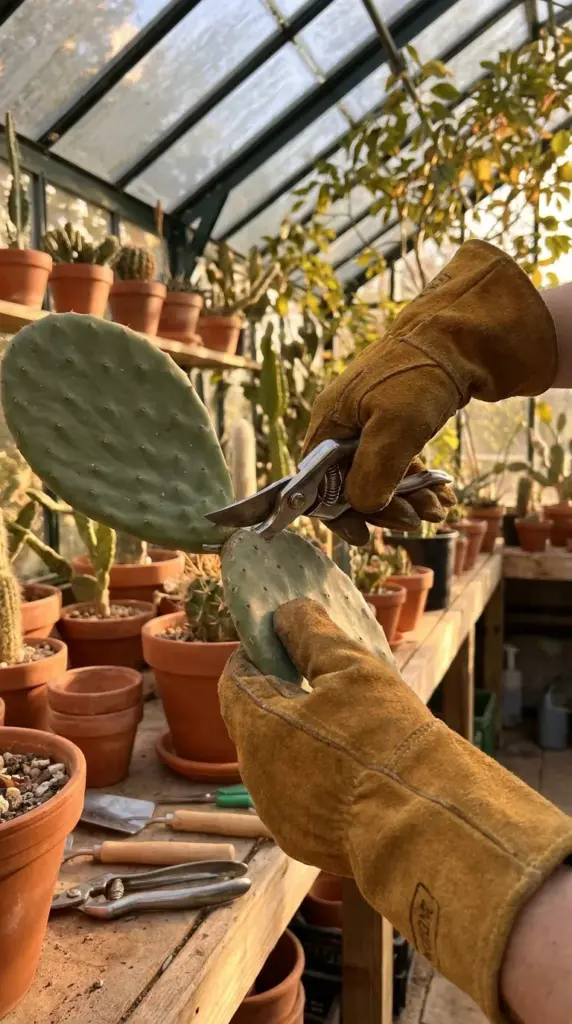
Choosing and Slicing the Perfect Pad
You want to select a mature, healthy pad from the mother plant that is completely free of pests and discoloration. Look for a pad that is at least six months old and feels thick and rigid when you gently secure it with your leather gloves.
Use a highly sterilized knife or sharp pruning shears to make a clean, swift slice right where the pad connects to the main stem. Never twist or tear the joint, as this structural bruising crushes the plant tissues and invites immediate fungal infections.
Curing Your Cutting for Maximum Protection
Now comes the part where your gardening patience is truly tested: setting up the ideal callus cactus cutting environment. Place your fresh, vulnerable cutting flat on a dry paper towel in a warm room with excellent natural air circulation.
Keep it entirely out of harsh, direct sunlight during this healing phase, opting for soft, indirect light instead. Leave it completely alone for 7 to 14 days until the wet, green edge completely transforms into a tough, leathery, whitish scab.
Honestly, watching a detached cactus pad just sit on your kitchen counter for two full weeks feels a bit like watching paint dry. But once that protective barrier is completely rock-hard, you are finally ready to introduce it to some soil, so hit that next button below because we are about to dive into the exact planting depths and the secret “dry spell” trick to trigger massive root growth.


GIPHY App Key not set. Please check settings