
4. The Outdoor Room Divider: Portable Privacy Solutions
The moment I realized I could move my privacy around like furniture was honestly life-changing. I’d been stuck thinking privacy had to be permanent – planted in the ground forever, no take-backs.
My lightbulb moment came during a backyard party when I desperately needed to block the view from my neighbor’s second-story window. I grabbed some old lattice panels and propped them up with plant stands – instant privacy that looked intentional.
Stylish Screen Panels That Move with Your Needs
Modular screen panels are basically the Swiss Army knife of outdoor privacy. I can create a cozy reading nook in the morning, then rearrange everything for evening entertaining.
The flexibility is addictive – last month I moved my screens three different times just because I could. Spring entertaining by the fire pit, summer shade over the dining area, fall windbreak for the hot tub.
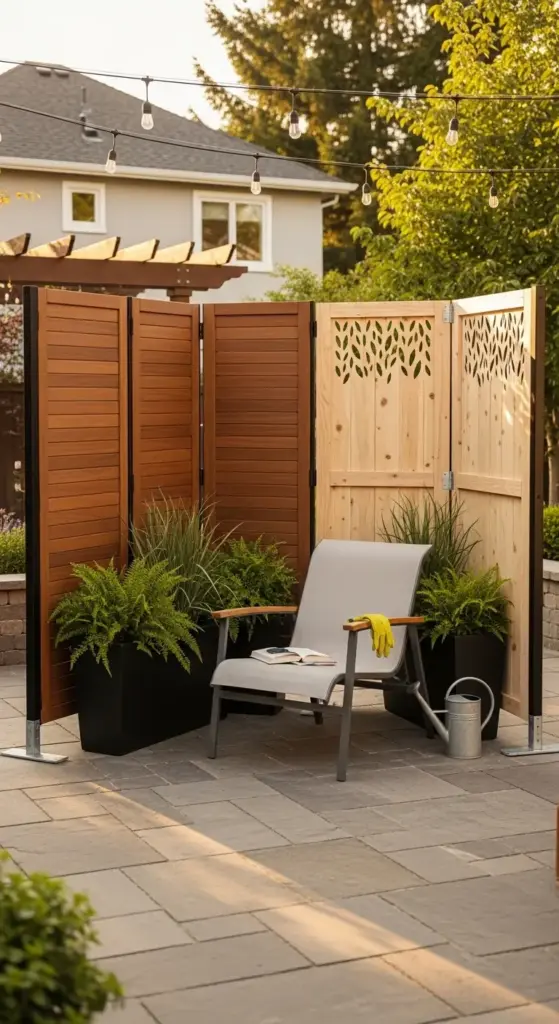
Folding screens work like giant outdoor room dividers. I found these gorgeous teak folding panels that collapse flat for storage but create an 8-foot privacy wall when needed.
Here’s what I love most – you can test different configurations without committing. Don’t like how it looks? Move it. Need more coverage for a party? Add another panel.
Weather-Resistant Materials That Actually Last
Aluminum frames with weather-resistant fabric inserts became my go-to after my first wooden screens warped beyond recognition. Lesson learned the expensive way – not all “outdoor” materials are created equal.
Powder-coated steel holds up incredibly well, but it’s heavier to move around. I use these for my semi-permanent setups where I’m not constantly rearranging.
The fabric choice makes or breaks the whole system. Sunbrella fabric costs more upfront but it’s worth every penny – mine still looks new after three seasons of abuse.
Composite materials like those used in decking work great for solid panels. They don’t fade, warp, or require annual staining like traditional wood options.
Integration with Existing Landscape Design
Color coordination is crucial for making portable screens look intentional instead of like afterthoughts. I match my screen colors to my existing outdoor furniture and planters.
The trick is treating them like outdoor art – they should enhance your space, not just hide parts of it. I chose screens with decorative cutouts that cast interesting shadows.
Plant integration makes portable screens feel permanent. I place large planters at the base of my screens, which anchors them visually and adds stability.
Strategic placement near existing features like pergolas or garden beds makes the screens feel like they belong. I position mine to frame views I want to keep while blocking what I don’t.
Storage Solutions for Seasonal Screens
Vertical storage in my garage keeps screens organized and accessible. I installed simple wall brackets that hold panels upright – takes up way less floor space.


My storage system evolved after I got tired of screens falling over and getting damaged. Now I have designated spots for each panel size with protective padding.
Wheeled storage carts are genius for heavier screens. I can roll them from storage to setup location without throwing out my back – learned this after one too many solo moving sessions.
Weather protection during storage is non-negotiable. Even weather-resistant materials benefit from being covered when not in use. I use old bedsheets to prevent dust buildup.
DIY vs. Store-Bought: The Real Comparison
DIY screens let you customize everything – size, materials, style, budget. I built my first set using cedar fence pickets and galvanized hinges for about $45 per 6-foot panel.
The DIY learning curve is real though. My first attempt looked like a middle school shop project – functional but definitely not Instagram-worthy.
Store-bought options save time and often look more polished. I splurged on commercial-grade screens for my main entertaining area and they’re worth every penny.
Here’s my honest take – DIY for experimental setups and budget builds, store-bought for your primary privacy needs. The quality difference is noticeable.
Cost Breakdown for Portable Privacy
For a flexible 3-panel system that covers 18 feet, here’s what I invested:
DIY Route:
- Materials for 3 panels: $135
- Hardware and hinges: $25
- Stain and weatherproofing: $20
- DIY Total: $180
Store-Bought Route:
- 3 commercial panels: $285
- Delivery and setup: $45
- Store-Bought Total: $330
The store-bought panels look more professional, but the DIY versions have character and were fun to build. Both approaches work – it depends on your skill level and available time.
Maintenance costs are minimal for both – maybe $20 annually for touch-up stain or fabric cleaning.
Want to add the soothing sound of water while creating an elegant privacy barrier that doubles as a stunning focal point? Click “next” to discover how water feature walls can transform your space into a tranquil retreat – plus the pump sizing secrets that prevent costly mistakes.


GIPHY App Key not set. Please check settings