5. Propagation Magic: Multiply Your Plants for Free

The day I realized I could turn one $15 snake plant into dozens of new plants was honestly life-changing. Plant propagation felt like discovering a secret money-saving superpower.
I went from buying new plants every month to having more snake plants than I knew what to do with. My friends started calling me the “plant lady” because I always had babies to give away.
Three Foolproof Methods That Actually Work
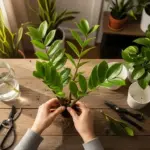
Division is hands-down the easiest method for beginners. When you’re repotting, just separate the baby plants (called pups) that grow from the main root system.
I use a clean, sharp knife to cut between the mother plant and the pup, making sure each section has its own roots. It’s literally like separating conjoined plants.
Leaf cuttings take longer but are so satisfying to watch. Cut a healthy leaf into 3-4 inch sections, let them dry for 24 hours, then stick them in soil.
The key is remembering which end was “up” on the original plant – I learned this the hard way when half my cuttings failed because I planted them upside down.
Water propagation is my favorite for watching root development. Cut leaf sections sit in water for weeks until roots form, then transfer to soil.
Timing is Everything for Success
Spring and early summer are absolute gold for propagation success. The plants are actively growing and recover from cutting stress much faster.
I made the mistake of trying to propagate in December once. Nothing happened for months because the plants were basically dormant.
Wait until your plant is mature and healthy before taking cuttings. Stressed or young plants don’t have the energy to create new growth.
Temperature matters too – I keep my propagation area around 70-75°F for the best root development.
Full moon propagation might sound woo-woo, but I swear my success rate is higher when I time cuttings with lunar cycles. Could be coincidence, but why risk it?
Creating Instagram-Worthy Plant Arrangements
Propagated babies in matching pots create the most stunning displays. I buy small terracotta pots in bulk and arrange them on floating shelves.
Different sized snake plant varieties propagated together make gorgeous layered arrangements. Tall ones in back, compact ones in front.
Macrame hangers filled with snake plant babies add vertical interest to any room. I made my own using YouTube tutorials – way cheaper than buying them.
Group odd numbers together – three or five small plants look more natural than even numbers. This is basic design theory that works every time.


Color-coordinated planters elevate the whole look. I stick to white, black, and natural materials for a cohesive aesthetic.
The Perfect Plant Gifts for Every Occasion
Housewarming gifts are my specialty now. A propagated snake plant in a cute pot costs me maybe$3 in materials but looks like a $20 gift.
I keep a “gift stash” of rooted cuttings ready to pot up at a moment’s notice. Baby shower? Graduation? New job? Snake plant baby!
Wedding favors made from my propagated plants were a huge hit. Small pots with personalized tags – guests loved taking home living memories.
Mother’s Day gifts hit different when you propagated the plant yourself. I include care cards with personal notes about the parent plant.
Office gifts for coworkers are perfect because snake plants thrive in fluorescent lighting and don’t need much attention.
Propagation Mistakes That’ll Break Your Heart
Overwatering new cuttings is the #1 killer. I lost so many babies before learning that barely moist soil is better than wet soil.
Using dirty tools spreads disease between plants. I clean my knife with rubbing alcohol between each cut now – learned this after losing an entire batch.
Planting leaf cuttings upside down means they’ll never root properly. The end that was closest to the soil on the original plant needs to go down.
Not letting cut ends dry before planting leads to rot. I was so impatient at first, but that 24-hour drying period is crucial.
Expecting instant results will drive you crazy. Leaf propagation can take 2-3 months to show real progress – patience is everything.
Wrong soil mix for babies is different than mature plants. I use a lighter, more perlite-heavy mix for better drainage during the vulnerable rooting stage.
Disturbing new roots by checking progress too often stunts growth. I had to train myself to leave them alone for weeks at a time.
Think your propagation game is strong? Wait until you discover the troubleshooting secrets that separate plant experts from frustrated beginners. The next section reveals how to diagnose and fix the most common snake plant problems before they become plant emergencies – including the yellow leaf mystery that stumps most plant parents! 🔍


GIPHY App Key not set. Please check settings