6. Creating a Wave-Form Flower Bed: Nature’s Flowing Design

Let me tell you about my journey with wave-form flower beds – they’re absolutely game-changing! When I first started gardening, my beds were as straight as rulers. But everything changed when I discovered the magic of curved designs. Now, I can’t imagine my garden without these flowing, graceful patterns.
Understanding Wave-Form Design Basics
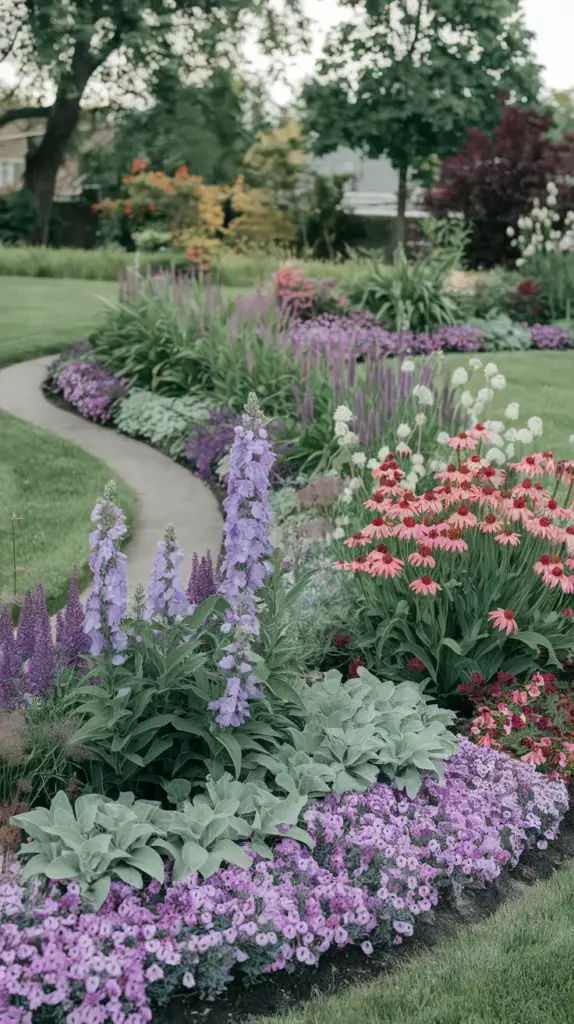
Creating a wave-form flower bed is like composing a symphony in your garden. The key is to think in gentle curves rather than straight lines. I learned this the hard way after trying to make perfect S-curves with string lines – trust me, nature doesn’t work in geometrical perfection!
The secret sauce? Start with a garden hose. Lay it out in flowing curves that feel natural to your eye. I’ve found that the most pleasing waves typically measure between 3-5 feet from crest to trough. This gives enough space for proper plant development while maintaining that gorgeous flowing effect.
Selecting and Arranging Plants
Here’s where the real fun begins! Plant selection is crucial for wave-form success. I typically use:
- Tall plants (3-4 feet): Delphinium, Russian Sage
- Medium plants (2-3 feet): Salvia, Coneflowers
- Short plants (under 2 feet): Dianthus, Creeping Phlox
The secret to creating visual movement is repeating plant groupings along your curves. I plant in groups of 3-5 of the same variety, then repeat these groupings every 6-8 feet. This creates what designers call “rhythm in the garden.”
Color Flow and Movement
Let me share a pro tip that took me years to figure out: color progression is everything in wave-form beds. Start with cool colors (purples, blues) at one end, transition through pinks and yellows, and end with warm oranges and reds. This color flow naturally draws the eye through the garden, creating that sense of movement we’re after.
Maintenance Tips for Curved Edges
Maintaining those beautiful curves can be tricky, but I’ve got a system down pat. Edge definition is crucial – I use a half-moon edger every spring to redefine the curves. The biggest mistake people make is letting grass creep in and blur those beautiful lines.
Pro tip: Install permanent edging that’s at least 4 inches deep. I learned this after spending countless hours fighting grass runners! A deep edge barrier saves so much maintenance time in the long run.
Ready to discover another stunning flower bed design? Click ‘next’ to learn about creating an eye-catching Butterfly-Shaped Flower Bed that will have your neighbors asking for gardening advice! The symmetrical wings and carefully planned color gradients make it a true showstopper in any garden.


GIPHY App Key not set. Please check settings