Insider Tips for Selecting and Prepping Your Garlic Cloves

Let me tell you about my first attempt at growing garlic in containers. I grabbed the first bulb I found at the grocery store, broke it apart, and tossed the cloves in some soil. Big mistake! After months of waiting, I ended up with tiny, disappointing bulbs. Through years of trial and error (and quite a few failures!), I’ve learned exactly what to look for when selecting and preparing garlic for container growing.
Choosing the Perfect Bulb
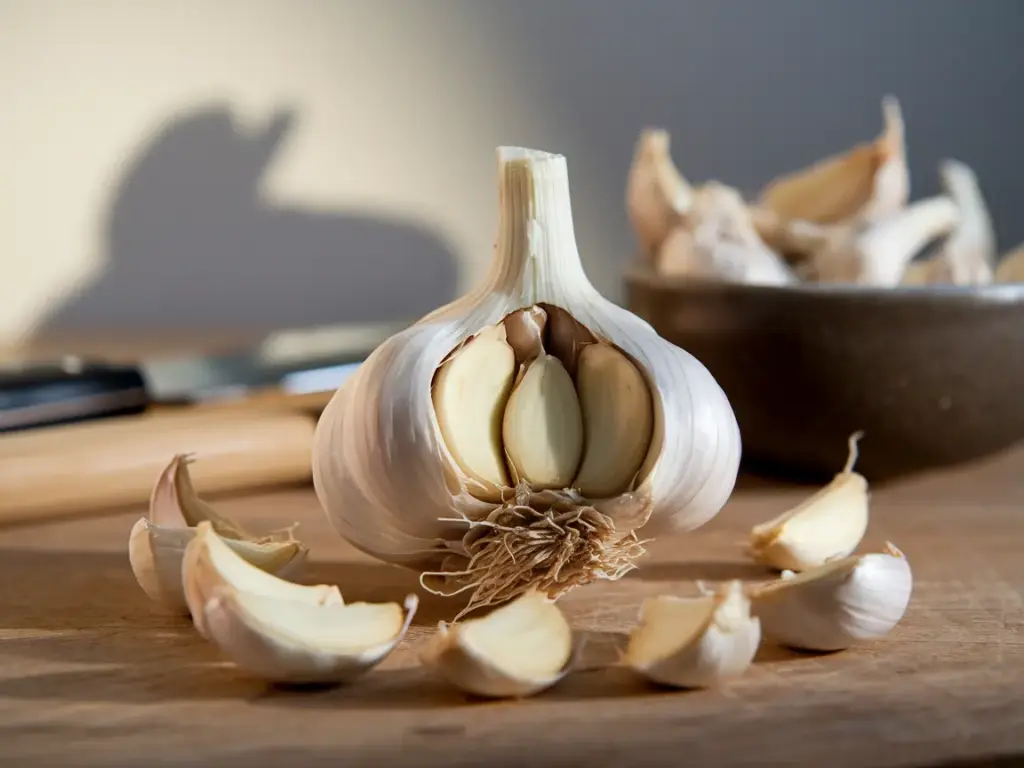
First things first – not all garlic is created equal! When selecting your starter bulb, look for ones that are firm and heavy for their size. I always give them a gentle squeeze – if they feel soft or spongy, that’s a hard pass. The best bulbs will have tight, papery skin without any dark spots or mold.
Here’s a pro tip that changed my garlic-growing game: check the bottom of the bulb where the roots were. If you see a firm, flat base with a small circular scar, you’ve got yourself a winner! This indicates the bulb was properly harvested and cured.
The Secret to Perfect Clove Separation
Now, here’s something most guides won’t tell you about separating garlic cloves. Don’t peel them right away! I learned this the hard way after damaging several cloves. Instead, gently break apart the bulb 24 hours before planting. This allows the natural protective layers to stay intact.
Choose the largest outer cloves – they have more energy stored up and will produce bigger bulbs. Those tiny center cloves? Save them for cooking! I typically select cloves that are at least the size of my thumbnail.
Timing Is Everything
The question I get asked most often is about timing. Here’s the deal: for most regions, you want to plant your garlic about 4-6 weeks before the ground freezes. For container growing, you’ve got a bit more flexibility since you can protect the pots from extreme temperatures.
I’ve found that fall planting (usually September to November) gives the best results. The cloves need that period of cold to develop properly. However, if you’re growing indoors in a temperature-controlled environment, you can start any time – just make sure to simulate the cold period by keeping the containers at around 40°F (4°C) for about a month.
Pre-Planting Preparation
Here’s my secret weapon for success: a pre-planting soak. Mix 1 tablespoon of liquid seaweed with a quart of water. Soak your cloves in this solution for 2-3 hours before planting – but no longer! I once left them overnight and ended up with mushy cloves.
Another trick I swear by is dusting the cloves with cinnamon right before planting. It sounds weird, but it works as a natural fungicide. Just a light coating does the trick.
Common Rookie Mistakes to Avoid
Trust me, I’ve made every mistake in the book! Here are the big ones to avoid:
- Never plant cloves with soft spots or damage
- Don’t remove all the papery covering
- Avoid planting cloves upside down (pointed end should face up)
- Don’t use cloves from grocery store garlic (they’re often treated with growth inhibitors)
Ready to take your garlic growing journey to the next level? Click the “next” button below to discover my step-by-step planting method. I’ll show you exactly how deep to plant your cloves and share my special soil mix that consistently produces plump, flavorful garlic bulbs. The success of your garlic garden starts with proper planting depth and spacing – and I’ve got some game-changing tips to share!


GIPHY App Key not set. Please check settings