Did you know that professional landscapers charge an average of$75-150 per linear foot for premium garden edging installation?
That’s a staggering amount when you consider that most homeowners can achieve the same stunning results for a fraction of the cost!
As someone who’s spent years perfecting outdoor spaces, I’m excited to share these closely-guarded secrets that will transform your garden from ordinary to absolutely breathtaking.
These aren’t your typical DIY edging solutions – these are the sophisticated techniques that high-end landscaping companies use to create those magazine-worthy gardens you admire.
Ready to elevate your outdoor space and save hundreds of dollars in the process?
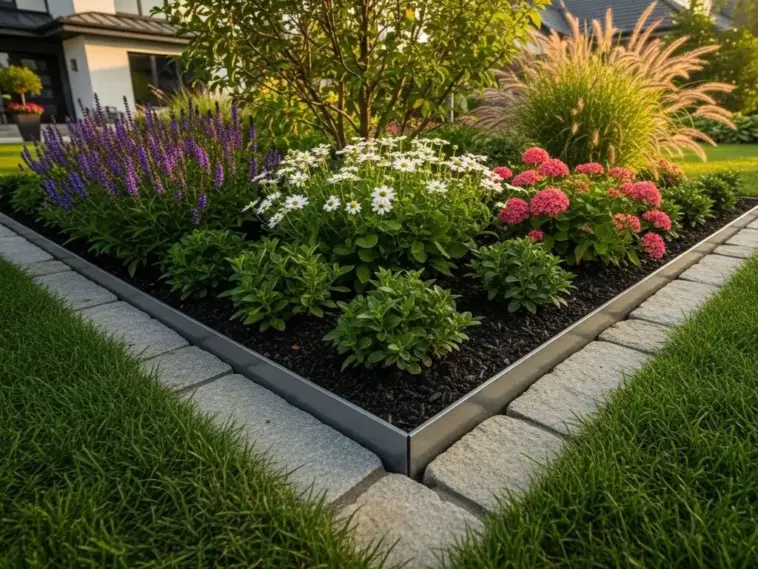
1. Steel Edging with Hidden Fastening Systems
Let me tell you about the time I completely botched my first steel edging project. I thought I could just hammer some basic steel strips into the ground and call it a day – boy, was I wrong!
The whole thing looked like a kindergarten art project within three months. That’s when I learned about professional-grade corten steel and hidden fastening systems.
Why Corten Steel is Worth Every Penny
Corten steel isn’t your average Home Depot metal edging. This stuff develops a protective rust layer that actually prevents further corrosion – it’s like nature’s own weatherproofing system.
I remember touching a piece that had been installed for five years. The surface felt solid as a rock, not flaky like regular rusted metal.
The initial cost made me wince – about $8-12 per linear foot compared to $2-3 for basic steel. But here’s the kicker: it literally lasts decades without replacement.
The Hidden Fastening Game-Changer
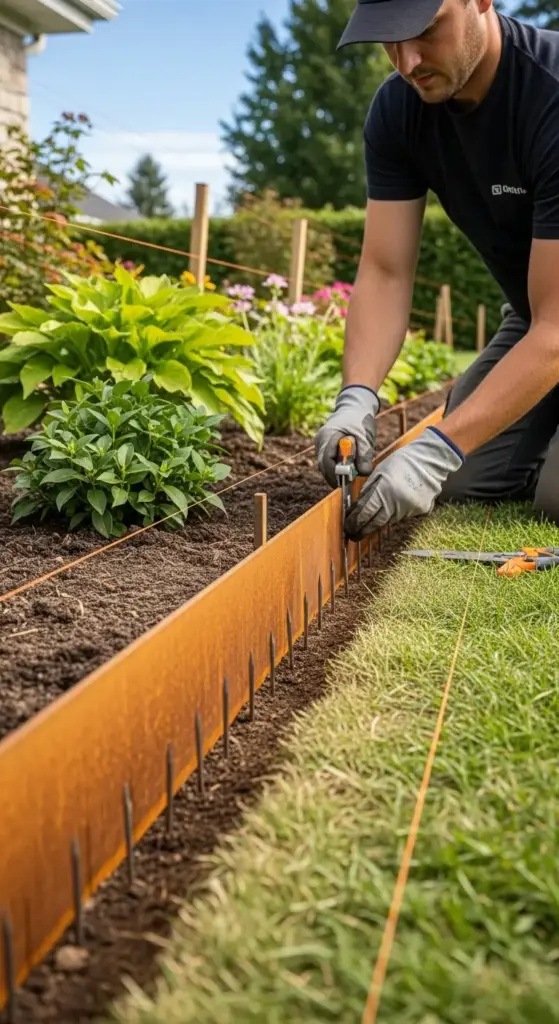
Traditional edging looks amateur because you can see all the stakes and brackets. Hidden fastening systems change everything.
These systems use specially designed spikes that sit behind the steel panel. The brackets lock into pre-cut slots, creating that seamless, floating appearance that screams “professional installation.”
I spent hours figuring out the spacing – turns out it’s exactly 24 inches on center for most residential applications. Any wider and you’ll get that wavy, unstable look that drives me crazy.


Depth Calculations That Actually Matter
Here’s where most DIYers mess up: proper depth calculations. The rule isn’t just “dig until it looks right.”
For standard 4-inch steel edging, you need exactly 2.5 inches below ground and 1.5 inches above. I learned this the hard way when my first attempt started tilting after one winter freeze-thaw cycle.
The soil type matters too. Clay soil requires an extra half-inch depth because of expansion pressure. Sandy soil can get away with slightly less, but I always stick to the standard measurement.
Weather-Resistant Coating Secrets
Even corten steel benefits from weather-resistant coating in certain climates. I live in an area with harsh winters, and the salt from road treatments was eating away at my edges.
The pros use a clear protective sealant that’s applied after the natural patina develops. This usually takes about 6-8 months of weathering.
Don’t make my mistake of applying coating too early – it prevents the protective rust layer from forming properly.
The Real Cost Breakdown
DIY installation runs about $15-20 per linear foot including materials and tools. Professional installation? We’re talking $45-75 per linear foot.
But here’s what that professional cost gets you: proper soil preparation, perfect alignment, and a warranty. I’ve seen too many DIY jobs that needed complete redo within two years.
The time investment is real too – expect a full weekend for 50 linear feet if you’re doing it right.
My Biggest Installation Mistake
I once tried to install 80 feet of steel edging in one day. Big mistake. The last 20 feet were so crooked I had to pull them up and start over.
Take your time with the layout. Use string lines and stakes to mark everything before you dig a single inch.
Ready to discover the mortared stone technique that creates those stunning, permanent borders you see in high-end neighborhoods? Click “next” below to learn the professional secrets behind drainage-integrated stone edging that lasts for generations!


GIPHY App Key not set. Please check settings