Essential Gardening Supplies You Need for DIY Bird Feeders
The Basic Toolkit (Don’t Overthink This!)
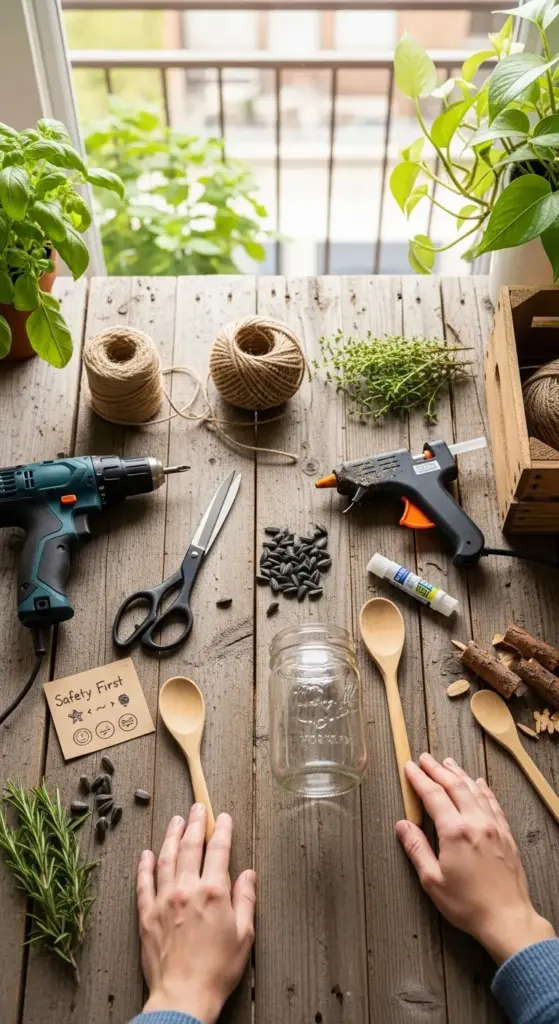
Okay, let’s keep it real simple. You don’t need a fancy workshop. I started with just a drill, some string, scissors, and glue. That’s it! Seriously.
My first project? A mason jar feeder. The glue gun almost won. I burned my finger twice. Ouch. But it taught me that basic tools are all you really need to start.
Going Green Without Breaking the Bank
I used to buy whatever was cheapest. Big mistake. Now I hunt for eco-friendly materials like untreated wood or recycled materials. It matters.
Sustainable gardening practices aren’t just a buzzword. They’re a lifestyle. I found old pallets on Craigslist for free. Score. Just make sure they weren’t treated with nasty chemicals.
Pro tip: Check your local farmers market find stalls. Sometimes vendors give away wooden crates. Perfect for vintage decor upcycle projects.
Where to Shop Smart (City Dwellers, This One’s For You)
Living in a metro area? You’ve got options. Big time. I hit up hardware store finds like Home Depot for basics. But don’t sleep on dollar stores!
Dollar store crafts are my secret weapon. I got a whole feeder kit for under five bucks. Online? Etsy has unique gardening supplies too. Just watch shipping costs.
For my friends in New York or Los Angeles, check local nurseries. They often have sales on garden tools essential kits. And community gardening groups sometimes share tools. Ask around.
Weather-Proofing 101 (Learned This After a Rainy Disaster)
Here’s a hard truth. Not all materials survive the elements. I learned this when my first feeder turned to mush after a Seattle downpour. Heartbreaking.
Weather-resistant materials are non-negotiable. Cedar wood? Yes. Untreated pine? Maybe not. For winter bird care, you need stuff that won’t warp or crack.
Also think about your climate. If you’re in Atlanta humidity, seal everything. In Chicago cold? Use metal hardware that won’t freeze brittle. It’s all about longevity.


Safety First (Because Pets and Kids Are Curious)
Okay, this part is serious. Please listen. I once used small beads for decoration. Big no-no. My cat nearly swallowed one. Never again.
Your DIY bird feeders should be pet safe plants and kid-friendly. Avoid tiny parts. Use non-toxic glue and paints. Always.
Quick safety checklist:
- Non-toxic finishes only
- Secure hanging mechanisms (no weak string!)
- Smooth edges (sand that wood!)
- Keep pest control natural in mind (no chemical residues)
And please, place feeders where little hands and paws can’t easily reach. Safety doesn’t have to be boring.
My “Oops” Moment That Saved You Trouble
I’m gonna admit something embarrassing. I used regular twine for my first hanger. It snapped in a week. Birds everywhere, seeds wasted. Ugh.
Now I only use weather-resistant nylon or metal chains. Worth the extra two bucks. Trust me on this one.
Garden care includes maintaining your feeder too. It’s not just build-and-forget. A little prep saves so much headache later.
And hey, if you mess up? It’s okay. I’ve got a feeder with a slightly crooked roof. The birds don’t care. Neither should you.
Ready to build? Up next, I’m walking you through my foolproof step-by-step instructions for easy DIY bird feeders (even if you’ve never held a drill!). Plus, my secret trick for making it look pro without the pro price tag. Click “next” – you’ve got this! 🛠️🐦


GIPHY App Key not set. Please check settings