7. Budget-Friendly DIY Projects That Look Expensive

Let me tell you about the moment I realized I didn’t need a designer budget to create my dream boho patio. I was scrolling through Instagram, drooling over a$300 macrame wall hanging, when my crafty neighbor showed me how to make the exact same thing for$15.
That was my lightbulb moment – expensive-looking doesn’t mean expensive to make.
Since then, I’ve become obsessed with DIY projects that deliver maximum impact for minimum cost. My friends constantly ask where I bought certain pieces, and they’re shocked when I tell them I made them myself. The secret isn’t being super crafty – it’s knowing which projects give you the biggest bang for your buck.
Macrame Magic You Can Actually Master
Macrame wall hangings seemed impossibly complicated until I broke down the basic knots and realized there are only four you really need to know. I started with YouTube tutorials and a$12 rope from the hardware store.
My first attempt was definitely wonky, but it still looked intentionally boho rather than like a mistake. The beauty of macrame is that imperfections actually add to the handmade charm.
For plant holders, I use 3mm cotton rope and follow simple patterns I found online. Each hanger costs about$8 to make versus$40-60 to buy.
The key is starting with simple patterns and working your way up. I can now make a basic wall hanging in about two hours while watching Netflix.
My biggest tip: buy rope in bulk. I got a huge spool that’s lasted me through 15 different projects, bringing my per-project cost way down.
Thrift Store Treasure Transformations
Upcycling thrift finds became my favorite weekend hobby after I scored an ugly wooden stool for$3 and turned it into a gorgeous plant stand that looks like it came from West Elm.
The secret is seeing potential instead of current reality. That beat-up wicker basket becomes a stunning planter with some spray paint and a plastic liner.
I always hit thrift stores with a specific list – looking for wooden furniture, interesting containers, and anything with good bones but bad finishes. My best find was a solid wood side table for$8 that I transformed with chalk paint and new hardware.
Wicker and rattan pieces are goldmines at thrift stores. A quick cleaning and maybe some touch-up paint, and you’ve got authentic boho furniture for a fraction of retail cost.
Don’t overlook damaged pieces. I bought a chair with a broken seat for$2, removed the seat entirely, and now it’s a unique plant display that everyone compliments.
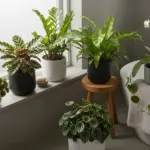
Custom Planters from Everyday Items
DIY planters saved me hundreds of dollars and let me create exactly the sizes and styles I needed. My most successful planters came from the most unexpected sources.
Large yogurt containers become perfect hanging planters with some rope and paint. I’ve made over 20 of these for about$2 each, and they’re still going strong after two years.
Concrete planters sound intimidating but are actually super easy. I use old towels as molds and create unique textured surfaces that look like expensive designer pieces.
My favorite discovery was using old colanders as planters – the built-in drainage is perfect, and they have this great industrial-meets-boho vibe when painted in earth tones.
For large planters, I use plastic storage bins with drainage holes drilled in the bottom. A coat of textured spray paint makes them look like expensive ceramic pots.


Always add proper drainage. I learned this the hard way after killing several plants in my early DIY planters that didn’t drain properly.
Building Furniture That Looks Professional
DIY outdoor tables seemed way beyond my skill level until I discovered the magic of simple construction and good finishing techniques. My first coffee table took a weekend and cost$35 in materials.
I use basic 2×4 lumber and simple joinery – no fancy tools required. The key is sanding everything smooth and using quality stain or paint to hide any amateur construction details.
My go-to design is a simple rectangular frame with slats on top. It’s basically impossible to mess up, and the rustic look fits perfectly with boho style.
For side tables, I stack and secure wooden crates from the craft store. With some stain and maybe a glass top, they look like expensive modular furniture.
The biggest game-changer was learning to use wood filler and sandpaper to hide mistakes. Even my wonky cuts look professional after proper finishing.
Paint Techniques That Fool Everyone
High-end paint finishes are what really sell the expensive look, and most of them are surprisingly simple to achieve. My favorite technique is color washing, which creates depth and texture that looks like expensive hand-finished furniture.
I start with a base coat in my desired color, then dry-brush a slightly lighter or darker shade over it while the base is still slightly tacky. The result looks like it took hours but actually takes about 20 minutes.
Chalk paint became my secret weapon for transforming any surface. It adheres to almost anything and creates that perfect matte finish that screams high-end boho.
For metallic accents, I use rub-on wax instead of spray paint. It gives a more authentic, aged metal look that’s way more sophisticated than shiny spray paint.
Distressing techniques add instant character. I use sandpaper to wear away paint in natural wear spots, creating that perfectly imperfect vintage look.
The key to professional-looking paint jobs is proper prep work and multiple thin coats rather than trying to cover everything in one thick application.
My most complimented piece is a$5 thrift store mirror that I painted with chalk paint and distressed slightly. Everyone assumes it’s an expensive antique find.
Don’t be afraid to experiment on practice pieces first. I perfected my techniques on scrap wood before tackling my actual furniture projects.
Conclusion
Your outdoor boho paradise is closer than you think! These seven stylist secrets prove that creating a stunning patio doesn’t require a massive budget or professional help – just a little creativity and the right insider knowledge.
Remember, the most beautiful boho spaces tell a story. They’re layered, personal, and filled with pieces that make you smile every time you step outside. Start with one or two of these tricks, and gradually build your dream space over time.
Ready to transform your patio this weekend? Pick your favorite tip from this list and take action today. Your future self (and your Instagram followers) will thank you! Don’t forget to share your boho patio transformation – I’d love to see how these secrets work their magic in your space.


GIPHY App Key not set. Please check settings