Smart Design Tips

Let me tell you something – after spending countless weekends tweaking my self-watering system, I’ve learned that smart design can make or break your garden’s success. Trust me, I’ve made pretty much every mistake in the book, and now I’m here to help you avoid them!
Strategic Pipe Placement
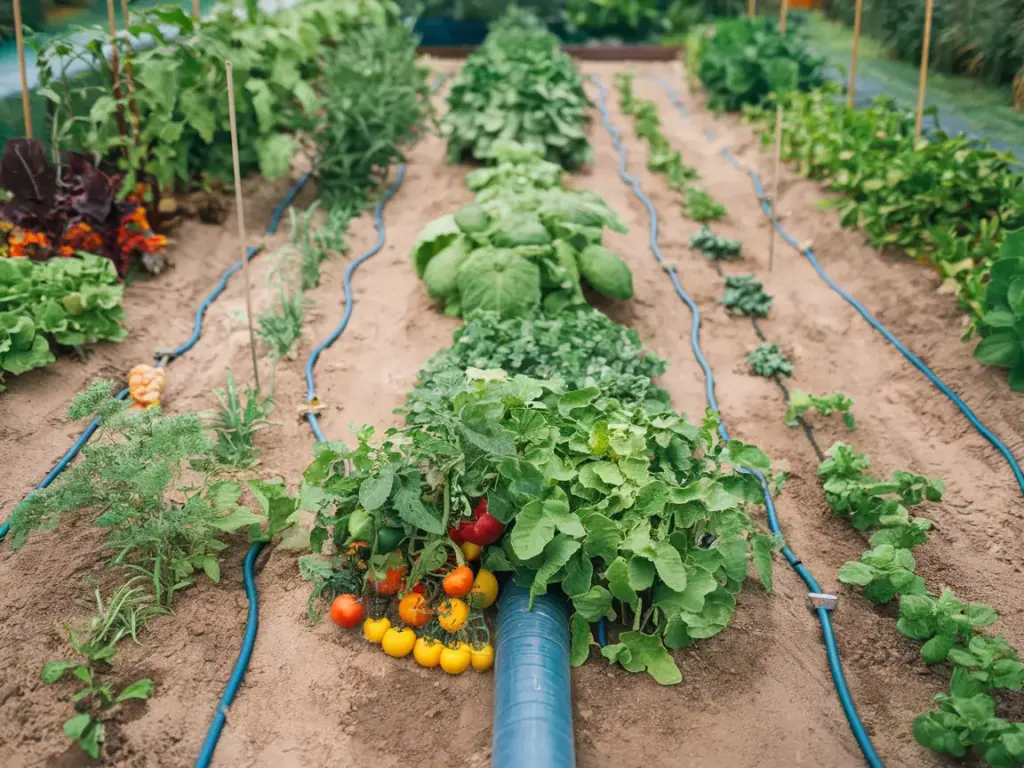
The first time I set up my irrigation system, I just kind of winged it. Big mistake! I ended up with uneven water distribution and some very unhappy tomatoes. Here’s what I’ve learned: start by creating a detailed garden map. Your main distribution pipe should run along the highest point of your garden, with smaller pipes branching down at a slight angle (aim for a 2% slope).
For optimal coverage, I’ve found that placing drip lines every 12 inches works best for most vegetables. Remember to use stakes every few feet to keep those pipes exactly where you want them. Nothing’s worse than finding your carefully placed pipes have shifted after a heavy rain!
Mastering Water Pressure
Let’s talk about water pressure – the silent killer of many DIY irrigation systems. After flooding half my lettuce bed last spring (oops!), I invested in a pressure reducer. Game changer! You’ll want to maintain between 20-30 PSI for most vegetable gardens. Too much pressure can damage your pipes and create uneven watering patterns.
I use simple pressure compensating emitters throughout my system. They’re a bit more expensive than regular emitters, but they’re worth every penny for consistent water flow.
Zone Planning Like a Pro
Here’s something I wish someone had told me earlier: group your vegetables by water needs! I now have three distinct irrigation zones:
- Heavy drinkers (tomatoes, cucumbers)
- Moderate needs (peppers, beans)
- Light waterers (herbs, root vegetables)
Each zone has its own control valve, so I can adjust watering schedules independently. This setup has literally doubled my garden’s productivity!
Avoiding Common Pitfalls
Oh boy, do I have some stories about mistakes! The biggest one? Not installing filter systems at key points. One day of dirty water can clog your entire system – learned that one the hard way! Always install:
- A main filter at the water source
- Smaller filters before pressure reducers
- Clean-out ports at the end of main lines
Professional Tricks I’ve Learned
After chatting with professional landscapers and fellow gardening nerds, I’ve picked up some amazing tricks. My favorite is using micro-tubing for delicate seedlings. These tiny tubes give you incredible control over water delivery. I also started adding air release valves at high points – no more water hammer issues!
One pro tip that revolutionized my setup: install a manifold system near your water source. It might seem like overkill, but being able to control different zones independently is absolutely worth it.
Ready to take your DIY irrigation system to the next level? In the next section, we’ll dive into the nitty-gritty of installation secrets – including my favorite technique for preventing leaks (hint: it involves a hairdryer!). Click the next button below to discover these game-changing installation tips that will save you hours of future headaches!


GIPHY App Key not set. Please check settings