Building Your System: Step-by-Step

Let me tell you about my journey creating the perfect self-watering system for my vegetable garden. After countless weekends of trial and error (and yes, a few flooded beds), I’ve finally nailed down a foolproof process that I’m excited to share with you!
Initial Garden Assessment
Before you grab those tools, let’s talk about proper planning – something I learned the hard way! First thing I do with any new installation is measure the garden space thoroughly. I remember my first attempt where I eyeballed the measurements… let’s just say I ended up with way too much irrigation tubing and a very confused-looking garden layout!
Your initial assessment should focus on three critical factors:
- Slope gradient of your garden (even slight inclines matter!)
- Water source location and pressure readings
- Soil composition and drainage patterns
Reservoir Construction
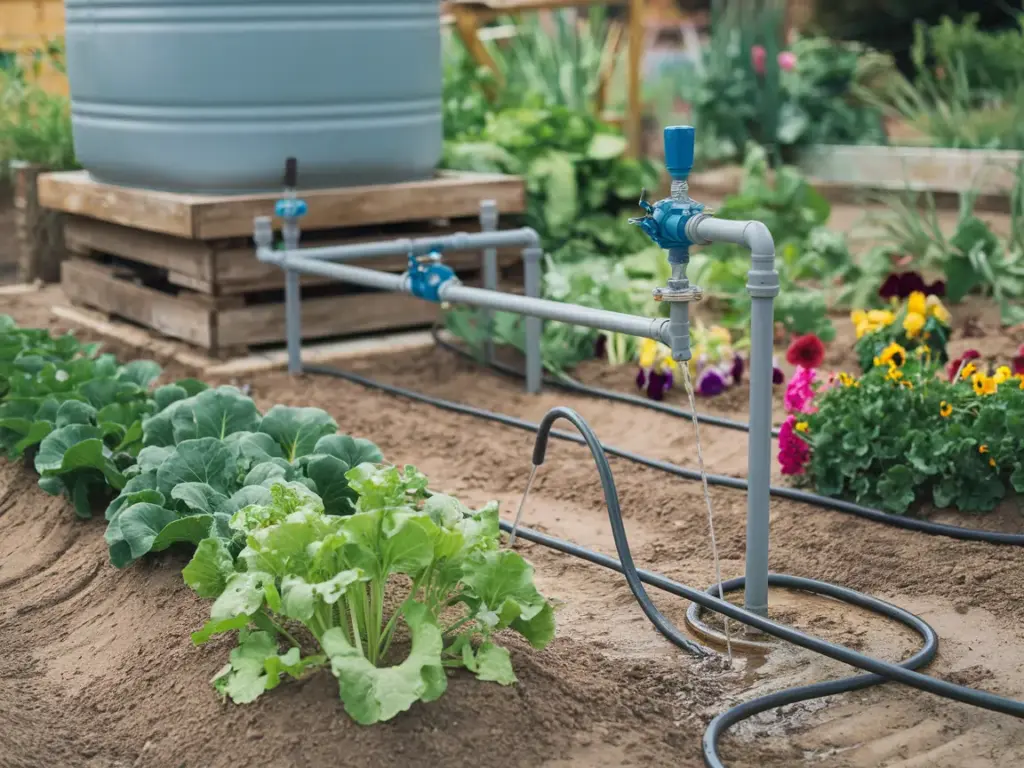
Building the reservoir is where the magic happens! After testing various setups, I’ve found that a 55-gallon food-grade barrel works perfectly for gardens up to 200 square feet. Here’s a pro tip that saved me countless headaches: always place your reservoir on a level, elevated platform. I learned this lesson after my first barrel tipped over during a heavy rain – not fun!
The key components you’ll need are:
- Food-grade water barrel
- Bulkhead fittings (get extras, trust me)
- Float valve for automatic filling
- Overflow pipe (don’t skip this!)
Distribution System Layout
This is where I see most DIY-ers get tripped up. Your distribution system needs to be planned like a tree’s root system. Start with your main line and branch out systematically. I’ve found that using 1/2 inch PVC pipe for the main line and 1/4 inch soaker hoses for the branches gives the best results.
The most important thing I’ve learned about layout is to create zones based on plant water needs. I once had thirsty tomatoes sharing a line with drought-resistant herbs – those poor herbs nearly drowned!
Timer and Control Installation
After burning through three cheap timers (and almost my entire herb garden), I finally invested in a quality digital timer system. It’s worth every penny! The key is to look for:
- Battery backup features
- Multiple program settings
- Weather resistance rating
- Flow rate control
Testing and Fine-Tuning
Here’s where patience really pays off. I always run my new systems for at least three test cycles before planting anything. Watch for:
- Pressure consistency across all zones
- Even water distribution
- Proper drainage
- Timer accuracy
I use the “catch cup test” to measure water output. Place small containers under different sections of your irrigation lines and measure the water collected after a set time. This helps identify any flow rate inconsistencies.
Ready to learn about some genius design tips that’ll take your system to the next level? Click the next button below to discover my favorite Smart Design Tips – including a game-changing trick for managing water pressure that I wish I’d known years ago!


GIPHY App Key not set. Please check settings