4. Layering Propagation Approach
This method literally saved my sanity when I was starting out. I’d killed so many cuttings that I was ready to give up on propagation entirely!
Then my plant-obsessed neighbor showed me layering propagation, and suddenly I felt like a propagation genius. No more dead cuttings floating in gross water.
The Beauty of Staying Connected
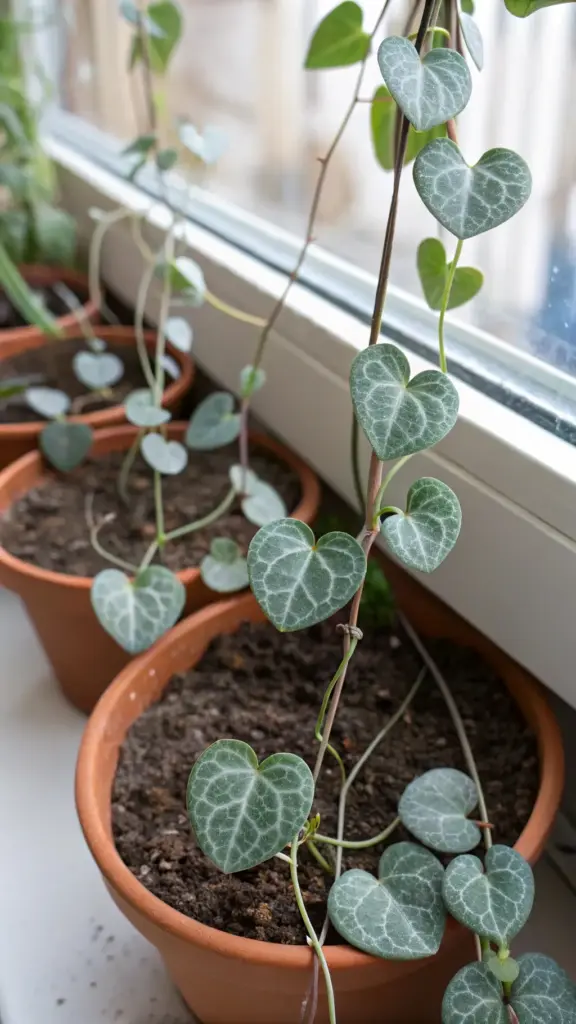
Layering is basically letting your String of Hearts do what it wants to do naturally – trail and root wherever it touches soil. You’re just giving it a little help and direction.
The genius part? The cutting stays attached to the mother plant the entire time it’s developing roots. No stress, no shock, no wondering if you’ve murdered another innocent cutting.
I like to think of it as plant propagation with training wheels. Perfect for anxious plant parents like me.
Your String of Hearts keeps feeding the new growth through the vine connection until those roots are strong enough to go solo.
Scouting for the Perfect Nodes
Not all propagation nodes are created equal for layering. You want to look for plump, healthy nodes that are at least 6-8 inches away from the mother plant.
The best nodes have that slightly swollen look and maybe even tiny root nubs already starting to show. These are your golden tickets.
Avoid nodes that look dried out, damaged, or too close to the growing tip. You want mature nodes with some substance to them.
I usually pick 2-3 nodes per vine for layering – gives you better odds and more new plants if everything goes right.
Setting Up Your Layering Station
Grab a small pot and fill it with well-draining potting mix. I use the same succulent soil blend I mentioned earlier – it works perfectly for this method too.
Place the pot right next to your mother plant, close enough that the vine can comfortably reach without stretching or bending awkwardly.
Here’s the key part: lay the vine section with your chosen nodes directly on top of the soil. Don’t bury it completely – just press it gently into the surface.
Use small hairpins, bobby pins, or wire clips to hold the vine in contact with the soil. This contact is crucial for root development.
Creating the Perfect Rooting Environment
The soil should be consistently moist but not soggy – think of a wrung-out sponge. This is way more forgiving than trying to manage water levels in propagation jars.
I mist the soil surface lightly every few days rather than doing deep waterings. The goal is keeping those nodes happy without creating a swamp.
Humidity helps a lot with layering success. I sometimes place a clear plastic bag loosely over the layering pot to create a mini greenhouse effect.
Make sure your setup gets bright, indirect light. The mother plant will handle the heavy lifting, but those developing roots still need decent light conditions.
Timeline Expectations (Patience Required)
Root development in layering typically takes 3-4 weeks, sometimes longer depending on conditions. Don’t get impatient like I used to.
Week 1-2: Not much visible action, but roots are starting to form underground where the nodes touch soil.


Week 3-4: You might start seeing new growth emerging from the layered nodes – tiny heart-shaped leaves are usually the first sign of success.
Week 5-6: Roots should be well-established, and you’ll definitely see new vine growth starting to develop.
The Big Separation Day
This part used to terrify me, but it’s actually pretty straightforward. Wait until you see consistent new growth from your layered section – at least 2-3 new leaf pairs.
Gently tug on the layered vine. If there’s good resistance, you’ve got solid root establishment. If it moves easily, give it another week or two.
Use clean, sharp scissors to cut the connecting vine between the new plant and the mother plant. Cut closer to the mother plant, leaving more vine attached to your new baby.
Don’t transplant immediately after separation. Let the new plant settle in its current pot for at least a week before considering any moves.
Why Beginners Love This Method
Success rate is incredibly high – I’d say 95% of my layering attempts work out. The continuous connection to the mother plant eliminates most failure points.
No daily maintenance like water propagation requires. Check the soil moisture every few days and you’re good to go.
Less stress for both you and the plant. The cutting never experiences transplant shock because it develops its root system exactly where it’s going to live.
You can layer multiple sections from the same mother plant simultaneously. I usually have 3-4 layering pots going around each of my mature String of Hearts.
Troubleshooting Layering Issues
No root development after 6 weeks usually means the nodes weren’t making good soil contact. Try pressing them down more firmly or using more clips to hold them in place.
Mushy, rotting nodes indicate overwatering. Let the soil dry out more between waterings and improve drainage if needed.
If the vine keeps lifting away from the soil, you need better anchoring. I’ve used everything from paperclips to small stones to keep stubborn vines in place.
Slow growth after separation is normal – the new plant needs time to adjust to life without mama’s support. Just maintain consistent care and be patient.
Advanced Layering Tips
Try air layering for nodes that are too high up to reach soil easily. Wrap damp sphagnum moss around the node and cover with plastic wrap.
Layer multiple nodes in the same pot to create fuller, bushier new plants right from the start.
You can layer directly into decorative pots if you want the new plant to stay put. Just make sure drainage is adequate.
Ready for the ultimate propagation power move? The Division Method I’m covering next is how you turn one mature String of Hearts into 5-10 new plants in a single afternoon. This is the method garden centers use when they need to rapidly multiply their stock – and it’s easier than you think! Hit next to learn this game-changing technique.


GIPHY App Key not set. Please check settings