3. Secret Soil Mix Ratios Used by Plant Nurseries
I spent way too much money on fancy peperomia potting mixes before I discovered this secret. A commercial grower finally spilled the beans on what they actually use – and it’s ridiculously simple!
Most of us are getting ripped off by those expensive “specialty” soils. The real pros make their own for pennies on the dollar.
The Magic 3-Ingredient Formula
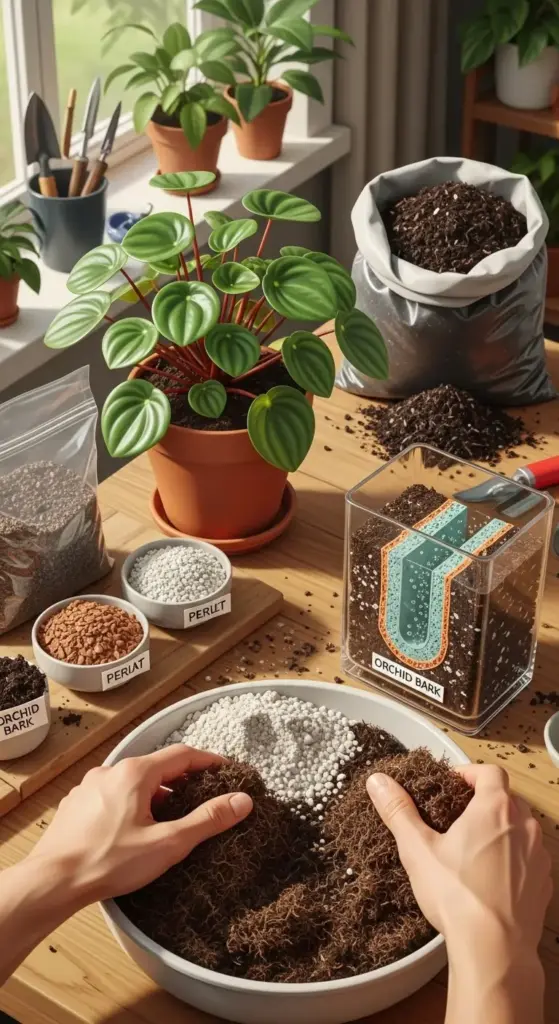
Here’s the recipe that changed everything for me: 40% peat moss, 30% perlite, and 30% orchid bark. That’s it – seriously!
I was skeptical at first because it seemed too easy. But after switching my entire collection to this mix, the difference was incredible.
The peat moss holds just enough moisture without getting soggy. The perlite creates drainage channels, and the orchid bark adds those crucial air pockets.
You can find all three ingredients at any decent garden center. I buy them in bulk now because this mix works for most of my houseplant collection.
The total cost? About$15 for enough soil to repot 20+ peperomias. Compare that to those$12 bags of “premium” potting mix that barely fill three pots!
Why Store-Bought Soil is Sabotaging Your Plants
Standard potting soil is basically plant quicksand for peperomias. I learned this the hard way after losing several beautiful specimens.
Most commercial mixes hold way too much water. Peperomias need soil that drains fast but still retains some moisture – it’s a delicate balance.
The worst culprit is that heavy, black potting soil you see everywhere. It turns into concrete when it dries out and becomes a swamp when wet.
I’ve also noticed that store-bought mixes often contain fertilizer pellets that burn peperomia roots. These plants prefer gentle, consistent feeding over those harsh chemical bursts.
Plus, most commercial soils break down too quickly. Within six months, you’re left with compacted muck that suffocates the roots.
DIY Amendments That Actually Work
Want to upgrade basic potting soil instead of starting from scratch? I’ve got you covered with these soil amendments.
Add coarse sand (not fine sand!) at about 20% of your total mix. This improves drainage without making the soil too chunky.
Coconut coir is my secret weapon for moisture retention. It holds water better than peat moss and doesn’t get as compacted over time.


Pumice is incredible if you can find it. It’s like perlite but doesn’t float to the surface when you water. Mix in about 25% for perfect peperomia drainage.
I also throw in a handful of worm castings for gentle, slow-release nutrition. Your peperomias will love the organic matter.
Testing Your Soil Mix Like a Pro
Here’s how I know if my soil mixture is working before I even plant anything. This simple test has saved me from so many repotting disasters.
Fill a clear container with your soil mix and water it thoroughly. Good peperomia soil should drain within 2-3 minutes but still feel slightly damp.
If water pools on top for more than 5 minutes, you need more drainage materials. Add perlite or bark until it drains faster.
The squeeze test is my favorite: grab a handful of moist soil and squeeze it. It should hold together briefly, then crumble when you poke it.
I also check how the soil looks after a week of drying. Healthy peperomia soil should still have some structure, not turn into dust or concrete blocks.
Spotting Soil Problems Before It’s Too Late
Your peperomias will tell you when the soil isn’t working – you just need to know their warning signs. I wish I’d learned this sooner!
Slow drainage is the first red flag. If water sits on the surface for more than a few seconds, your soil is too heavy.
White, crusty buildup on the soil surface means mineral accumulation. This happens with hard water or over-fertilizing in heavy soils.
Fungus gnats are another dead giveaway that your soil stays too wet. These annoying little flies love soggy, organic-rich potting mixes.
If your peperomia’s growth suddenly stops or leaves start yellowing from the bottom up, check the soil consistency. Compacted soil suffocates roots fast.
The smell test never lies – healthy peperomia soil should smell earthy and fresh. Sour or musty odors mean anaerobic conditions and potential root rot.
Ready to discover the lighting secrets that will make your peperomias absolutely explode with growth? Click “next” to learn the shadow test technique and strategic positioning tricks that professional growers use to maximize every single leaf!


GIPHY App Key not set. Please check settings