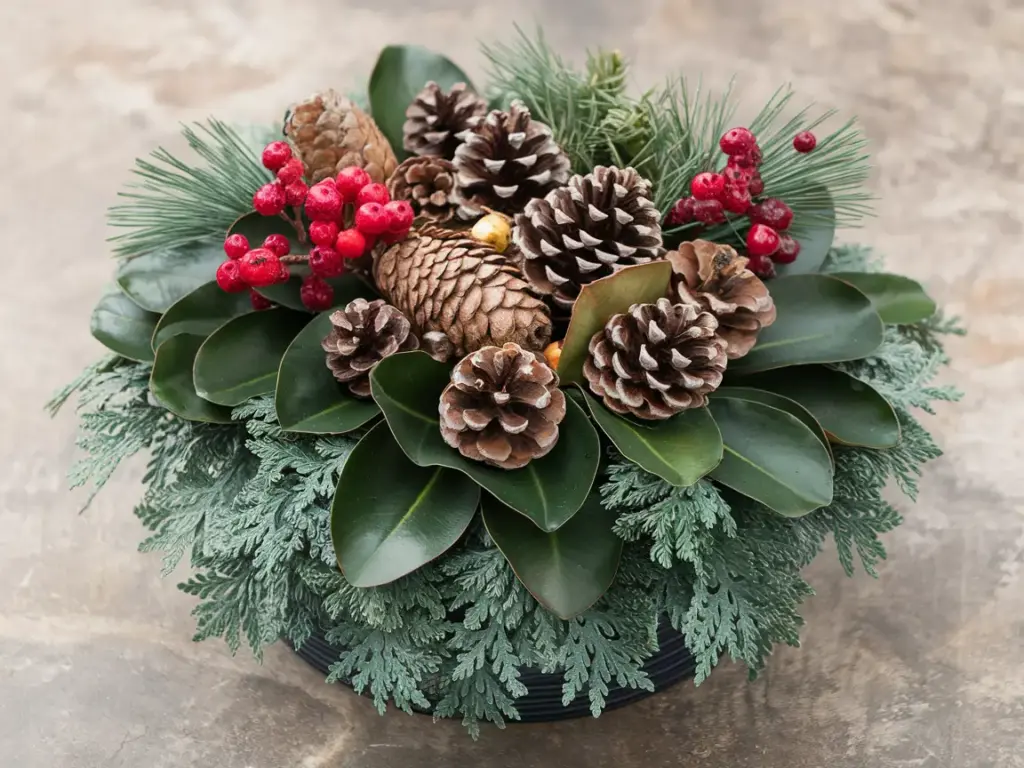
Secret #8: The “Texture Trifecta” Rule

I used to create winter planters that looked flat and uninspiring until a design mentor taught me about the power of textural contrast. Now, after creating hundreds of winter containers, I’ve perfected what I call the “Texture Trifecta” – and it’s completely transformed my designs!
The Essential Three Textures
Every stunning winter planter needs these critical textural elements:
- Smooth Texture:
- Magnolia leaves
- Broad evergreen foliage
- Silver dollar eucalyptus
- Smooth-bark branches
- Feathery Texture:
- Cedar branches
- Wispy pine needles
- Delicate ferns
- Airy grasses
- Rough Texture:
- Pine cones
- Bark-covered branches
- Dried seed heads
- Berried branches
The Professional Mixing Method
Here’s my foolproof formula for combining textures like a pro:
The 40-30-30 Rule:
- 40% dominant texture (usually feathery)
- 30% contrasting texture
- 30% accent texture
Pro tip: Always place contrasting textures next to each other for maximum impact!
Budget-Friendly Texture Sources
After years of foraging, I’ve discovered these amazing cost-free texture sources:
- Natural Elements:
- Pine cones from local parks
- Dried perennial heads
- Fallen branches
- Seed pods
- Recycled Materials:
- Last year’s preserved elements
- Dried hydrangea blooms
- Saved ornamental grasses
- Garden center clearance items
The Must-Have Professional Texture
Here’s the texture that every professional includes (and most amateurs miss):
The Magic of Frost-Catching Materials:
- Silver-Toned Elements:
- Dusty Miller
- Silver fir branches
- Frosted pine cones
- Mercury glass accents
- Light-Reflecting Surfaces:
- Glossy magnolia leaves
- Metallic-sprayed branches
- Glitter-dusted elements
- Crystalline decorations
Texture Placement Strategy
My tried-and-true method for texture positioning:
- Base Layer:
- Dense, feathery textures
- Strong structural elements
- Foundational greenery
- Middle Layer:
- Contrasting smooth textures
- Berried branches
- Transitional elements
- Top Layer:
- Statement rough textures
- Eye-catching accents
- Frost-catching materials
Seasonal Texture Evolution
Here’s how I plan for textures that last:
- Early Winter:
- Fresh evergreen textures
- Living plant materials
- Natural elements
- Mid-Winter:
- Preserved materials
- Frost-enhanced textures
- Weather-resistant elements
- Late Winter:
- Dried materials
- Artificial accents
- Transitional elements
Texture Maintenance Tips
Keep your textures looking fresh with these professional secrets:
- Weekly Care:
- Gently brush snow from delicate textures
- Remove damaged elements
- Refresh dried materials
- Monthly Updates:
- Rotate weather-worn pieces
- Add seasonal accents
- Enhance frost effects
Ready to learn the secret to making your planter look twice as full without adding more materials? In Secret #9, I’ll reveal my “Optical Illusion Effect” that creates incredible depth and fullness. Plus, discover the spacing trick that professionals use to maximize impact! Click next to master the art of visual abundance.


GIPHY App Key not set. Please check settings