
8. Consider a Full Repot: A Fresh Start for Healthy Roots
When a fungus gnat infestation is really severe, and the soil seems to be just teeming with gnat larvae and their eggs, it might be time to take this more drastic step. Think of it as giving your beloved houseplant a clean slate and a chance for super healthy roots. This is a core tactic in advanced garden care when you’re dealing with persistent soil pests.
When All Else Fails: The “Nuclear Option” (That’s Actually Really Good!)
I know “nuclear option” sounds intense! But honestly, sometimes a full repot is the kindest thing you can do for a plant that’s struggling with a massive gnat population.
If you’ve tried other methods and those larvae just keep coming back, it often means the infested soil itself is the main problem. A fresh start can make all the difference.
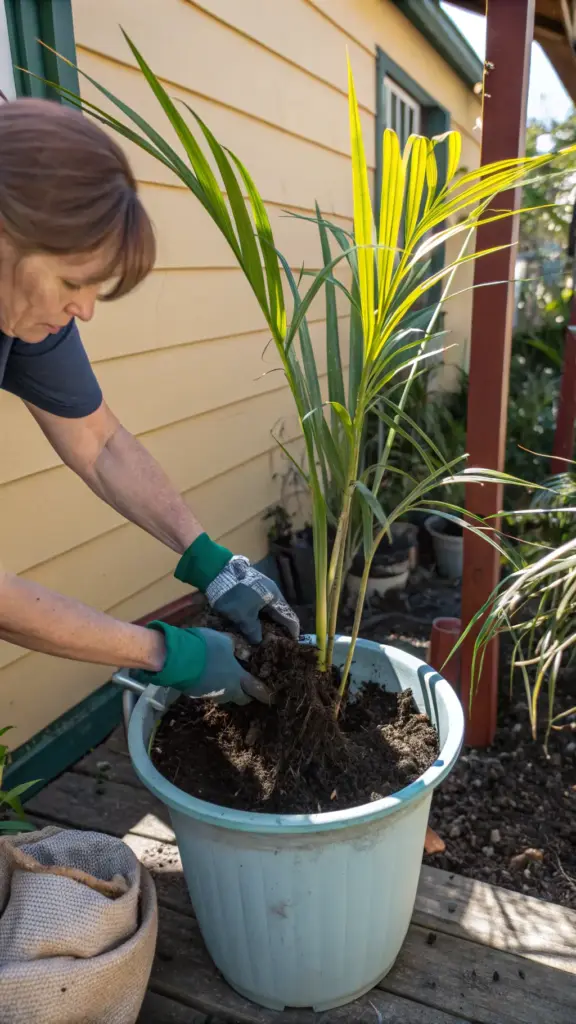
My “Had to Be Done” Repotting Saga
I have this gorgeous Kentia palm – it’s one of my statement plants here in my place in San José del Cabo. A while back, it got a terrible case of fungus gnats, likely from a contaminated bag of potting mix I’d used.
I tried everything, but the gnats just kept emerging. I finally realized that the sheer volume of larvae in that old soil was too much to overcome with surface treatments alone. So, I prepped for a repotting session. It felt like a big task, but the relief for both me and my palm afterward was immense!
Why a Fresh Start Works Wonders for Gnat Control
Repotting is so effective because you are physically removing the source of the problem. You’re getting rid of that infested soil which is the main breeding ground and cafeteria for fungus gnat larvae.
You’re essentially evicting the existing eggs and larvae hiding amongst the plant roots. And by using fresh, ideally sterile potting mix, you ensure you’re not just reintroducing the problem.


The Repotting Roadmap: Step-by-Step to a Gnat-Free Plant
Ready to give your plant that fresh start? Here’s how to tackle it:
- First, gently slide your plant out of its current pot. It’s often easier if the soil is a bit on the dry side.
- Next, very carefully shake off as much of the old, infested soil from the plant roots as you possibly can.
- Be gentle with those delicate roots! You want to remove the bad soil, not break all the good roots. Sometimes I even use a chopstick to gently loosen compacted old soil.
- If you plan to reuse the same pot, scrub it out thoroughly with hot, soapy water. This will kill any lingering gnat eggs or larvae. Or, even better, use a brand new, clean pot.
- Finally, repot your plant using fresh, high-quality, well-draining potting mix.
- Make sure it’s a good mix designed for houseplants, as this will help with proper soil aeration and prevent future waterlogging. Don’t pack it down too hard.
A Few Post-Repotting Pointers
After the repotting adventure, your plant might be a little stressed. This is totally normal.
Give it a gentle watering with the new potting mix. Then, keep it out of direct, harsh sunlight for a few days to let it settle into its new, gnat-free home.
This fresh start with new soil can truly turn the tide in your battle against stubborn fungus gnat infestations.
Repotting is a fantastic way to hit the reset button on a bad gnat problem by completely changing out their breeding ground. But what if you want to introduce some microscopic allies, some tiny “good guys,” directly into your soil to actively hunt down any remaining larvae? There are amazing, invisible helpers that can do just that!
Ready to learn about enlisting a microscopic army? Click ‘Next’ to explore the fascinating world of Beneficial Nematodes!


GIPHY App Key not set. Please check settings