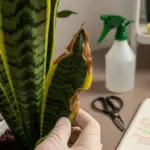
5. Rhizome Cutting Propagation
Rhizome cutting propagation is like discovering the secret underground network of your ZZ plant. I stumbled onto this method when I accidentally broke off a chunk of rhizome during repotting.
Instead of panicking, I decided to experiment with it. Best happy accident ever – that broken piece grew into one of my most robust ZZ plants!
This method gives you faster results than leaf propagation but requires understanding what’s happening beneath the soil.
Decoding ZZ Plant Rhizome Structure
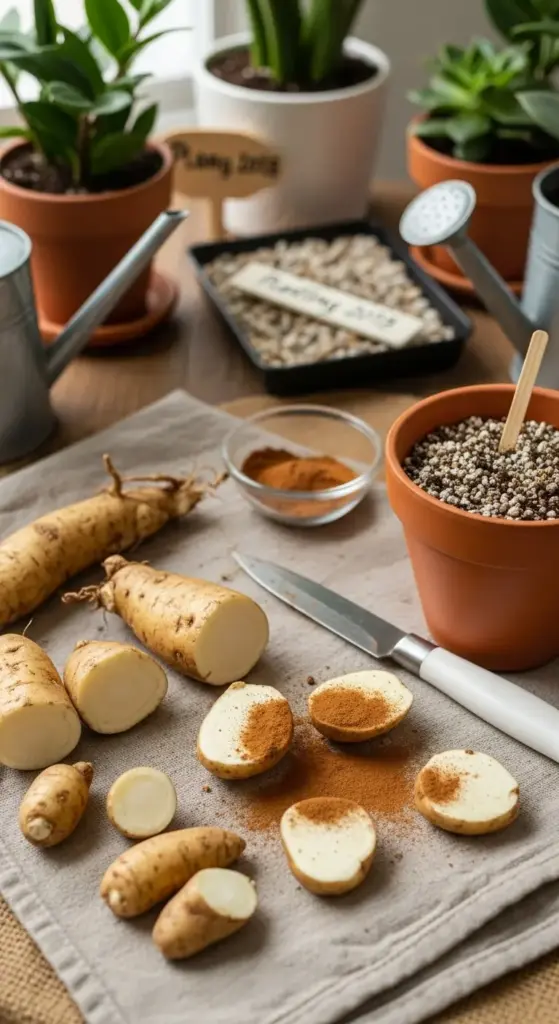
ZZ plant rhizomes look like chunky, pale potatoes connected underground. These aren’t roots – they’re actually modified stems that store water and nutrients.
Each rhizome has multiple “eyes” or growth points, just like potato eyes. These are where new shoots emerge from.
The rhizomes can be thick as your thumb or thin as a pencil, depending on the plant’s age and health. Thicker rhizomes generally have more stored energy for propagation.
I was amazed when I first saw how extensive the underground rhizome network can be. A single ZZ plant might have 6-8 connected rhizomes spreading throughout the pot.
Mastering Rhizome Cutting Techniques
Timing is everything with rhizome cutting. I do this during repotting when the plant is already disturbed and the rhizomes are exposed.
Look for rhizomes that are at least 2-3 inches long with visible growth points. Tiny rhizome pieces rarely succeed – learned this through multiple failures.
Use a clean, sharp knife to cut rhizomes into sections. Each piece needs at least one growth eye, but two or three eyes give better success rates.
Let the cut surfaces dry for 2-4 hours before planting. This callusing period prevents rot – something I wish I’d known during my first attempts.
I dust the cut ends with cinnamon as a natural antifungal. Sounds weird, but it actually works better than expensive rooting hormones for rhizomes.
Soil Prep and Planting Depth Secrets
Rhizome propagation soil needs to drain exceptionally well. I use 60% succulent mix and 40% perlite – regular potting soil is too heavy and holds too much moisture.
The planting depth is crucial and where most people mess up. Plant rhizomes horizontally, not vertically like bulbs.
Bury them just 1-2 inches deep with growth eyes pointing upward. Too deep and they rot; too shallow and they dry out.


I use 4-6 inch pots for individual rhizome pieces. Terra cotta works best because it breathes and prevents waterlogged soil.
Mark your pots with planting dates – rhizome propagation takes patience and it’s easy to forget when you started.
Watering and Care During Establishment
This is where I killed my first batch of rhizome cuttings – I treated them like regular houseplants and watered too frequently. Big mistake.
Newly planted rhizomes need barely moist soil, not wet. I water only when the top inch feels completely dry, usually every 10-14 days.
Use room temperature water and water slowly until it drains from the bottom. Never let pots sit in standing water.
Humidity helps but isn’t critical like with leaf propagation. I place pots on pebble trays filled with water for gentle humidity.
Keep them in bright, indirect light – no direct sun while they’re establishing. My east-facing window works perfectly.
Timeline Expectations and Growth Milestones
Rhizome propagation timeline is faster than leaf propagation but still requires patience. Here’s what I’ve observed over dozens of attempts:
Week 1-3: Nothing visible happens (the rhizome is developing roots) Week 4-6: First tiny shoots may appear from growth eyes Week 8-12: Recognizable ZZ plant shoots emerge Month 4-6: Established plants ready for normal care
Some rhizomes are slow starters and don’t show growth for 3-4 months. Don’t give up if you don’t see immediate results!
I gently check for root development after 6 weeks by carefully lifting one corner of the rhizome. White, firm roots indicate success.
Failed rhizomes turn mushy and black – remove these immediately to prevent fungal spread to healthy pieces.
The most exciting moment is seeing that first green shoot push through the soil. It never gets old, even after dozens of successful propagations!
Ready for the most advanced technique that’ll make you feel like a true plant propagation expert? Air layering is coming up next – it’s the method I use when I want guaranteed success with my most precious ZZ plants!


GIPHY App Key not set. Please check settings