Spring is in the air, and what better way to welcome the season than with a gorgeous handmade wreath! Did you know that according to Pinterest trends, floral wreath searches increase by 350% during the spring months?
Whether you’re a crafting enthusiast or a beginner, these 10 stunning wreath ideas will help you create the perfect statement piece for your home. Get ready to bring the beauty of spring right to your front door!
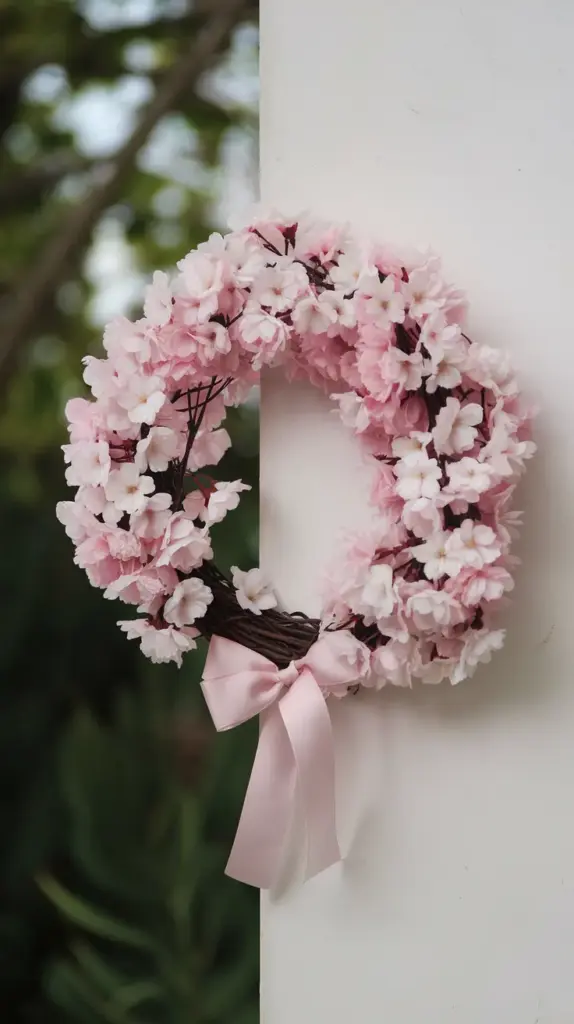
1. Cherry Blossom Wreath: A Spring Door Masterpiece

Let me tell you about my journey creating the perfect cherry blossom wreath! After countless attempts (and yes, a few craft store meltdowns), I’ve finally mastered the art of making these gorgeous spring decorations. Trust me, once you get the hang of it, you’ll be amazed at how professional your wreaths look.
Essential Materials
Before we dive in, let’s gather everything you’ll need:
- Grapevine wreath base (18-24 inches works best)
- Pink silk cherry blossoms (I recommend getting 2-3 bunches)
- High-quality floral wire
- Wire cutters
- Hot glue gun and extra glue sticks
- Ribbon for hanging (optional)
Step-by-Step Assembly Guide
I learned this the hard way – organization is key! Here’s my foolproof method that I’ve perfected over years of wreath-making:
- Start by examining your grapevine wreath for any loose pieces. Give it a gentle shake and remove any debris. This might seem fussy, but trust me, it makes a huge difference in the final result!
- Before attaching anything, lay out your cherry blossoms in a clockwise pattern around the wreath. I call this the “dry run” – it helps you visualize the final design and avoid that dreaded lopsided look I got on my first attempt!
- Begin securing the blossoms using floral wire. Here’s my pro tip: create small bundles of 3-4 blooms before attaching them. This gives you better control over the shape and fullness.
Creating That Natural Cascade Effect
The secret to achieving that professional cascading look lies in the placement technique. I’ve found that working in layers creates the most natural appearance:
- Start with a base layer of smaller blooms
- Add medium-sized clusters in the middle
- Finish with larger, showstopping blooms as focal points
- Always work in a clockwise direction to maintain consistency
Care and Maintenance Tips
Your cherry blossom wreath can last for years with proper care! Here’s what I’ve learned about preservation:
- Store in a cool, dry place when not in use
- Avoid direct sunlight to prevent fading
- Use a soft brush to remove dust monthly
- Store in a large plastic container during off-season
I keep mine in a special storage box with tissue paper between the layers. It might seem excessive, but it’s saved me from having to replace expensive silk flowers every season!
Ready to take your wreath-making journey to the next level? Click the “next” button below to discover how to create a stunning Tulip and Eucalyptus Wreath! I’ll show you my secret technique for combining fresh and faux flowers that’ll have your neighbors asking for your professional florist’s contact information! 😉
Remember, the key to a beautiful cherry blossom wreath is patience and attention to detail. Don’t rush the process – take your time positioning each bloom until it looks just right. Your front door will thank you!


GIPHY App Key not set. Please check settings