4. Choose the Right Soil Mix
I used to grab whatever bag of potting soil was on sale at the grocery store and call it a day. Big mistake. Huge.
My poor snake plants were sitting in what was basically mud that never dried out, and I couldn’t figure out why they kept getting root rot despite my “perfect” watering schedule.
The Soil Revelation That Changed Everything
It wasn’t until I repotted a struggling plant that I realized the problem. The soil was so compacted I could barely get it out of the pot. It looked like chocolate cake batter and smelled like a swamp.
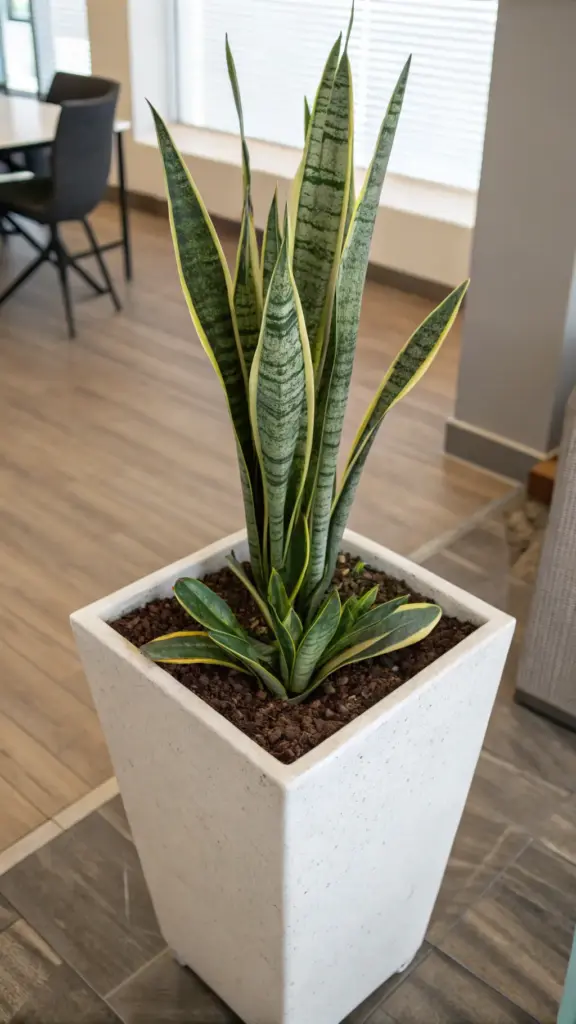
That’s when I learned that regular potting soil is way too heavy and moisture-retentive for snake plants. These desert natives need soil that drains fast and doesn’t hold onto water like a sponge.
Signs Your Current Soil is Sabotaging Your Plant
Your potting mix might be the problem if:
- Water sits on top for more than a few minutes after watering
- The soil stays wet for weeks after watering
- There’s a musty or sour smell coming from the pot
- The soil has turned into a hard, compacted brick
- You see white mold or fungus growing on the surface
I had all these signs and kept blaming everything except the soil. Sometimes the most obvious answer is the right one.
My Go-To DIY Soil Recipe That Actually Works
After years of trial and error, here’s my perfect snake plant soil mix:
- 40% regular potting soil
- 30% perlite (those white chunky bits)
- 20% coarse sand or pumice
- 10% bark chips or coconut coir
This mixture costs me about$12 to make and works better than any expensive “succulent soil” I’ve ever bought.
The perlite creates drainage and air pockets, while the sand adds weight so your plant doesn’t tip over. Bark chips help with drainage and add some organic matter as they slowly break down.
The Perlite Game-Changer
Perlite became my secret weapon after I discovered it. It looks like tiny white Styrofoam balls but it’s actually volcanic glass that’s been heated until it pops.
I buy it in huge bags from garden centers – way cheaper than those tiny bags at big box stores. Mix it into any soil and instantly improve drainage without making the mix too heavy.
Pro tip: Wet the perlite before mixing to avoid getting that white dust everywhere. I learned this after coating my entire kitchen in volcanic dust.


Understanding pH and Why It Actually Matters
I used to think soil pH was just fancy gardening talk until I tested my soil and found it was super acidic. My snake plants were basically trying to grow in pickle juice.
Snake plants prefer slightly acidic to neutral soil, around 6.0-7.0 pH. Most regular potting soils are fine, but if you’re using a lot of peat moss or pine bark, it might be too acidic.
I bought a cheap pH testing kit for$8 and it was honestly eye-opening. You can adjust pH with a little lime to raise it or sulfur to lower it, but most of the time, a good soil mix is naturally in the right range.
When to Refresh Your Plant’s Growing Medium
Soil replacement isn’t something I used to think about until I noticed my plants looking sad despite good care. Old soil gets compacted and loses its drainage properties over time.
I refresh my snake plant soil every 2-3 years, or sooner if:
- The soil smells funky or looks moldy
- Water runs straight through without being absorbed
- The plant seems stuck and won’t produce new growth
- I can see salt buildup on the soil surface (white crusty stuff)
The Repotting Process That Saves Plants
When I repot snake plants, I gently remove as much old soil as possible without damaging the roots. Sometimes I literally have to soak the root ball to get that compacted soil off.
I inspect the roots while I’m at it – healthy ones are white or light tan, while rotted ones are black and mushy. Cut off any bad roots with clean scissors before putting the plant in fresh soil.
Common Soil Mistakes That Nearly Killed My Plants
Miracle-Gro potting mix straight from the bag was my biggest mistake. It holds water like crazy and my snake plants hated it. I learned to always add perlite or sand to any commercial potting soil.
Another mistake: using garden soil indoors. It’s too heavy, doesn’t drain well, and can bring pests into your home. Stick with potting mixes designed for containers.
Cactus soil seems like it would work, but most commercial versions are still too moisture-retentive for snake plants. I always end up adding more perlite even to “succulent” soils.
Think you’ve got the basics covered? Hit next to discover how your home’s environment might be secretly stressing your snake plant – and the simple tweaks that can turn any room into a plant paradise!


GIPHY App Key not set. Please check settings