Direct Soil Propagation Technique

While water propagation is my go-to method, direct soil propagation has some serious advantages. After countless experiments (and yes, some failures), I’ve perfected my soil propagation technique for Sansevieria cuttings. Let me share what I’ve learned about getting these stubborn plants to root directly in soil.
The Perfect Soil Mix
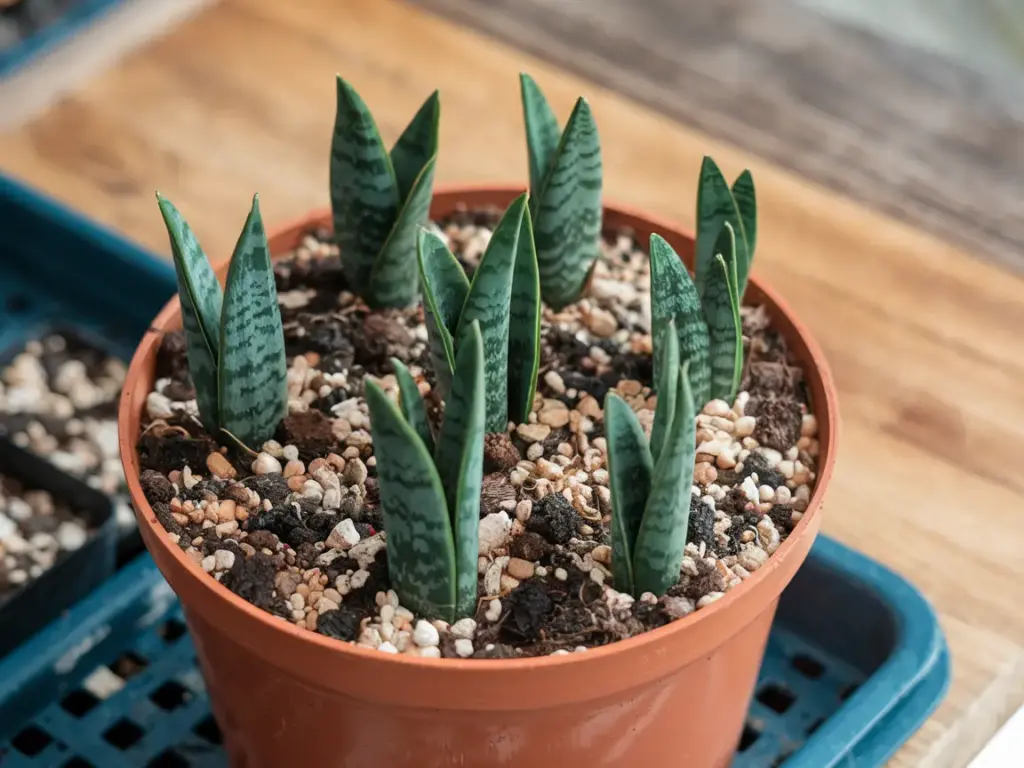
Your soil mix can make or break your propagation success. My golden ratio is 2 parts succulent soil, 1 part perlite, and 1 part coarse sand. This mix provides the perfect balance of drainage and moisture retention. The first time I tried propagating in regular potting soil… well, let’s just say those cuttings didn’t make it. Well-draining substrate is absolutely crucial!
Planting Depth and Position
Here’s something I wish I’d known earlier: snake plant cuttings should only be inserted about 1-1.5 inches into the soil. Any deeper, and you risk stem rot. I learned this lesson the hard way after burying several cuttings too deep. Make sure your growth nodes (those little ridges on the cut end) are below the soil surface.
Spacing Your Cuttings
When it comes to spacing, I’ve found that each cutting needs at least 2 inches of space on all sides. You might be tempted to crowd them together (I certainly was), but proper spacing allows for better air circulation and root development. In a standard 6-inch pot, I never place more than 3-4 cuttings.
The Crucial First Watering
This part is tricky but important. After planting, give the soil one thorough watering until water runs out the drainage holes. Then – and this is crucial – don’t water again until the soil is completely dry! I keep a moisture meter handy to avoid overwatering. That first month is all about finding the balance between too wet and too dry.
Environmental Conditions
Temperature and humidity play huge roles in successful soil propagation. Keep your cuttings in a spot that stays between 70-85°F (21-29°C). I’ve had great success using a humidity dome to maintain about 60% humidity around the cuttings. Just remove it for an hour each day to prevent fungal issues.
Timeline and Expectations
Let’s talk timeline – and I’ll be honest here. Soil propagation is slower than water propagation. You’re looking at 8-12 weeks before seeing significant growth. But don’t get discouraged! The waiting game is worth it because soil-propagated plants often develop hardier root systems.
Here’s how to tell if your cuttings are rooting:
- Slight resistance when gently tugged
- New leaf growth (usually after 2-3 months)
- The cutting remains firm and green
- Soil moisture levels decrease more quickly
I test for rooting by giving each cutting a very gentle tug after about 6 weeks. If you feel resistance, congratulations – your cutting has started developing roots!
Sometimes direct soil propagation feels like gardening blindfolded because you can’t see the roots developing. But there’s something really satisfying about seeing that first new leaf emerge, knowing your patience has paid off.
Ready for the next crucial step? Click the “next” button below to discover my detailed aftercare routine. I’ll share my exact watering schedule, light requirements, and the fertilizing technique that transformed my struggling cuttings into thriving plants. Plus, I’ll reveal my secret weapon for preventing the most common problems that pop up during the first three months!


GIPHY App Key not set. Please check settings