Did you know that 65% of home cooks say having fresh herbs within arm’s reach has transformed their cooking experience? Your kitchen windowsill isn’t just a sunny spot gathering dust – it’s prime real estate for a mini garden that can elevate your culinary game!
From zesty herbs that’ll make your pasta sing to compact vegetables that’ll have you feeling like a master gardener, I’ll show you the absolute best plants that will thrive in your kitchen window. Ready to turn that empty sill into your own personal produce section? Let’s dig in!
10. Microgreens – Your Window to Nutrient-Dense Superfoods

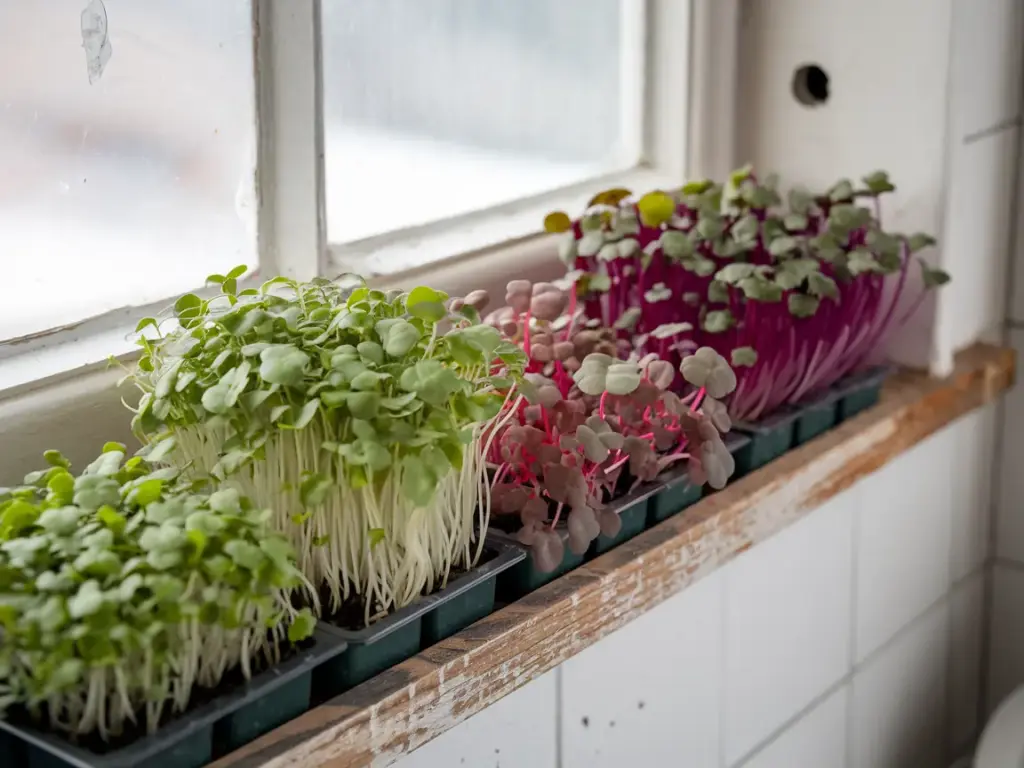
Let me tell you about my journey with microgreens, which started after I spent way too much money on those tiny garnishes at fancy restaurants! I couldn’t believe these delicate little shoots could pack such a flavor punch. After doing some research, I discovered that microgreens aren’t just pretty – they’re nutritional powerhouses that can contain up to 40 times more nutrients than their fully-grown counterparts!
What Exactly Are Microgreens?
Think of microgreens as teenage vegetables – they’re harvested right after the first true leaves appear, usually about 7-14 days after planting. Unlike sprouts that you eat whole (root and all), microgreens are cut just above the soil level. The cool thing about these little guys is that they’re basically concentrated versions of the full-grown plants, packed with vitamins, minerals, and antioxidants.
Best Varieties for Your Windowsill Garden
Through some trial and error (and yes, a few failed attempts), I’ve found that certain varieties are absolute superstars for windowsill growing. Radish microgreens are my go-to recommendation for beginners – they’re ready in just 5-7 days and have this amazing peppery kick that’ll wake up any sandwich. Arugula and mustard microgreens are also fantastic options that practically grow themselves!
I learned the hard way that some varieties are trickier than others. My first attempt at growing cilantro microgreens was a bit of a disaster – they’re slower growers and need more patience. But don’t let that discourage you!
Setting Up Your Microgreen Station
Here’s what you’ll need to get started (and trust me, it’s simpler than you might think):
- A shallow tray with drainage holes
- A second tray without holes (for bottom watering)
- Good quality potting soil or seed starting mix
- Your chosen microgreen seeds
- A sunny windowsill
- A spray bottle for gentle watering
Pro tip I wish I’d known earlier: Use a humidity dome (even a clear plastic bag works!) for the first few days to boost germination rates. Your seeds will thank you for it!
Growing and Harvesting Your Microgreens
The process is pretty straightforward once you get the hang of it. Spread your soil about 1-2 inches deep, scatter seeds densely (but not overlapping), and lightly press them into the soil. I mist them gently with water and cover them until they sprout. Once they do, it’s like watching a tiny forest grow!
For harvesting, wait until you see those first true leaves develop – they’ll look like miniature versions of the adult plant leaves. Use clean, sharp scissors and cut just above the soil level. Here’s a game-changing tip: you can get multiple harvests from hardier varieties like pea shoots by cutting just above the lowest set of leaves!
Speaking of delicious and easy-to-grow plants, you’re going to love what’s coming up next. Our #9 pick, English Thyme, is another windowsill superstar that’ll take your cooking game to the next level. Click the next button below to discover why this aromatic herb deserves a prime spot in your kitchen garden!
Remember: The key to success with microgreens is consistent moisture and good air circulation. Once you nail these basics, you’ll have an endless supply of nutrient-rich garnishes right at your fingertips!


GIPHY App Key not set. Please check settings