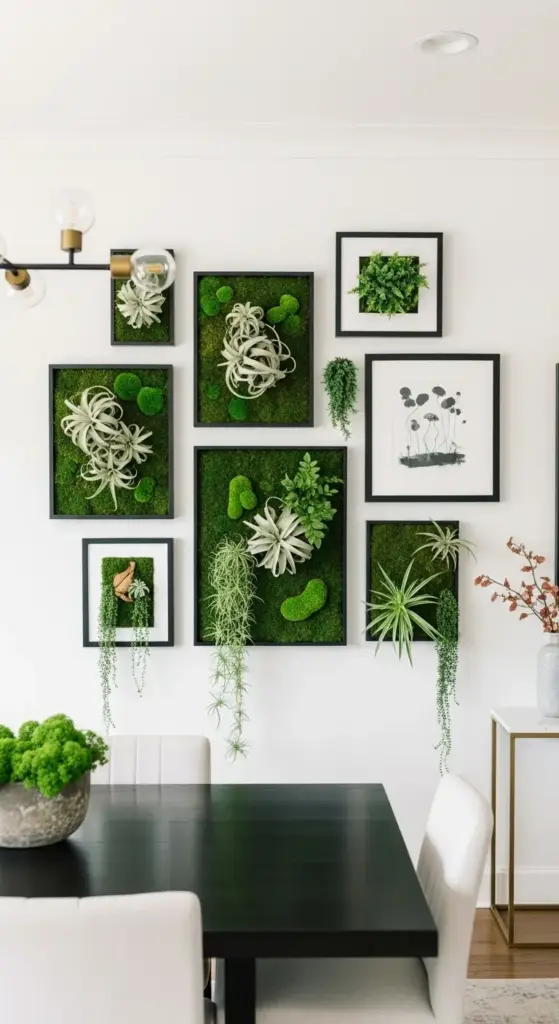
4. The Living Picture Frame Gallery
Last year, I was staring at this boring blank wall in my dining room, trying to figure out how to make it interesting without spending a fortune on art. Then I stumbled across this concept of living picture frames at a trendy café in Seattle.
Mind officially blown.
But here’s the thing – my first attempt looked like I hot-glued some plants to old picture frames and called it art. Spoiler alert: it was not cute.
Designing Frames That Look Intentional
The secret to framed plant art is treating it like actual artwork, not just plants shoved into frames.
Start with shadow boxes or deep picture frames – at least 2 inches deep. I learned this after my first shallow frames couldn’t hold soil properly and made a mess.
Plant wall art needs proper backing material. I use hardware cloth (wire mesh) covered with landscape fabric to hold everything in place.
Here’s what nobody tells you – paint or stain your frames before adding plants. Trying to touch up paint around living plants is basically impossible.
Size variety is crucial for gallery wall design. I use 8×10, 11×14, and 16×20 frames mixed together for visual interest.
Plants That Actually Work in Frames
After killing way too many plants in my early living wall experiments, I’ve narrowed down the varieties that actually thrive in vertical frame gardens.
Air plants are absolutely perfect for this. They don’t need soil and create amazing sculptural shapes in frames.
Small ferns work beautifully, especially maidenhair ferns if you can keep the humidity right. Mine took three tries to get established.
Succulents are tricky in frames – they need excellent drainage which is hard to achieve in this setup. Stick with very small varieties if you go this route.
Moss varieties are foolproof and create gorgeous textural backgrounds for other plants.
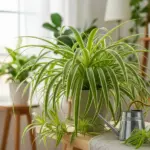
Baby spider plants work amazingly well and eventually create those cool trailing effects.
Mounting Without Destroying Your Walls
Vertical plant displays can get heavy fast, especially when watered. I learned this when my first installation pulled chunks of drywall down.
Use heavy-duty picture hanging strips rated for at least double the weight of your frame. Better safe than sorry with plant wall installations.
For heavier pieces, screw directly into wall studs. A stud finder is your best friend here.
Pro tip from my contractor friend – install a small ledge or shelf under each frame to catch any drips. Your floors will thank you.
Consider removable mounting systems so you can take frames down for maintenance without destroying your wall.
Drainage Solutions That Actually Work
This is where most living picture frame projects fail. Plants need drainage, but you can’t have water running down your walls.
I drill small holes in the bottom of each frame and line them with coffee filters. This allows drainage while catching debris.


Activated charcoal at the bottom of each frame prevents that swampy smell that can develop in enclosed plant systems.
The game-changer for me – use a turkey baster to remove excess water from the bottom of frames after watering. Sounds weird but it works perfectly.
Water very sparingly and only when the soil feels dry. These vertical garden setups hold moisture longer than regular pots.
Creating Cohesive Gallery Walls
The trick to plant gallery walls that look intentional is treating them like any other art collection.
Stick to a consistent frame color or finish. I use all black frames because they make the plants pop and work with any home decor style.
Plan your layout on the floor first. I use kraft paper templates taped to the wall before committing to holes.
Mix frame orientations – some horizontal, some vertical, some square. This creates visual rhythm just like traditional gallery walls.
Leave consistent spacing between frames. I use 2-3 inches between pieces for a clean, museum-like look.
Blending Plants with Traditional Art
This is where living wall art gets really exciting – combining plants with regular artwork creates such unique wall decor.
Alternate plant frames with traditional prints or paintings. The contrast between living and static art is stunning.
Color coordination is key. If your artwork has green tones, echo those with your plant choices.
Scale matters more than you think – don’t put a tiny plant frame next to a huge painting. Keep proportions balanced.
Consider lighting for both your plants and artwork. LED picture lights can serve double duty here.
Seasonal Swapping Strategy
One advantage of framed plant gardens is you can easily swap out plants seasonally without redoing the whole installation.
Spring calls for fresh green ferns and new air plant varieties. I love adding tillandsia with pink or purple blooms.
Summer is perfect for small flowering plants if you can provide enough light.
Fall and winter work beautifully with preserved elements mixed in – dried flowers, interesting branches, or seasonal moss varieties.
The indoor plant wall trend keeps evolving, but living picture frames feel timeless and sophisticated.
Ready to create a plant wall system that grows with your space? Click below to discover modular pocket gardens that let you rearrange, swap, and expand your vertical garden whenever inspiration strikes!


GIPHY App Key not set. Please check settings