Warning Sign #6: Wilting Despite Moist Soil Indicates Root Problems
This one completely stumped me for three weeks. My sage was drooping like it was dying of thirst, but every time I stuck my finger in the soil, it was perfectly moist. I felt like I was going crazy.
I kept watering it more, thinking maybe the moisture wasn’t reaching deep enough. Big mistake. Root rot was already destroying my plant’s foundation, and I was just making it worse with every “helpful” watering session.
Spotting Root Rot vs. Root-Bound Plants
Root rot has this distinctive smell – like a swamp or rotten eggs. I first noticed it when I moved my wilting sage and got hit with this awful odor that definitely wasn’t coming from healthy soil.
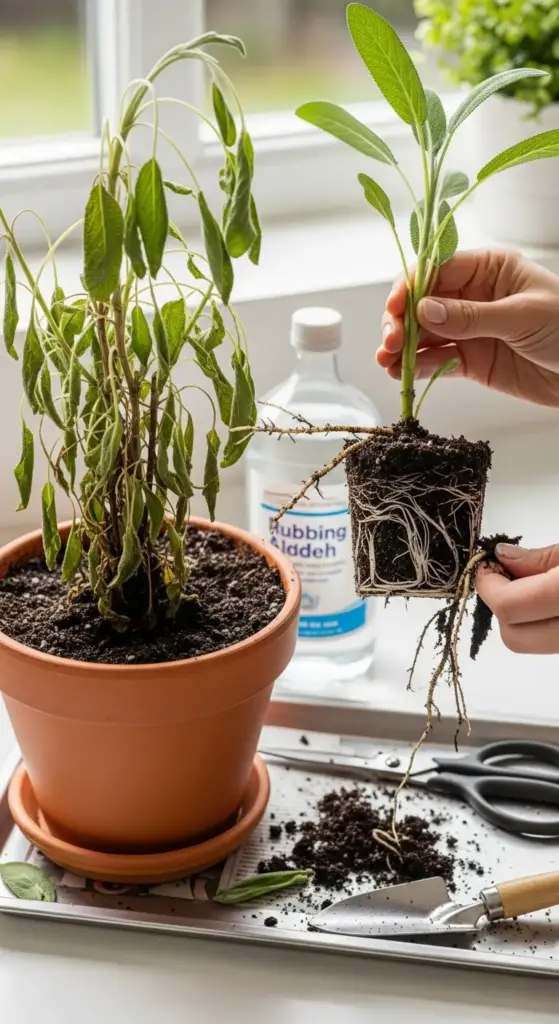
The telltale signs include black, mushy roots instead of firm white ones. When I finally worked up the courage to unpot my sage, the roots literally fell apart in my hands like wet tissue paper.
Root-bound conditions look completely different. The roots form tight circles around the pot’s edges, sometimes so thick you can barely see soil. These roots are healthy but literally have nowhere left to grow.
I learned to check for drainage issues by lifting the pot – if water pours out the bottom holes immediately after watering, that’s good. If it sits heavy and waterlogged, you’ve got problems brewing.
Stunted growth combined with wilting is another red flag. My sage stopped producing new leaves entirely, even though I was giving it perfect light and regular feeding.
Emergency Repotting Protocol
When I finally diagnosed root rot, I had to act fast. Immediate unpotting revealed the extent of the damage – about 60% of the root system was black and slimy.
Sterilize your tools first – I learned this after accidentally spreading root rot to another plant. Clean scissors with rubbing alcohol before making any cuts.
Cut away all black, mushy roots without mercy. It feels brutal, but healthy white roots can regenerate while rotten ones will just spread the infection. I ended up removing two-thirds of my sage’s root system.
Rinse the remaining roots gently under lukewarm water to remove any infected soil particles. The water should run clear when you’re done, not brown or murky.
I also trimmed back the foliage by about half to reduce stress on the damaged root system. Less leaves means less water demand while the plant recovers.
Pot Selection and Drainage Mastery
Pot size was where I’d been going wrong all along. I thought bigger was always better, but oversized pots hold too much moisture for sage’s Mediterranean preferences.
The new pot should be only 1-2 inches larger in diameter than the root ball. Any bigger and you create soggy soil pockets that roots can’t reach and dry out properly.
Drainage holes are non-negotiable – I now drill extra holes in pots that don’t have enough. My sage needs at least 3-4 drainage holes in the bottom, not just one tiny one.
Drainage layers made a huge difference. I put a layer of small stones or broken pottery pieces in the bottom before adding soil. This prevents soil from clogging the drainage holes.
Pot material matters more than I realized. Terracotta pots breathe and allow excess moisture to evaporate through the sides, while plastic traps every drop of water inside.


The Perfect Sage Soil Recipe
Regular potting soil was too heavy and moisture-retentive for my sage. I now mix my own well-draining blend that’s saved multiple plants from root problems.
My recipe: 50% quality potting mix, 25% perlite for drainage, 15% coarse sand, and 10% bark chips. This creates air pockets that roots love and water drains through quickly.
Perlite is the secret ingredient – those white chunky bits that look like Styrofoam but aren’t. They create permanent air spaces in soil that don’t compact over time.
Avoid miracle-gro potting mix for herbs – it holds too much moisture and has slow-release fertilizer that can burn sage roots. I learned this expensive lesson with my first three plants.
I also add a handful of coarse sand (not fine sand, which creates concrete-like soil) to improve drainage even more. The goal is soil that drains within 30 seconds of watering.
Recovery Timeline and Aftercare
Week 1-2 after repotting were nerve-wracking. My sage looked worse before it looked better, with some additional leaf drop as it adjusted to its new root situation.
Water very sparingly during recovery – maybe once a week or when the soil is completely dry 2 inches down. The reduced root system can’t handle normal watering schedules.
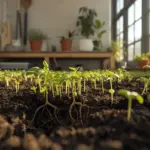
New growth started appearing around week 3, which was the first sign that my emergency surgery had worked. Tiny new leaves at the growing tips meant the roots were functioning again.
Full recovery took about 6-8 weeks. My sage didn’t return to its pre-problem size until month 3, but the new growth was healthier and more robust than before.
I kept the plant in bright, indirect light during recovery instead of full sun. Stressed plants need gentler conditions while they rebuild their root systems.
Prevention Strategies That Actually Work
Bottom watering became my new standard practice. I put the pot in a tray of water for 30 minutes, then remove it. This encourages roots to grow downward and prevents surface overwatering.
Monthly root checks sound obsessive, but they catch problems early. I gently tip the plant and look at the drainage holes – healthy roots should be white or cream-colored, never black.
Seasonal watering adjustments prevent most root problems. Summer means more frequent watering, winter means backing way off even if the plant looks thirsty.
I also rotate my pots quarterly to prevent roots from growing in circles. This simple step keeps the root system healthy and prevents binding issues.
Fertilizer reduction during winter months prevents root burn when plant growth slows down. I learned that feeding a dormant plant is like force-feeding someone who’s not hungry.
Roots looking healthy now? Click “next” to discover the most subtle warning sign I almost missed – when my sage lost its signature fragrance. This seemingly minor change actually signals major plant stress that affects everything from growth to flavor!


GIPHY App Key not set. Please check settings