Warning Sign #3: Leggy, Stretched Growth Means Your Lighting is All Wrong

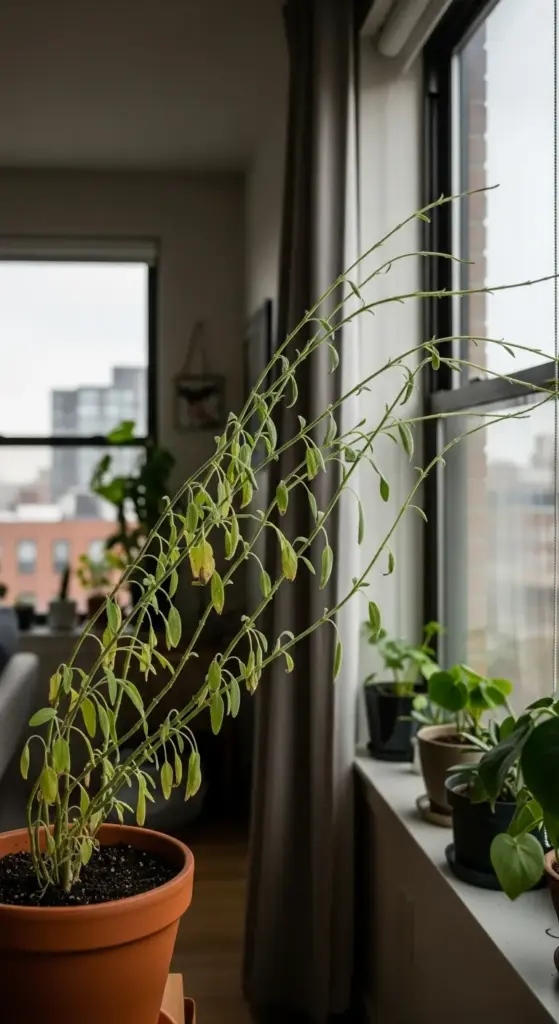
I thought I was being smart by putting my sage in the “brightest” spot in my apartment – right next to my north-facing window. Three weeks later, my once-bushy sage looked like it was doing yoga stretches, reaching desperately toward the glass.
Leggy growth was my introduction to the world of etiolation – a fancy word for “your plant is literally stretching to find light.” Who knew plants could be so dramatic?
Sage’s Picky Light Requirements
Here’s what nobody tells you: sage is a Mediterranean herb that’s used to getting 6-8 hours of bright light daily. My sad north window was giving it maybe 3 hours of weak, filtered light.
Direct morning sun is sage’s best friend, but harsh afternoon sun can actually scorch the leaves. I learned this when I moved my stretched sage to a south window and watched the leaves turn brown within days.
The sweet spot is an east-facing window where your sage gets that gentle morning light for 4-6 hours. West windows work too, but you might need a sheer curtain during summer months.
I use a light meter app on my phone now (yes, they exist and they’re free!). Sage needs about 2000-3000 foot-candles of light to stay compact and healthy.
Window Placement Strategy for City Living
Living in an apartment means working with what you’ve got. My east kitchen window became sage headquarters after I realized it got the most consistent light throughout the day.
Urban shadows from other buildings can mess with your light calculations. I thought my south window was perfect until I noticed a neighboring building blocke most of the afternoon sun.
Seasonal changes hit hard in apartments. My sage was happy in spring but started stretching again in fall when the sun angle changed. I had to move it closer to the window as winter approached.
Reflective surfaces can boost your light game. I put a white poster board behind my sage to bounce more light onto the back leaves – sounds weird, but it totally works.
Grow Lights That Don’t Scream “Grow Operation”
After my third leggy sage disaster, I finally caved and bought a grow light. The purple LED ones looked like I was running some kind of illegal operation, so I went with full-spectrum white LEDs.
My favorite find was a clamp-on desk lamp with a grow light bulb from Home Depot – $35 total and it looks like regular task lighting. I clamp it to a nearby shelf and aim it at my herbs.
Timer plugs are game-changers for consistent lighting. I set mine for 12 hours daily during winter months when natural light is weak. No more forgetting to turn lights on and off.
The distance matters more than I expected. Too close and you’ll burn the leaves, too far and it’s useless. I keep my grow light about 12 inches above my sage and adjust as it grows.
Plant Rotation Without Ruining Your Aesthetic
I used to just spin my sage randomly, which created this lopsided, weird-looking plant that didn’t match my kitchen’s vibe. Now I have a system that keeps things looking intentional.
Quarter turns twice a week work better than big rotations. I do it every Wednesday and Sunday while I’m making coffee – small movements that the plant barely notices.
The trick is marking your pot with a tiny piece of tape so you know which direction you turned it last. I felt silly doing this at first, but it prevents over-rotating in one direction.
For aesthetic purposes, I rotate toward the room so the fullest side always faces out. This way, my sage looks intentionally styled even while it’s getting even light exposure.
When Your Sage is Getting Too Much Sun
Plot twist: after fixing my low-light problem, I created a too-much-light problem. My sage’s leaves started getting pale and washed out, almost like they were bleached.
Leaf scorch shows up as brown, crispy patches in the middle of leaves – not just the tips like with underwatering. The damage usually appears on the side facing the strongest light source.
Afternoon sun through glass is particularly brutal because windows can magnify heat and light intensity. I learned to use sheer curtains during the hottest part of the day in summer.
Wilting in bright light is another red flag. If your sage droops during sunny afternoons but perks up in the evening, it’s getting overwhelmed by light intensity.
The solution isn’t always moving the plant – sometimes it’s just filtering the light with blinds or moving it back a few inches from the window.
Quick Fixes for Already-Leggy Sage
When I caught my sage mid-stretch, I pruned the leggy stems back to encourage bushier growth. Cut just above a leaf node, and new growth will branch out from that point.
Gradually increasing light works better than shocking the plant with sudden brightness. I moved my stretched sage closer to the window over the course of a week.
Don’t expect instant results – it took about a month for my sage to start growing compact again after I fixed the lighting situation.
Got your lighting dialed in? Click “next” to learn about the white powdery coating that appeared on my sage leaves one morning – and why it’s way more serious than it looks! This fungal issue can spread to your other plants if you don’t catch it early…


GIPHY App Key not set. Please check settings