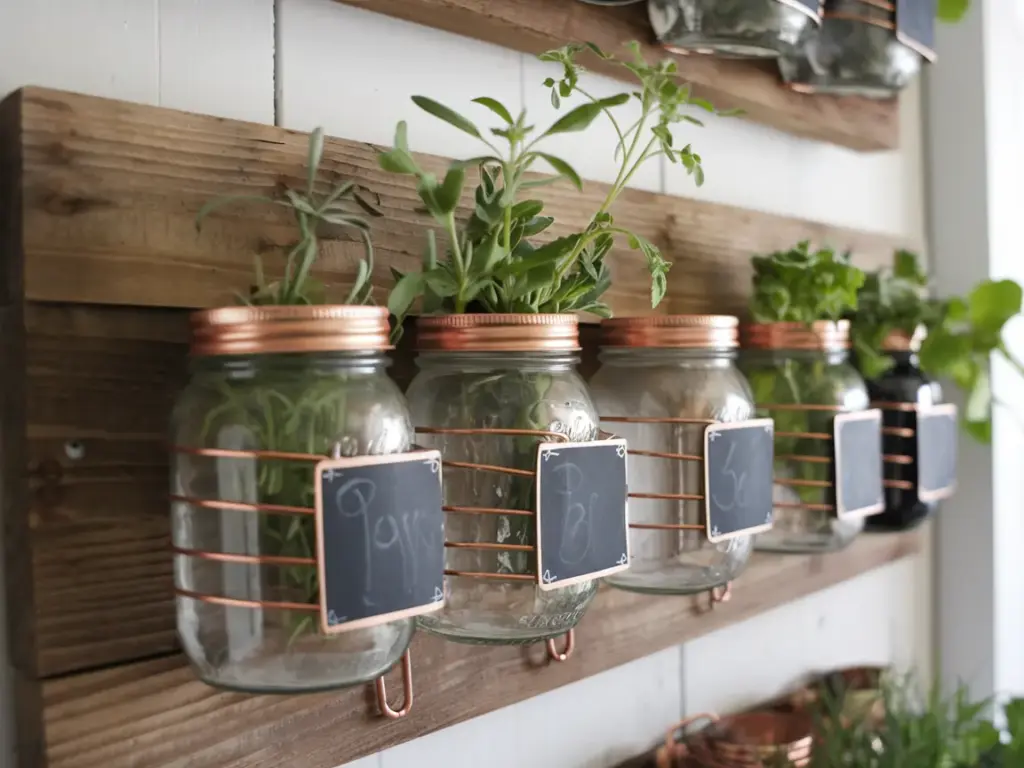
1. Upcycled Mason Jar Wall Garden

Okay, I’ve got to share something funny – my first mason jar wall garden looked like a Pinterest fail of epic proportions! The jars were crooked, herbs were drooping, and water was definitely where it shouldn’t be. But after countless attempts and teaching dozens of workshop students, I’ve perfected this charming and practical design. Let me show you how to do it right the first time!
Mounting Your Mason Jar Garden
First up: mounting these bad boys securely. You’ll need:
- Stainless steel pipe clamps (those cheap ones will rust, trust me!)
- A sturdy piece of reclaimed wood (I use an old pallet board)
- Waterproof wood sealant
- Wide-mouth mason jars
- Heavy-duty wall anchors
Here’s the crucial part that nobody tells you – you need to seal that wood board thoroughly, or you’ll end up with water damage like I did in my first attempt. Apply at least three coats of sealant, letting each one dry completely.
Choosing the Right Herbs
Not all herbs play nice in mason jars. Through trial and error (mostly error), I’ve found these work best:
- Mint (any variety)
- Basil
- Oregano
- Thyme
- Chives
Avoid rosemary and sage – they hate having wet feet and will throw a fit in this setup. Ask me how I know!
Water Management Secrets
Here’s where things get interesting. The biggest game-changer in my jar garden journey was discovering the double-jar method. Place a smaller plastic container inside your mason jar with drainage holes at the bottom. This creates a reservoir system that prevents overwatering – pure genius!
I check water levels every three days using a wooden chopstick (yep, just like checking a cake!). If the stick comes out clean, it’s watering time.
Making It Pretty
Let’s talk aesthetics because, hey, this is going on your wall! I love using:
- Copper wire wrapping
- Chalk paint labels
- Vintage-style name tags
- LED string lights
My favorite personal touch? I use different colored mason jars for different herb families. The blue ones are for Mediterranean herbs, clear for cooking herbs, and green for tea herbs. It’s both pretty and practical!
Maintenance Made Easy
Listen up, because this will save you tons of headaches: rotation is key. Every week, give your jars a quarter turn so all sides get equal light. I lost half my first herb wall because I skipped this step!
For pruning, always cut just above a leaf node – this encourages bushier growth. I learned this after accidentally creating some very sad, leggy basil plants.
Speaking of vertical gardens, wait until you see what’s coming next! Our DIY pallet herb garden takes things to a whole new level – literally. Click that next button to discover how to transform an old wooden pallet into a stunning vertical garden that’ll feed your family all year round. Plus, I’ll share my secret trick for preventing soil spillage that’ll save your floors from becoming a mini garden themselves!


GIPHY App Key not set. Please check settings