5. Never Ignore Temperature and Humidity Requirements

I used to think monstera propagation was just about water and light. Boy, was I missing a huge piece of the puzzle.
My cuttings would sit there for weeks with barely any root growth, and I couldn’t figure out what I was doing wrong. Turns out my dry house and inconsistent temperatures were basically putting my plants in survival mode.
It wasn’t until I started paying attention to humidity levels and temperature that my propagation success finally took off.
The Sweet Spot for Root Development
Monstera cuttings are basically tropical babies that crave warmth and moisture. They want to feel like they’re back in their jungle home.
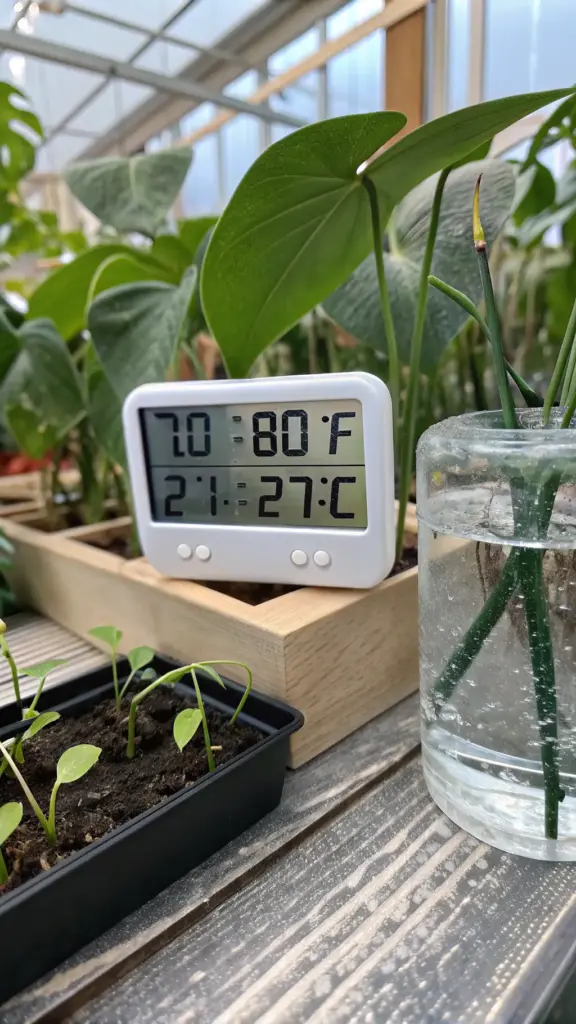
The magic temperature range is between 70-80°F (21-27°C). Below 65°F and root development slows to a crawl. Above 85°F and you risk cooking your precious cuttings.
I keep a small digital thermometer near my propagation station now. Those little temperature swings make way more difference than I ever imagined.
Kitchen Hacks That Actually Work
You don’t need fancy equipment to boost humidity around your cuttings. Some of my best tricks came from raiding my kitchen cabinets.
Pebble trays became my go-to solution – just a shallow dish filled with water and some decorative stones. The evaporating water creates a perfect humidity bubble around your plants.
I also discovered that placing a clear plastic container over my cuttings creates an instant mini greenhouse. Old takeout containers work perfectly for this.
Seasonal Propagation Reality Check
Winter propagation used to be my nemesis until I figured out how seasonal changes affect everything. Heating systems absolutely destroy indoor humidity.
My success rate would plummet from November through March because my house turned into a desert. Humidity levels would drop to like 20%, which is brutal for tropical cuttings.
Summer isn’t always better either – air conditioning can create cold drafts and temperature fluctuations that stress your propagation setup.
DIY Humidity Solutions
Plastic wrap became my secret weapon for creating humid microclimates. I loosely cover my propagation containers with it, leaving some gaps for air circulation.
Glass cloche covers from thrift stores work amazing too. I found a bunch for like$3 each and they’re perfect for individual cuttings.
Spray bottles help, but I learned not to mist directly on the leaves. Instead, I spray around the cutting to boost ambient humidity.
My Budget Greenhouse Setup
I converted a clear storage tub into a propagation chamber that cost maybe$15 total. Best plant investment I ever made.
The setup includes a humidity tray on the bottom, a small digital hygrometer to monitor conditions, and adjustable ventilation holes in the lid.
LED strip lights mounted inside give consistent lighting, and the whole thing maintains 60-70% humidity automatically.
Temperature Consistency Tricks
Heat mats designed for seed starting work perfectly for monstera propagation. They provide gentle, consistent bottom heat that roots absolutely love.
I place mine under my propagation containers and set them to maintain about 75°F. The difference in root development speed is incredible.
Thermal mass helps too – I keep a few water-filled jars near my cuttings to buffer temperature swings throughout the day.
Reading Environmental Stress Signs
Cold stress shows up as slow or stalled root growth, even when everything else looks perfect. The cutting just sits there doing nothing for weeks.
Low humidity stress causes leaf edges to brown and crisp up, even with proper watering. The aerial roots also tend to shrivel and look sad.
Temperature fluctuations create weak, spindly root systems that break easily when you try to transplant later.
Monitoring Made Simple
I use a combo thermometer/hygrometer that tracks daily highs and lows. Knowing your actual conditions beats guessing every time.
Ideal humidity for monstera propagation is 50-70%. Below 40% and you’ll struggle. Above 80% and you risk fungal issues.
I check my readings every few days and adjust my humidity hacks accordingly. Consistency beats perfection when it comes to environmental conditions.
Seasonal Adjustment Strategies
Winter means cranking up the humidity solutions and adding supplemental heat. I run humidifiers near my plant areas and group propagation setups together.
Summer requires more ventilation and careful temperature monitoring. Those heat waves can cook your cuttings faster than you’d think.
I’ve learned to move my propagation stations seasonally – closer to heat sources in winter, away from AC vents in summer.
Finally got your environment dialed in perfectly? Don’t get too excited yet – the last mistake is probably the hardest one to avoid, and it involves knowing exactly when to make the big move! Click “next” to learn why transplant timing can make or break months of careful propagation work. 🌱⏰


GIPHY App Key not set. Please check settings