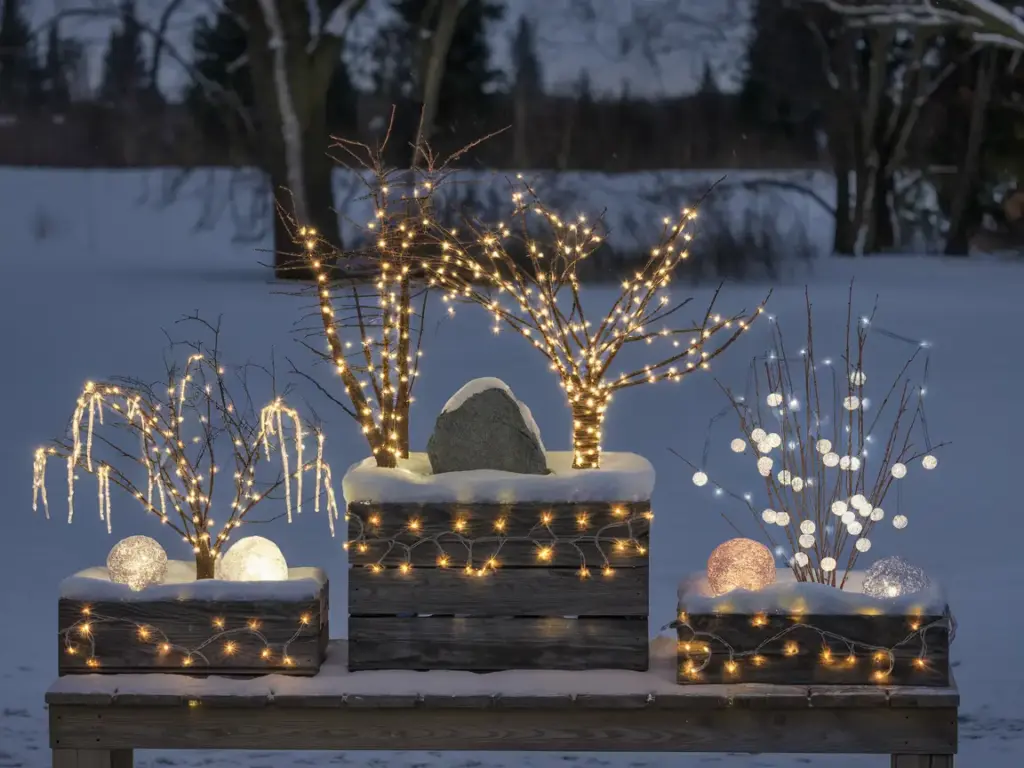
Secret #5: The “Layered Lighting” Technique

You wouldn’t believe how many times I’ve been asked about the “magical glow” in my winter planters! After that one December evening when I accidentally discovered the power of strategic lighting (thanks to a dropped flashlight in my planter), I’ve perfected what I call the three-dimensional lighting approach.
The Hidden Illumination Strategy
The key to professional-looking winter container lighting isn’t about how many lights you use – it’s all about where you hide them. Here’s my tried-and-true layering system:
- Ground Level:
- Upward-facing micro spotlights
- Wrapped branch bases
- Hidden rope lights
- Middle Layer:
- Woven fairy lights
- Illuminated branches
- Glowing orbs
- Top Layer:
- Dangling icicle lights
- Twinkling stems
- Star-effect spotlights
Battery-Powered Solutions That Actually Last
Let me save you from the mistake I made buying cheap dollar store lights! After testing dozens of options, here are the battery-operated lights worth investing in:
Best Options for Long-Term Use:
- Professional-grade fairy lights with D batteries
- Solar-battery hybrid spotlights
- Weather-resistant LED strings
- Timer-enabled branch lights
Pro tip: The initial investment might seem high, but quality lights last 3-4 seasons!
The Battery Life Extension System
Here’s my secret timing formula that makes batteries last all winter:
- Morning Glow (7-9am):
- 2 hours during breakfast time
- Perfect for dark winter mornings
- Uses 20% of daily power budget
- Evening Display (4-10pm):
- 6 hours of main display time
- Captures both dinner and bedtime viewing
- Uses 80% of daily power budget
- Programming Tips:
- Set timers for automatic operation
- Adjust times monthly with sunset changes
- Create special extended hours for holidays
Strategic Light Placement Guide
After years of experimenting, I’ve discovered these game-changing placement techniques:
Base Layer:
- Position uplights at 120-degree angles
- Hide power packs in decorative boxes
- Wrap main stems with warm white lights
Middle Section:
- Weave lights from inside out
- Create depth with multiple light sources
- Layer different bulb sizes
Top Section:
- Focus on highlight elements
- Use spotlights for dramatic effects
- Create a natural light cascade
Professional Timing Tricks
Here’s how I extend battery life by up to 300%:
- Smart Timing:
- Use 6-hour timer cycles
- Alternate different light sections
- Program weather-based adjustments
- Battery Management:
- Rotate batteries monthly
- Use lithium in extreme cold
- Keep backup sets charged
Weather-Proofing Your Lights
Don’t make the same mistake I did losing an entire light setup to freezing rain! Here’s my protection system:
- Waterproofing Essentials:
- Silicone seal all connections
- Use weather-resistant battery boxes
- Create drainage for battery compartments
- Temperature Protection:
- Insulate battery packs
- Use cold-rated products
- Monitor temperature forecasts
Want to know how to create stunning vertical interest that makes your planter look twice as tall? In Secret #6, I’ll reveal my “Vertical Victory Strategy” and share the forgotten space that most gardeners completely overlook. Plus, learn how to create dramatic height without spending a fortune on tall materials! Click next to elevate your winter planter game.


GIPHY App Key not set. Please check settings