Secret #10: The “Season Stretcher” Solution

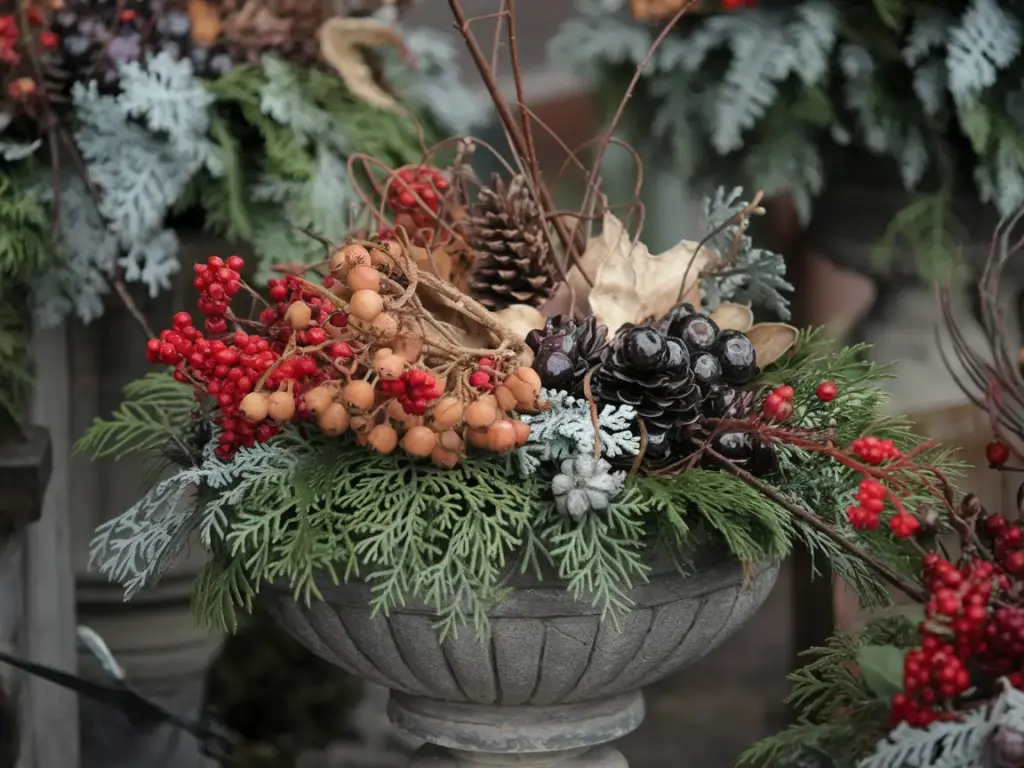
After years of dismantling winter planters too early (and missing out on those precious early spring weeks), I finally cracked the code on creating transition-ready winter containers. What started as an experiment with one hardy evergreen has evolved into a complete system for year-round interest!
The Four-Month Framework
Here’s my proven strategy for making your winter planter last from December through March:
- Foundation Elements (December-March):
- Sturdy evergreen base
- Weather-resistant containers
- Long-lasting structural pieces
- These form your lasting backbone!
- Transition Pieces (February-April):
- Early spring bulbs
- Frost-hardy perennials
- Cold-tolerant annuals
Professional Transition Elements
These are my go-to crossover materials that bridge the seasons:
Winter to Early Spring:
- Evergreen Basics:
- Boxwood branches
- Blue spruce tips
- Cedar boughs
- Early Bloomers:
- Hellebores
- Snowdrops
- Winter pansies
The Swap-Out Strategy
My foolproof method for seamless seasonal transitions:
- January Updates:
- Remove holiday-specific items
- Add winter berries
- Incorporate dried elements
- February Refresh:
- Plant spring bulbs
- Add fresh greenery
- Include flowering branches
- March Transitions:
- Introduce early bloomers
- Keep sturdy evergreens
- Add spring accents
Long-Lasting Display Secrets
Here’s how I maintain picture-perfect planters for months:
Weekly Maintenance:
- Inspection Routine:
- Check for damage
- Remove dead materials
- Adjust positions
- Preservation Steps:
- Water when not frozen
- Monitor soil moisture
- Protect from harsh winds
The Professional’s Timeline
My detailed schedule for maximum longevity:
- December Setup:
- Install main elements
- Add winter interest
- Plan for transitions
- January Maintenance:
- Remove holiday decor
- Refresh greenery
- Add winter elements
- February Preparation:
- Plant spring bulbs
- Add transition pieces
- Begin color introduction
- March Evolution:
- Incorporate spring elements
- Remove winter damage
- Add fresh growth
Budget-Friendly Transition Tips
Save money with these smart strategies:
- Reusable Elements:
- Invest in quality evergreens
- Choose versatile containers
- Select multi-season plants
- Smart Additions:
- Force bulbs strategically
- Use removable inserts
- Include flexible decor
Weather Adaptation Techniques
My system for handling weather changes:
- Temperature Fluctuations:
- Use frost protection
- Adjust watering schedule
- Monitor plant stress
- Season Shifts:
- Gradually remove winter elements
- Add spring components
- Maintain visual balance
Congratulations! You’ve now mastered all ten secrets of creating professional-quality winter planters. Remember, these techniques work together to create stunning displays that last longer and look better than you ever imagined possible. Keep experimenting and developing your own style – that’s how new secrets are discovered!
Conclusion
Now you’re armed with the same secrets professionals use to create their stunning winter planters! Remember, these aren’t just ordinary tips – they’re tried-and-tested techniques that transform ordinary containers into extraordinary displays. Ready to put these secrets into action? Your gorgeous winter planter awaits! Don’t forget to bookmark this guide for future seasons, and remember: sometimes the biggest impact comes from the smallest details.


GIPHY App Key not set. Please check settings