Troubleshooting Common Issues

Let me share some battle-tested solutions I’ve developed after facing pretty much every microgreen growing challenge imaginable. Trust me, I’ve made all the mistakes so you don’t have to!
Battling the Dreaded Mold
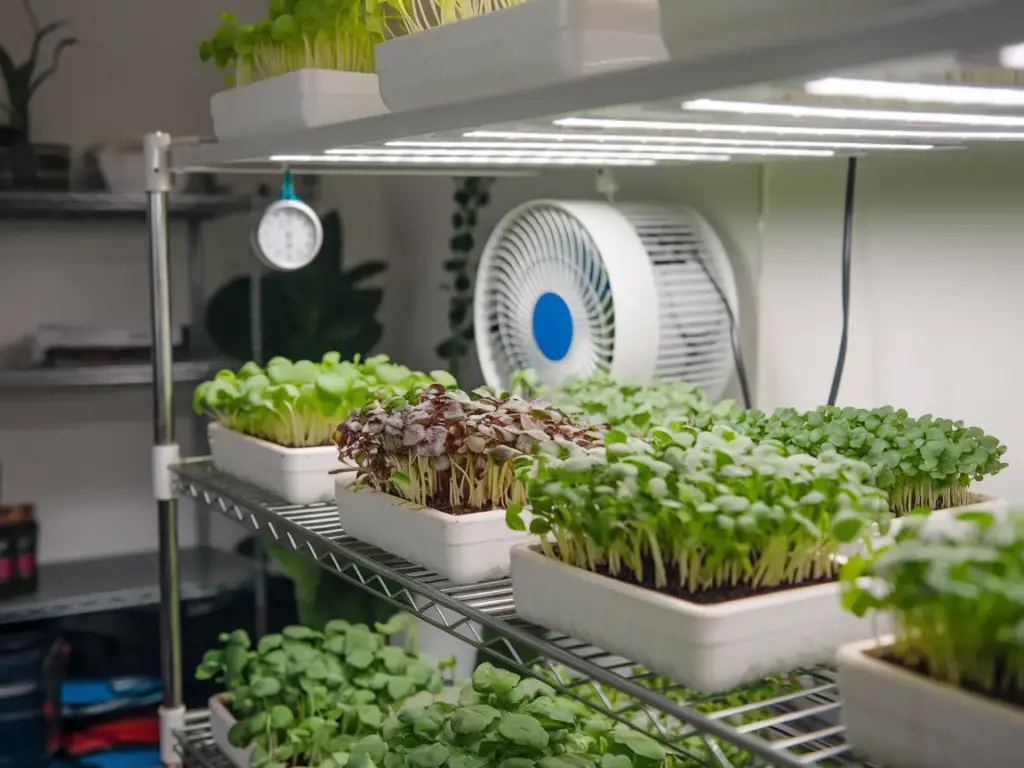
The first time I spotted white fuzzy mold on my microgreens, I nearly gave up! Now I know that prevention is key. The magic formula is air circulation + proper spacing + moisture control. I run a small oscillating fan 24/7 and maintain humidity between 45-60%.
Here’s my mold prevention routine:
- Use food-grade hydrogen peroxide (3%) in spray water (1 tablespoon per gallon)
- Keep air moving with proper ventilation
- Water from bottom when possible
- Never water late in the day
Identifying Nutrient Issues
Nutrient deficiencies show up in specific ways. Yellow leaves usually mean nitrogen deficiency, while purple stems often indicate phosphorus issues. I learned to spot these early warning signs by keeping a detailed growing journal.
The most common deficiencies I’ve encountered:
- Iron: Yellowing between leaf veins
- Calcium: Brown spots on leaves
- Nitrogen: Overall yellowing
- All of these can be prevented with a proper hydroponic nutrient solution
Light-Related Challenges
After burning an entire crop with too-close LED lights, I became an expert in light management. The sweet spot for most varieties is 16 hours of light at 4-6 inches above the canopy. Leggy, pale growth means your lights are too far away or too weak.
Common light issues I’ve solved:
- Stretching: Move lights closer
- Leaf burn: Increase height gradually
- Uneven growth: Rotate trays daily
- Yellow patches: Check for light shadows
Temperature Stress Management
When my growing room hit 85°F last summer, I watched my microgreens bolt practically overnight. Now I know that temperature control is non-negotiable. Most varieties thrive between 65-75°F (18-24°C).
Signs of temperature stress:
- Rapid bolting
- Wilting despite moisture
- Slow growth
- Tough, bitter leaves
Root Health Essentials
Healthy roots mean healthy greens! I check root development regularly by gently lifting the growing mat. Brown or slimy roots are a red flag that something’s wrong. Usually, it’s either overwatering or poor drainage.
My root care checklist:
- Use sterile water and equipment
- Maintain proper pH (5.8-6.2)
- Avoid overwatering
- Check drainage daily
Germination Troubleshooting
Poor germination used to drive me crazy until I developed this foolproof system:
- Maintain consistent seed moisture
- Keep temperature steady at 70°F (21°C)
- Use complete darkness during germination
- Check seeds twice daily
Common germination issues I’ve solved:
- Patchy sprouting: Usually uneven moisture
- No sprouting: Temperature too low/high
- Mold during sprouting: Too wet
- Slow sprouting: Old or poor quality seeds
Preventive Measures
Here’s my daily prevention routine that keeps most problems at bay:
- Morning inspection of all trays
- Check ventilation and air flow
- Monitor temperature and humidity
- Look for early warning signs
The biggest lesson I’ve learned? Small problems become big ones fast with microgreens. Taking preventive action at the first sign of trouble has saved countless crops for me.
Remember, even experienced growers face challenges. The key is learning from each issue and improving your system. Every problem you solve makes you a better grower!
Conclusion
Growing microgreens without soil isn’t just possible – it’s a fantastic way to produce fresh, nutritious greens year-round! Remember, successful hydroponic growing comes down to maintaining proper moisture levels, providing adequate light, and keeping your growing environment clean. Start with easy varieties like radish or pea shoots, and expand your garden as you gain confidence. Ready to start your soil-free microgreen journey? Grab your growing trays and let’s get growing! Don’t forget to join our community of hydroponic enthusiasts to share your progress and learn from others.


GIPHY App Key not set. Please check settings