Step-by-Step Growing Process

After countless batches of microgreens (and yes, quite a few failures), I’ve developed a foolproof process that consistently produces amazing results. Let me walk you through exactly what I do, including some hard-learned lessons along the way!
Preparation and Sanitization
First things first – cleanliness is absolutely crucial for success. I learned this the hard way after losing several trays to mold. I mix a food-grade hydrogen peroxide solution (1 tablespoon per gallon of water) and thoroughly clean all my equipment. Don’t skip this step, even if you’re in a hurry!
For my growing medium, I pre-soak my hydroponic mats in pH-balanced water (aim for 5.8-6.2 pH). A common mistake I used to make was using tap water straight from the faucet. Now I always let it sit for 24 hours to dechlorinate. Your microgreens will thank you for this extra step.
Seeding Techniques
Here’s where precision matters more than you might think. For small seeds like amaranth or basil, I aim for about 1 tablespoon per 10×20 tray. Larger seeds like pea shoots need more space – about 2-3 ounces per tray. The key is creating an even distribution without overcrowding.
I use a seed shaker I made from an old spice jar – total game-changer! After spreading the seeds, I mist them lightly and cover with a blackout dome. Don’t press the seeds into the medium like I used to – they’ll find their way down naturally.
Water and Light Management
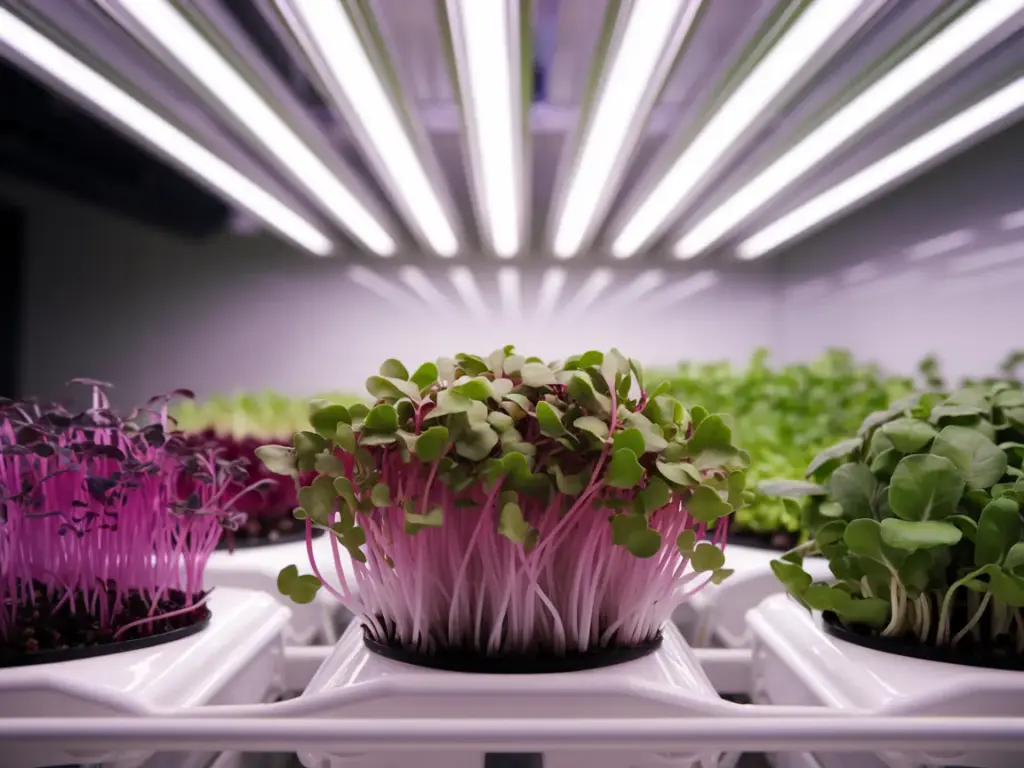
This is where the magic happens! For the first 3-4 days during germination, I maintain complete darkness and mist twice daily with my spray bottle. The secret is keeping the environment consistently moist but not waterlogged. Once I see sprouting, I remove the dome and introduce light.
My LED grow lights are positioned exactly 6 inches above the greens. I learned through trial and error that too close causes burning, too far leads to leggy growth. I run my lights on a 16/8 schedule using a simple timer – no need for fancy equipment here!
Environmental Control
Temperature and humidity are crucial factors I monitor daily. I keep my growing area between 65-75°F (18-24°C) with humidity around 50-60%. A small fan providing gentle air circulation has virtually eliminated my previous mold problems.
Here’s a pro tip: I place a humidity dome over newly uncovered sprouts for the first day of light exposure. This helps them transition gradually and prevents shock. Just remember to remove it after 24 hours to prevent dampness issues.
Daily Maintenance Schedule
My daily routine looks like this:
- Morning: Check moisture levels, mist if needed
- Afternoon: Quick inspection for any signs of problems
- Evening: Final misting and environmental check
The most important thing I’ve learned is consistency. These little plants thrive on routine, and even small disruptions can affect their growth. I keep a growing journal to track everything – it’s been invaluable for improving my results over time.
Ready to dive deeper into different hydroponic methods and find out which one might work best for your setup? Click the next button below to explore various growing systems – from simple starter setups to advanced commercial techniques. I’ll share my honest experiences with each method and help you choose the perfect system for your needs!


GIPHY App Key not set. Please check settings