Harvest Secrets for Maximum Yield

Let me tell you something that took me years to figure out about harvesting beets from containers. When I first started, I used to just yank them out whenever they “looked ready” – boy, was that a mistake! After countless harvests and, honestly, quite a few failures, I’ve learned there’s actually a science to this whole process.
Perfect Timing Indicators
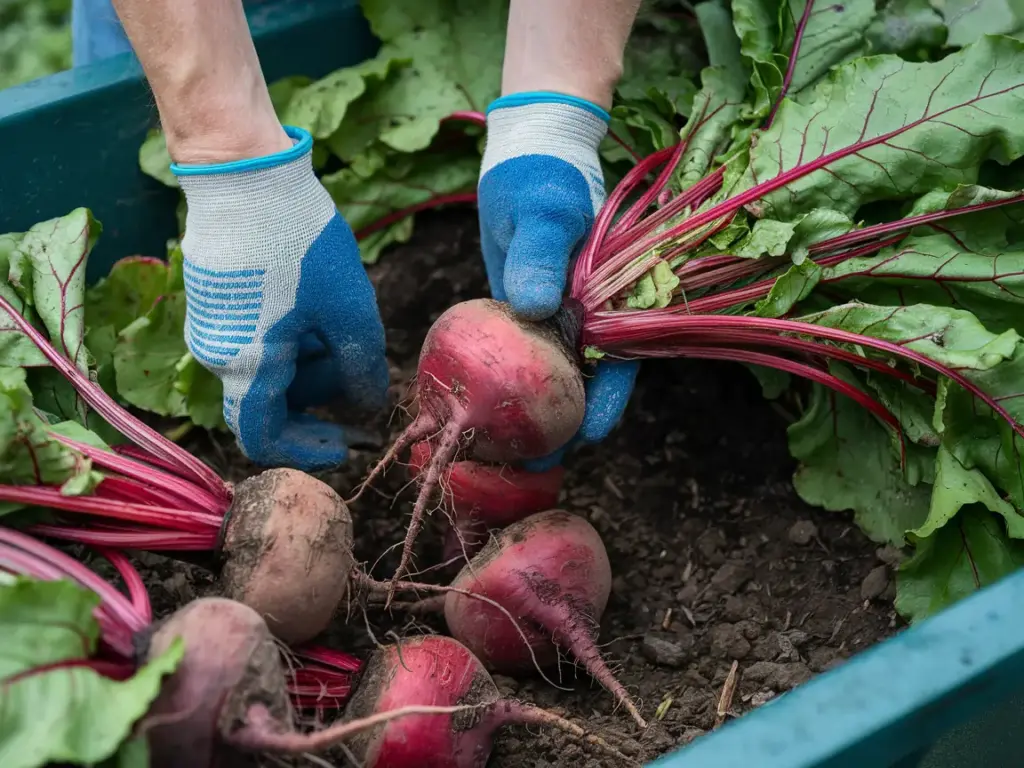
The biggest game-changer in my container beet growing journey was learning the perfect timing indicators. Here’s the thing – you don’t actually need to dig up your beets to check if they’re ready! The most reliable indicator is the beet’s shoulder (that’s the top part that pokes above the soil). When it reaches about 1.5 to 2 inches in diameter, you’ve hit the sweet spot.
I learned this trick from an old-timer at my local garden center: gently brush away the soil around the shoulder and measure it with your fingers. If it feels about the width of two fingers, you’re good to go. Most beets will be ready around 50-65 days after planting, but I always say let the shoulder be your guide, not the calendar.
The Two-Step Harvest Method
Listen, I used to be that person who’d just grab the greens and pull – and ended up with either broken stems or damaged roots. Now I use what I call the “twist and lift” method:
- First, loosen the soil around your beet with a small trowel or your fingers, working in a circle about 2 inches away from the plant
- Then, gently grasp the base of the stems (not the leaves!) and use a slight twisting motion while pulling upward
This method has seriously reduced my damaged beet count from about 30% to practically zero!
Preserving Those Precious Greens
Here’s something most people don’t realize – beet greens are actually more nutritious than the roots! After years of composting these gems (I still cringe thinking about it), I’ve perfected their preservation.
The secret is in the immediate processing. Within 30 minutes of harvest, I separate the greens from the roots, leaving about 1 inch of stems on the root. Then I plunge the greens into ice water for 5 minutes – this keeps them crisp and prevents wilting.
Long-Term Storage Success
The biggest mistake I see folks make with beet storage is washing them before storing. Trust me on this one – dirt is your friend! I learned this the hard way after losing an entire harvest to rot. Now I:
- Brush off excess soil (don’t wash!)
- Trim the tops to 1 inch
- Store in a perforated plastic bag with slightly damp sand
- Keep in the crisper drawer at 32-40°F
This method keeps my beets fresh for up to 3 months, sometimes even longer!
Post-Harvest Container Care
Don’t just dump your container and call it a day! The secret to continuous successful harvests is proper post-harvest care. I add a mixture of compost and aged manure to rejuvenate the soil, then let it rest for two weeks before planting again. This “resting period” has made a huge difference in my next crop’s yield.
Remember, these aren’t just vegetables we’re growing – they’re little purple jewels that deserve our patience and attention! I’ve seen my yields increase by about 40% since implementing these methods, and the quality? Well, let’s just say my neighbor stopped buying store-bought beets altogether after trying mine!
Pro tip: Keep a harvest journal! Note down the dates, sizes, and any issues you encounter. This has been absolutely invaluable for improving my timing year after year.
Conclusion
Now you’re in on the professional secrets that most experts keep to themselves! These game-changing techniques will transform your container beet growing success rate. Remember, the key is combining these hidden methods with consistent care. Ready to grow the most impressive container beets in your neighborhood? Put these expert secrets into action today, and watch as your beet garden thrives like never before! Don’t forget to bookmark this guide – you won’t find these professional tips anywhere else!


GIPHY App Key not set. Please check settings