
3. The Pruning Power Secret for Maximum Harvest
I’ll be honest – I was terrified to prune my rosemary for the longest time. The first plant I ever cut back looked so bare and sad that I thought I’d killed it.
But then something magical happened. Within three weeks, that “ruined” plant exploded with new growth that was bushier and more fragrant than ever before.
The One-Third Rule That Changed Everything
Here’s the secret that doubled my rosemary harvest: never cut more than one-third of the plant at any single pruning session. This rule literally saved my gardening sanity.
I used to hack away at my plants like I was giving them a buzz cut. Bad idea.
The one-third rule works because it leaves enough foliage for the plant to photosynthesize and recover quickly. Cut more than that, and you stress the plant into survival mode instead of growth mode.
When I Prune for Cooking vs Pretty Gardens
This took me forever to figure out, but cooking harvests and ornamental pruning are totally different games.
For cooking, I do light harvests throughout the growing season. Just pinch off what I need for dinner – maybe 2-3 sprigs at a time.
For shaping and major harvests, I wait until specific times of year. Timing is absolutely everything here.
My Seasonal Pruning Calendar (Hard-Won Wisdom)
Early Spring (March-April):
- Major shaping cuts
- Remove any winter damage
- This is when I do my biggest pruning session
Late Spring (May):
- Light pinching to encourage bushiness
- Remove flower buds if you want leaf production
Summer (June-August):
- Continuous light harvesting for cooking
- Pinch growing tips weekly
Fall (September):
- Final shaping before winter
- Harvest heavily for drying
Winter:
- Hands off! Let the plant rest
I learned this schedule the hard way after pruning in late fall one year and losing two plants to frost damage.
The Pinching Technique That Creates Bush Monsters
Okay, this is where the magic really happens. Pinching is different from cutting, and it makes rosemary plants go absolutely crazy with new growth.
Here’s my exact method: using just my fingernails, I pinch off the very tip of each growing stem – maybe 1/4 inch of new growth.
This forces the plant to branch out instead of growing tall and leggy. One stem becomes two, two becomes four, and so on.
I do this pinching thing every week during growing season. Takes maybe 2 minutes per plant, but the results are incredible.
The Flower Dilemma (And My Solution)
Rosemary flowers are gorgeous, but here’s the thing – flowering reduces leaf production. The plant puts all its energy into making those pretty blue blooms instead of the aromatic leaves we want.


My compromise: I let about 25% of the stems flower for the bees, and pinch the buds off the rest. Best of both worlds.
If you’re growing rosemary purely for cooking, pinch those flower buds as soon as you see them forming.
Shaping for Garden Design (My Favorite Part)
This is where rosemary gets really fun. You can shape these plants into almost anything – hedges, topiaries, even bonsai-style specimens.
For hedge-style rosemary, I prune the sides more aggressively than the top. Creates that neat, formal look that works great for Mediterranean garden design.
For specimen plants, I let the natural shape develop but just clean up any crossing branches or dead wood.
The key is starting young – it’s way easier to shape a small plant than trying to fix a big, overgrown one.
My Biggest Pruning Disasters (Learn From My Pain)
Mistake #1: I once pruned my rosemary in November. The new growth didn’t have time to harden off before winter, and frost killed half the plant.
Mistake #2: Used dirty pruning shears and spread some kind of fungal infection between plants. Now I always clean my tools with rubbing alcohol.
Mistake #3: Cut into old, woody stems thinking they’d regrow. Nope. Rosemary doesn’t regenerate from old wood like some plants do.
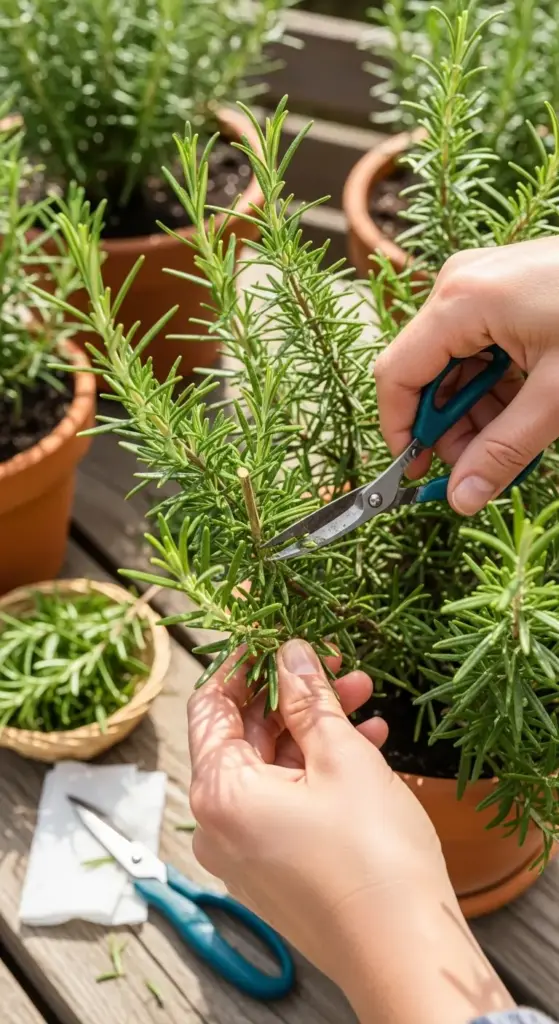
The Tools That Actually Matter
Forget fancy pruning shears for most rosemary work. My fingernails do 80% of the job through pinching.
For bigger cuts, I use small, sharp scissors – the kind you’d use for crafts. They’re more precise than big pruning shears.
Clean tools are crucial. I learned this after accidentally spreading disease between plants. A quick wipe with alcohol prevents so many problems.
Reading Your Plant’s Response
After pruning, watch for new growth within 7-10 days. If you see tiny green shoots emerging, you did it right.
If the cut areas turn brown or black, you either cut too much or hit the plant during a stressful time (like extreme heat or drought).
Healthy rosemary bounces back fast from proper pruning. The new growth is usually more aromatic and tender than the older leaves.
The Harvest Timing Sweet Spot
For maximum essential oil content, harvest in the morning after the dew dries but before the heat of the day. The oils are most concentrated then.
I usually do my big harvests around 9-10 AM on sunny days. The difference in fragrance is noticeable compared to afternoon harvests.
Ready to discover which plants can make your rosemary grow faster and taste better just by being nearby? Click “next” to uncover The Companion Planting Magic Formula – these plant partnerships will blow your mind and create the most beautiful, productive herb garden you’ve ever seen!


GIPHY App Key not set. Please check settings