Preparing Your Zucchini Scraps

Let me tell you about my first attempt at saving zucchini seeds – it was quite the learning experience! After watching countless gardening videos, I thought I could just scoop out any old zucchini seeds and start growing. Boy, was I wrong. Through years of trial and error (and some epic failures), I’ve figured out exactly what works when it comes to preparing zucchini scraps for successful propagation.
Choosing the Perfect Zucchini
Here’s something most gardening blogs won’t tell you: maturity matters. You’ll want to select a zucchini that’s way past its prime for eating – I’m talking about those giant ones that got away from you in the garden. When I first started, I made the mistake of using seeds from young zucchini, and guess what? Most of them weren’t even mature enough to germinate!
The perfect zucchini for seed saving should be:
- At least 8-10 inches long
- Have a tough, yellowish rind
- Feel heavy and dense when you pick it up
- Show signs of the stem starting to dry out
Extracting Seeds Like a Pro
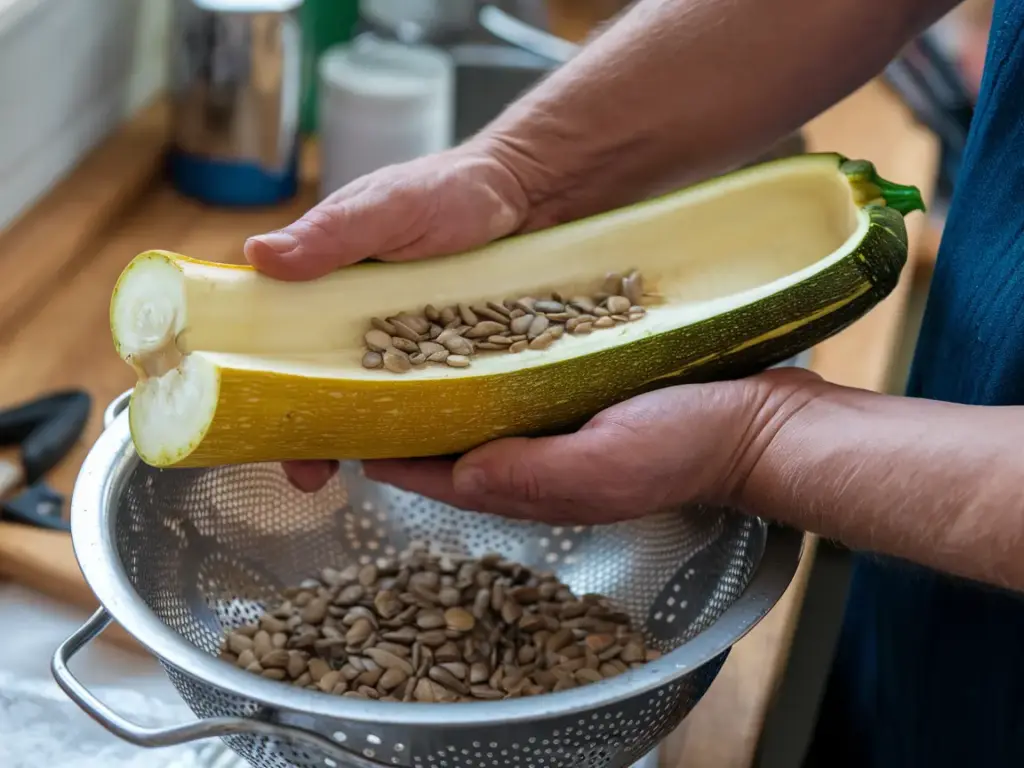
Remember my first seed extraction attempt? I ended up with a slimy mess all over my kitchen counter! Now I know better. Start by cutting the zucchini lengthwise – it’s like splitting open a treasure chest. The best seeds are usually found in the center cavity of the fruit.
Pro tip: Don’t just grab any seeds you see. The viable seeds will be:
- Plump and cream-colored
- Slightly bigger than store-bought seeds
- Feel firm when you press them gently
The Cleaning Process
This is where things get a bit messy, but trust me, it’s worth it! Place your seeds in a colander and rinse them thoroughly under cool water. I learned the hard way that skipping the cleaning process can lead to moldy seeds – definitely not what you want!
Here’s my tried-and-true cleaning method:
- Remove any pulp attached to the seeds
- Gently rub the seeds between your fingers under running water
- Place clean seeds on a paper towel to dry
Storage Secrets
After cleaning about a hundred batches of seeds over the years, I’ve developed a foolproof storage system. The key is making sure your seeds are completely dry before storing them. I once stored slightly damp seeds, and let’s just say that experiment ended with some very disappointed spring planting!
For optimal storage:
- Let seeds dry for 48-72 hours in a well-ventilated area
- Store in a paper envelope (not plastic – they need to breathe!)
- Label with the date and variety
- Keep in a cool, dark place around 50-55°F
I can’t tell you how many times I’ve reached for unlabeled seed envelopes and played “guess the variety” come spring. Learn from my mistakes – proper labeling is your friend!
Want to know what happens next? Click the “next” button below to discover how to create the perfect growing environment for your saved seeds. I’ll show you my secret soil mixture that’s helped me achieve an impressive 90% germination rate – something I wish I’d known when I first started this journey!


GIPHY App Key not set. Please check settings