Level Up: Soil Transfer Success Secrets

Let me tell you about my first attempt at transferring celery to soil – it was a complete disaster! I was so excited about seeing those tiny leaves sprouting in water that I rushed the process and ended up with wilted plants. But after years of trial and error (and quite a few failed attempts), I’ve finally mastered the art of soil transfer. Trust me, timing is absolutely everything when it comes to this crucial step.
The Perfect Moment for Soil Transfer
You know what’s funny? I used to think I could just plop my celery into soil whenever I felt like it. Big mistake! The perfect transplanting time is when your celery stems have grown about 3 inches tall and you can see a good network of white roots. This usually happens around day 7-10 of water propagation.
I’ve learned to look for these specific signs:
- At least 3-4 fresh leaves in the center
- White roots about 1-2 inches long
- Strong, upright growth in the middle
- A healthy green color (no yellowing)
My Secret Soil Mix Recipe
After experimenting with countless combinations, I’ve found the perfect budget-friendly soil mix that won’t break the bank. Here’s what I use:
- 60% regular potting soil
- 20% coconut coir (helps retain moisture)
- 20% perlite (for drainage)
- A handful of compost
Pro tip: You can save money by buying these components in bulk during end-of-season sales. I typically spend less than $15 for enough mix to last an entire growing season!
Foolproof Transplanting Method
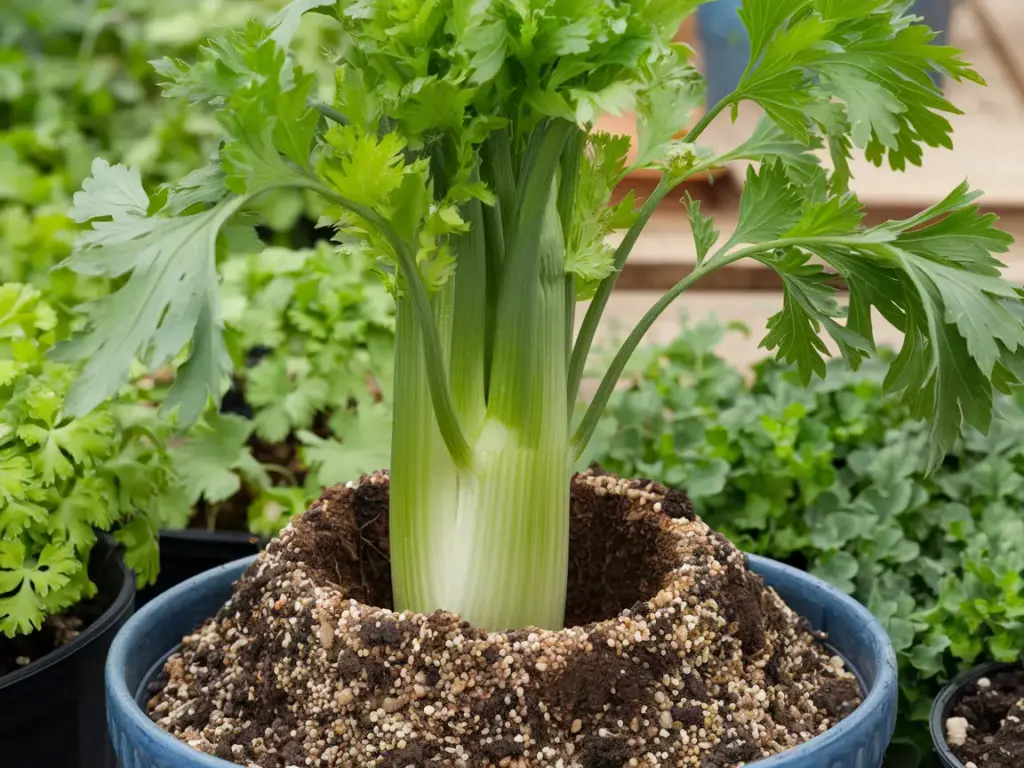
Here’s where most people mess up (like I did countless times). The key to successful transplanting is being gentle – treat those roots like they’re made of glass! First, prepare your pot with about 3 inches of soil mix. Make a small well in the center, about the size of your thumb.
The game-changing technique I discovered is to create a small soil mound in the center of the well. This supports the base of the celery while allowing the roots to spread naturally downward. Position your celery so the crown (where the stems meet) sits just above soil level.
Growth Acceleration Secrets
Want to know my favorite growth-boosting trick? Every two weeks, I add a splash of compost tea to the soil. It’s like giving your celery plants a power smoothie! But here’s something most people don’t tell you – temperature consistency is crucial. Keep your newly transplanted celery in a spot where temperatures stay between 60-70°F (15-21°C).
Indoor vs. Outdoor Money-Saving Tips
After growing celery both indoors and outdoors, I can tell you that both have their perks. Indoor growing is perfect for year-round harvests and controlled conditions. I save money by using LED grow lights on a timer instead of running them constantly. For outdoor growing, I’ve found that companion planting with beans or peas helps share nutrients naturally, reducing the need for fertilizers.
The biggest money-saving secret? Create a self-watering system using recycled plastic bottles. Just punch tiny holes in the cap, fill with water, and insert upside down next to your celery. It’s saved me countless hours and ensures consistent moisture.
Want to know what happens once your celery starts thriving? Click the “next” button below to discover my tried-and-true harvesting techniques that’ll keep your celery producing for months! I’ll show you exactly when to harvest for the most tender stalks and how to keep your plant producing new growth continuously. Trust me, you won’t want to miss these game-changing harvesting secrets!


GIPHY App Key not set. Please check settings