2. Decode the Perfect Potting Mix Recipe That Pros Swear By
I’ll never forget the day I killed my first Anthurium Clarinervium with what I thought was “premium” potting soil. I had spent$40 on this fancy bag that promised to be perfect for tropical plants, only to watch my beautiful plant slowly decline over three months.
The problem wasn’t the plant – it was my complete misunderstanding of what these rainforest beauties actually need. That expensive soil was basically plant quicksand, holding way too much moisture and suffocating the roots.
The Game-Changing 3-Ingredient Secret Formula
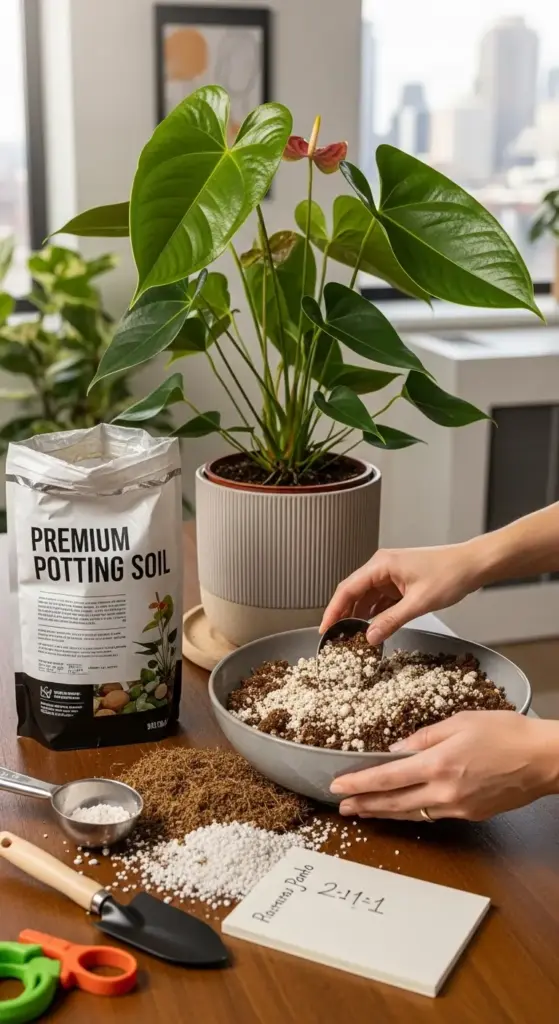
After that heartbreaking loss, I went down a rabbit hole of research and discovered what professional growers have known for years. The magic formula is surprisingly simple: orchid bark, perlite, and peat moss in a 2:1:1 ratio.
This combination mimics the loose, airy conditions these plants experience in their natural rainforest habitat. The orchid bark provides structure and drainage, perlite adds extra aeration, and peat moss holds just enough moisture without getting soggy.
I was skeptical at first – it looked nothing like traditional potting soil! But my Anthurium absolutely thrived in this chunky, almost soil-less mixture.
Sourcing Premium Ingredients in Major Cities
Living in a big city actually gives you a huge advantage when hunting for these potting mix ingredients. In NYC, I’ve had great luck at Chelsea Garden Center and Greenpoint’s Garden Center Brooklyn – they stock high-quality orchid bark year-round.
For my LA friends, Armstrong Garden Centers and Green Thumb Nursery carry everything you need. The key is asking specifically for “chunky orchid bark” – not the fine stuff that breaks down too quickly.
Perlite is easier to find at big box stores, but I’ve learned to avoid the super fine grades. Look for coarse perlite that’s about the size of small peas – it provides better drainage and doesn’t compact over time.
Home Depot and Lowe’s usually carry decent perlite, but the real treasure is finding a local hydroponics store. They often have bulk options that save you serious money.
DIY vs. Store-Bought: The Real Cost Breakdown
Here’s where things get interesting from a budget perspective. A bag of “premium” tropical plant mix costs around$25-30 and might last for 2-3 plants.
Making your own costs about$45 upfront but gives you enough mix for 15-20 plants! I did the math after my third Anthurium purchase, and the savings are incredible.


The quality difference is even more dramatic. Store-bought mixes often contain too much regular potting soil, which holds moisture longer than these epiphytic plants can handle.
DIY mixing also lets you adjust the recipe based on your specific conditions. If your apartment runs dry, add a bit more peat moss. Too humid? Bump up the perlite ratio.
Seasonal Mix Adjustments for Year-Round Success
This was a total revelation for me – your potting mix needs change with the seasons! During winter when heating systems dry out the air, I add about 10% more peat moss to help retain moisture.
Summer adjustments go the opposite direction. When humidity naturally increases, I lean heavier on the orchid bark and perlite to prevent root rot issues.
I learned this lesson the hard way when my perfectly happy plant suddenly started declining in July. The same mix that worked beautifully in February was holding too much moisture during the humid summer months.
Deadly Potting Mistakes That Kill Anthuriums
The biggest killer I see people make is using regular houseplant potting soil. It’s like trying to grow a fish in a swimming pool – technically water, but completely wrong for what they need.
Another fatal mistake is not checking the bark quality. Cheap orchid bark often contains a lot of dust and fine particles that defeat the whole purpose of creating good drainage.
I’ve also seen people go overboard with moisture retention, adding things like vermiculite or extra peat moss. Anthurium Clarinervium roots need to breathe – they’re used to growing on trees in nature, not sitting in dense soil.
The most heartbreaking mistake is not refreshing the mix annually. Even the best potting medium breaks down over time, and what starts as perfect drainage can become a soggy mess after 12-18 months.
Think you’ve got the soil figured out? Wait until you see how the pros handle lighting – click “next” to discover the light placement secrets that make Anthurium leaves absolutely glow with health!


GIPHY App Key not set. Please check settings