Step #7: Harvest and Arrange Like a Pro
There’s something incredibly satisfying about cutting flowers from your own garden and turning them into stunning arrangements. It’s like being your own florist, minus the hefty price tag. But here’s the thing—there’s an art to harvesting and arranging that can make all the difference. I’ve learned this the hard way, like the time I cut my sunflowers too late in the day, and they wilted within hours. Oops. Let’s dive into how you can do it right and create arrangements that wow.
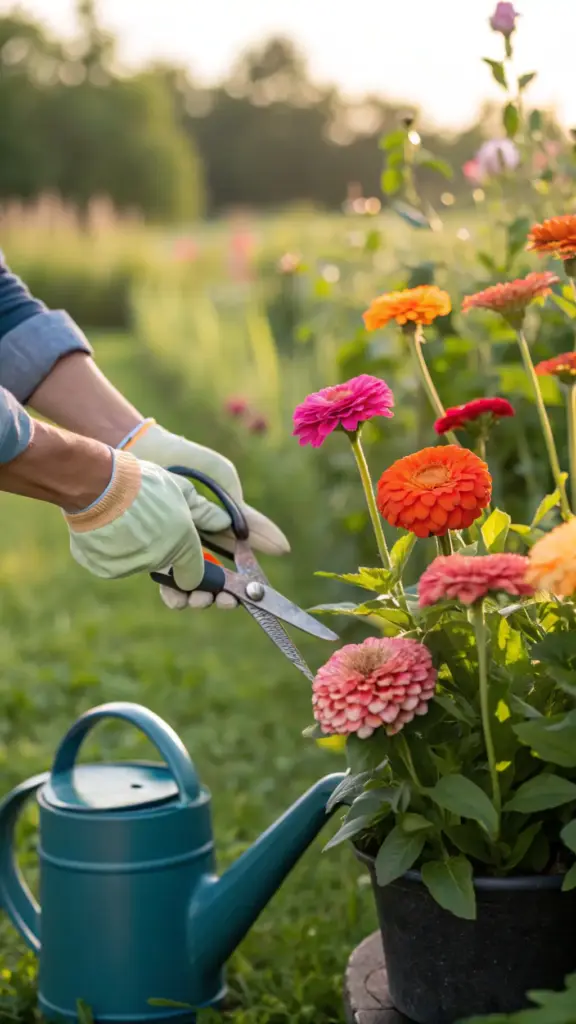
Cutting Techniques to Encourage Regrowth
First things first: if you want your garden to keep producing blooms, you need to harvest them the right way. The golden rule? Cut early in the morning when the flowers are hydrated and fresh. Trust me, this makes a huge difference.
When you’re cutting, aim for a clean snip at a 45-degree angle using sharp scissors or pruners. This helps the stems absorb water better and encourages regrowth. For plants like zinnias and dahlias, always leave a few leaves on the stem so the plant can continue photosynthesizing. I once ignored this step, and my poor zinnias looked sad for weeks. Lesson learned!
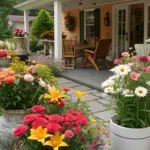
DIY Arrangement Ideas Using Unique Containers
Now for the fun part: arranging your blooms! You don’t need fancy tools or expensive vases to create something beautiful. In fact, some of my favorite arrangements have been in mason jars, vintage pitchers, or even repurposed tin cans.
For a rustic look, try pairing wildflowers like daisies and cosmos with sprigs of eucalyptus in a mason jar. If you’re going for elegance, tall lilies or snapdragons in a clear glass vase can feel super chic. And don’t forget about unique containers—like teapots or wooden boxes—that add personality to your arrangement. One of my go-to tricks is to group smaller arrangements together for a tablescape that feels intentional yet effortless.
Your Own Blooms for Special Occasions
Here’s where things get exciting: using your garden-grown flowers for events and weddings. Imagine walking into a room filled with bouquets you created yourself—it’s personal, meaningful, and totally Instagram-worthy.


I once helped a friend decorate her wedding with dahlias, eucalyptus, and fairy lights, and it was magical. We used mismatched vases for the centerpieces, which gave the whole vibe a cozy, bohemian feel. Whether it’s a birthday party, baby shower, or holiday dinner, your blooms can tie into any theme. Just think about the color palette and mood you’re aiming for, and let your creativity flow.
Pair Arrangements with Candles or Fairy Lights
If you really want to amp up the ambiance, pair your arrangements with candles or fairy lights. There’s something about the soft glow of candlelight next to a floral centerpiece that feels straight out of a Pinterest board.
For outdoor gatherings, string fairy lights above your dining area and place small bud vases with single stems along the table. It’s simple but oh-so-effective. I did this for a summer dinner party once, and my guests couldn’t stop raving about how cozy and inviting it felt.
Conclusion
Creating a gorgeous cut flower garden isn’t just about growing flowers—it’s about crafting a space that reflects your personality and inspires joy. From choosing the perfect color palette to harvesting blooms for stunning arrangements, these 7 steps will help you transform any outdoor area into a floral oasis. Ready to start your journey? Grab your gardening gloves, pick your favorite plants, and let nature do the rest. Don’t forget to share your progress with us—we’d love to see what you create! 🌼


GIPHY App Key not set. Please check settings