9. Swiss Chard: Colorful Shade Garden Addition

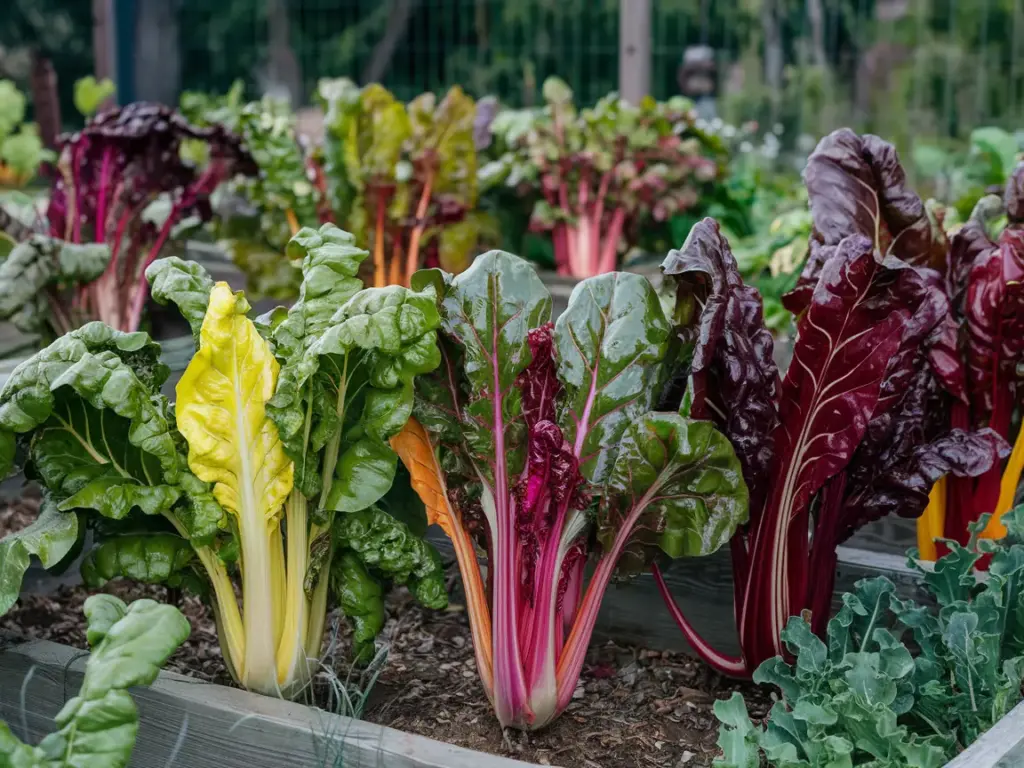
Let me tell you about my love affair with Swiss chard – it’s been a game-changer in my shaded garden! I remember the first time I discovered rainbow chard at a farmer’s market. Those stems were literally glowing like jewels, and I couldn’t believe these beauties could actually thrive in partial shade.
Rainbow Varieties That’ll Make Your Garden Pop
My absolute favorite is the ‘Bright Lights’ Swiss chard variety. The stems come in the most incredible colors – yellow, pink, orange, and deep ruby red. Last season, I planted a mix of varieties, and let me tell you, even my picky neighbor couldn’t stop commenting on how gorgeous they looked along my fence line!
For beginners, I highly recommend starting with the classic ‘Fordhook Giant’. It’s super reliable and produces these massive, dark green leaves that are perfect for cooking. The white stems are less flashy but just as tasty.
Growing from Seed (It’s Easier Than You Think!)
Here’s something most gardening books won’t tell you – Swiss chard seeds can be a bit tricky to handle! I learned this the hard way when I dumped way too many seeds in one spot. Now I use this neat trick: mix the seeds with some fine sand before sowing. This helps spread them more evenly.
The key steps I follow:
- Plant seeds 1/2 inch deep
- Space them about 4-6 inches apart
- Keep soil consistently moist until germination
- Thin seedlings when they’re about 3 inches tall
Maintenance Tips from Years of Trial and Error
Water management is crucial with Swiss chard. I’ve found that consistent moisture is the secret to preventing bitter leaves. A good layer of mulch (about 2 inches) helps tremendously. Trust me on this one – I learned after losing half my crop to drought stress one summer!
One thing that surprised me was how frost-tolerant these plants are. While other greens were giving up the ghost, my Swiss chard kept producing well into late fall. Just remember to protect them if temperatures dip below 15°F (-9°C).
My Continuous Harvesting Method
Here’s my tried-and-true harvesting technique that keeps the plants producing for months:
- Start with outer leaves first
- Cut about 2 inches above the base
- Never take more than 1/3 of the plant at once
- Leave the center crown intact for continued growth
The coolest part? Using this method, I’ve kept single plants producing for up to 8 months! That’s a lot of fresh greens from one planting.
Ready to learn about another shade-loving superstar? Our next section covers arugula, and let me tell you, this spicy little green has some tricks up its sleeve that’ll revolutionize your shade garden. Click ‘next’ below to discover why I call arugula my “shade garden secret weapon” and learn my special growing technique that doubles its typical yield!


GIPHY App Key not set. Please check settings