Tip 4: Master the Seed Starting Process

Let me tell you about my first attempt at starting tomato seeds – it was a complete disaster! I had scattered seeds randomly in containers, barely covered them with soil, and wondered why nothing sprouted properly. After years of trial and error (and lots of failed seedlings), I’ve finally nailed down a foolproof process that works every time.
The Perfect Seed Starting Setup
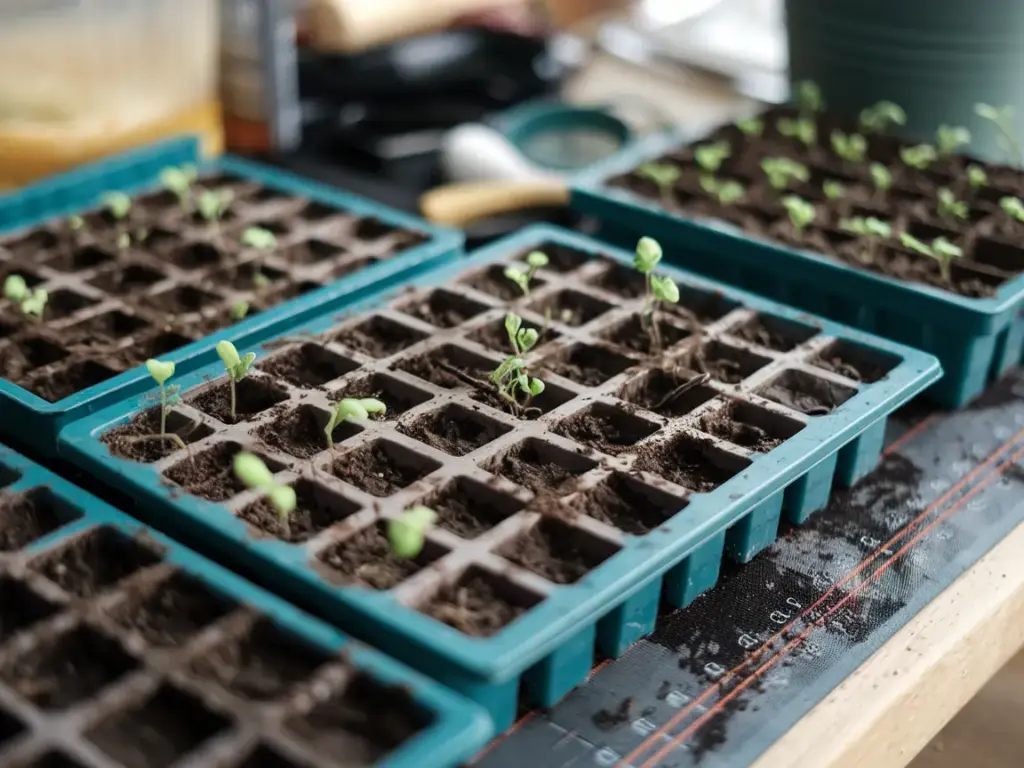
Before you even think about planting, gather your supplies. You’ll need a quality seed starting mix (trust me, regular garden soil won’t cut it), clean containers with drainage holes, and your tomato seeds. The biggest game-changer in my seed-starting journey was switching to a professional-grade seed starting mix – it made such a difference in germination rates!
I like to pre-moisten my soil mix before filling containers. Here’s a pro tip: mix the soil with warm water until it feels like a wrung-out sponge. Too many folks use dry mix and then try to water it after planting – that’s just asking for seeds to float around and end up at uneven depths!
Planting Depth and Spacing Secrets
Here’s something I learned the hard way: tomato seeds need to be planted at just the right depth. I now use the “two knuckle” rule – make an indentation about 1/4 inch deep, which is roughly the depth of your first two knuckles when you press your finger into the soil. Any deeper, and those little seeds might not have enough energy to reach the surface.
For spacing, I plant 2-3 seeds per cell or container. Why multiple seeds? Because even with fresh seeds, you won’t get 100% germination. It’s better to thin out extra seedlings than to have empty cells. Speaking of thinning – don’t skip this step! I used to feel guilty about removing excess seedlings, but crowded seedlings lead to leggy, weak plants.
Watering Without Drowning
The watering technique you use can make or break your seed starting success. I learned this lesson when I drowned an entire tray of seedlings by watering from above. Now, I use bottom watering exclusively. Place your containers in a tray with about an inch of water, and let them soak up what they need. The soil will wick up exactly the right amount of moisture, and you’ll avoid the dreaded damping-off disease that kills so many seedlings.
My Fool-Proof Labeling System
Can I tell you about my biggest seed-starting embarrassment? I once grew an entire flat of what I thought were Roma tomatoes, only to discover they were cherry tomatoes at harvest time! Now, I have a bulletproof labeling system. I use permanent markers on plastic labels, recording:
- Variety name
- Planting date
- Expected germination date
- Number of seeds planted
I also take photos of my seed packets and save them on my phone as backup – you’d be surprised how often those physical labels fade or disappear!
Want to know what happens after your seeds sprout? Click the next button below to discover how to create the perfect growing environment for your tomato seedlings. I’ll share my secret technique for preventing leggy seedlings and the exact light setup that transformed my seed starting success rate from 60% to nearly 95%! Trust me, you won’t want to miss these game-changing tips in the next section about creating optimal growing conditions.


GIPHY App Key not set. Please check settings