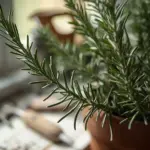
3. The Monastery Knot Garden: Intricate Rosemary Patterns

I thought I was pretty good at garden design until I tried to recreate a monastery knot garden I’d seen in a magazine. Holy cow, was I in for a humbling experience.
My first attempt looked like a toddler had drawn squiggly lines with plants. But after three years of trial and error, I finally cracked the code to creating these stunning geometric herb patterns.
Understanding Traditional Knot Garden Geometry
The monks weren’t just randomly planting herbs – there’s actual sacred geometry behind these designs that goes back centuries.
Most traditional knot gardens use four-fold symmetry, meaning the pattern repeats itself four times around a central point. It’s like looking at a snowflake, but made of rosemary.
The basic shapes are circles, squares, and diamonds that interweave to create the “knot” effect. Think of it like braiding, but with plants instead of hair.
I started with the simplest pattern – two interlocking circles. Even that took me six months to get right because I didn’t understand the underlying mathematics.
The symbolism is pretty cool too. The endless loops represent eternity, while the four sections often symbolized the four seasons or elements.
Step-by-Step Planning Your Rosemary Knot Design
Here’s where I made my biggest mistake initially – I just started planting without proper planning. What a disaster.
Step 1: Choose your space and measure it precisely. My first knot garden is 12×12 feet, which is perfect for beginners.
Step 2: Draw your design on graph paper first. I use 1 square = 1 foot, and I probably went through 20 sheets of paper perfecting my pattern.
Step 3: Transfer the design to your garden using spray paint or flour. I prefer flour because it’s temporary and won’t harm the soil if I mess up.
Pro tip that saved my sanity – take photos of each step. When you’re staring at a half-planted mess, those reference photos are lifesavers.
Step 4: Mark your planting points with small flags. Space them 8-12 inches apart depending on your rosemary variety’s mature size.
Choosing Contrasting Varieties for Definition
This is where the magic happens – contrasting rosemary cultivars create the visual separation that makes the knot pattern pop.
For my main “over” lines, I use ‘Tuscan Blue’ with its deep green foliage and intense blue flowers. It grows upright and stays dense with regular pruning.
The “under” lines get ‘Golden Rain’ rosemary – it has this gorgeous yellow-green foliage that creates incredible contrast. Plus it stays naturally lower.
Here’s what nobody tells you – flower color matters as much as foliage. I learned to coordinate bloom times so the contrast is visible year-round.
For really dramatic effect, ‘Silver Spires’ rosemary has almost white foliage that makes other varieties look super dark by comparison.
Don’t use more than three varieties in one knot garden. I tried five once and it just looked chaotic instead of elegant.
Essential Tools and Supplies
My knot garden toolkit has evolved over the years, but these are the absolute must-haves.
A good measuring tape – I use a 50-foot one because constantly moving a short tape drives me crazy. Spring-loaded is worth the extra cost.
Hedge shears are non-negotiable. I splurged on Felco hedge shears after my cheap ones gave me blisters and uneven cuts.
String line and stakes for keeping your lines straight. I use bright orange mason’s line because it’s easy to see against green foliage.
The tool that changed everything for me – a small hand cultivator for precise weeding between plants. Regular hoes are too big for intricate knot work.
A wheelbarrow or garden cart saves your back when hauling plants and supplies. Trust me on this one.
Seasonal Pruning Schedules
Knot garden maintenance is all about timing – mess up the schedule and your crisp lines turn into a fuzzy mess.
Spring pruning (March-April): This is the big shaping session. I cut back about one-third of the growth to maintain the pattern definition.
Summer touch-ups (June and August): Light pruning to keep lines clean. Just removing growth that’s breaking the pattern.
Fall cleanup (October): Remove any dead or damaged growth, but no major shaping. Plants need their energy for winter survival.
My biggest pruning mistake was trying to maintain perfect lines year-round. The plants get stressed and start looking sparse.
I learned to embrace slight imperfection between major pruning sessions. The monks probably did too.
Adapting Large Designs for Small Spaces
Most traditional monastery knot patterns were designed for huge courtyards, but you can totally scale them down.
I took a classic four-square design and shrunk it from 30×30 feet to 8×8 feet. The key is maintaining the proportions while reducing the overall size.
Simplified patterns work better in small spaces. Instead of complex interwoven knots, try two simple circles that overlap in the center.
Urban gardeners, listen up – you can even do knot gardens in large containers. I’ve seen gorgeous ones in half-barrel planters on patios.
For really tiny spaces, focus on one section of a larger pattern. A single “knot” from a four-part design can look stunning on its own.
The minimum space I’d recommend is 6×6 feet. Anything smaller and you lose the visual impact that makes knot gardens so special.
Raised beds work great for small knot gardens too. The elevation helps define the pattern and makes maintenance easier on your back.
Ready to create pathways that awaken your senses with every step? Hit “next” to learn how aromatic pathway borders can transform ordinary garden walks into fragrant journeys that’ll make your guests never want to leave your outdoor sanctuary!


GIPHY App Key not set. Please check settings