Optimizing Your Indoor Greenhouse Environment

After building dozens of mini greenhouses (and killing more than a few plants along the way), I’ve cracked the code on creating the perfect growing environment. Trust me, the location and setup of your greenhouse can make or break your growing success!
Finding the Perfect Spot
Your greenhouse’s location is absolutely crucial. I made the rookie mistake of putting my first one right next to an air vent – talk about temperature fluctuation nightmares! The ideal location needs:
- At least 6 hours of indirect sunlight
- Protection from heating/cooling vents
- A stable temperature range
- Easy access for daily maintenance
Pro tip: South-facing windows are your best friends, but east-facing ones work great too. Just keep an eye on afternoon heat if you’re using west-facing windows.
Mastering Light Management
Let’s talk about light requirements – they’re trickier than you might think! While natural light is fantastic, most indoor spaces need some supplementation. After experimenting with various setups, I’ve found that LED grow lights provide the best balance of efficiency and cost.
My lighting schedule looks like this:
- Spring/Summer: 14-16 hours of light
- Fall/Winter: 12-14 hours of light
- Always provide a dark period for plant rest
Temperature and Humidity Secrets
Maintaining proper temperature control was my biggest challenge until I figured out this system. Your mini greenhouse should stay between 65-80°F (18-27°C). The real game-changer was adding a small digital thermometer with humidity reading.
For humidity control, I use:
- A small humidity tray
- Pebble-filled water dishes
- Strategic ventilation
- Occasional misting (but don’t go overboard!)
Perfecting Air Circulation
Here’s something most guides won’t tell you: stagnant air is a plant killer! After losing several seedlings to mold, I learned that proper air circulation is non-negotiable.
My air flow setup includes:
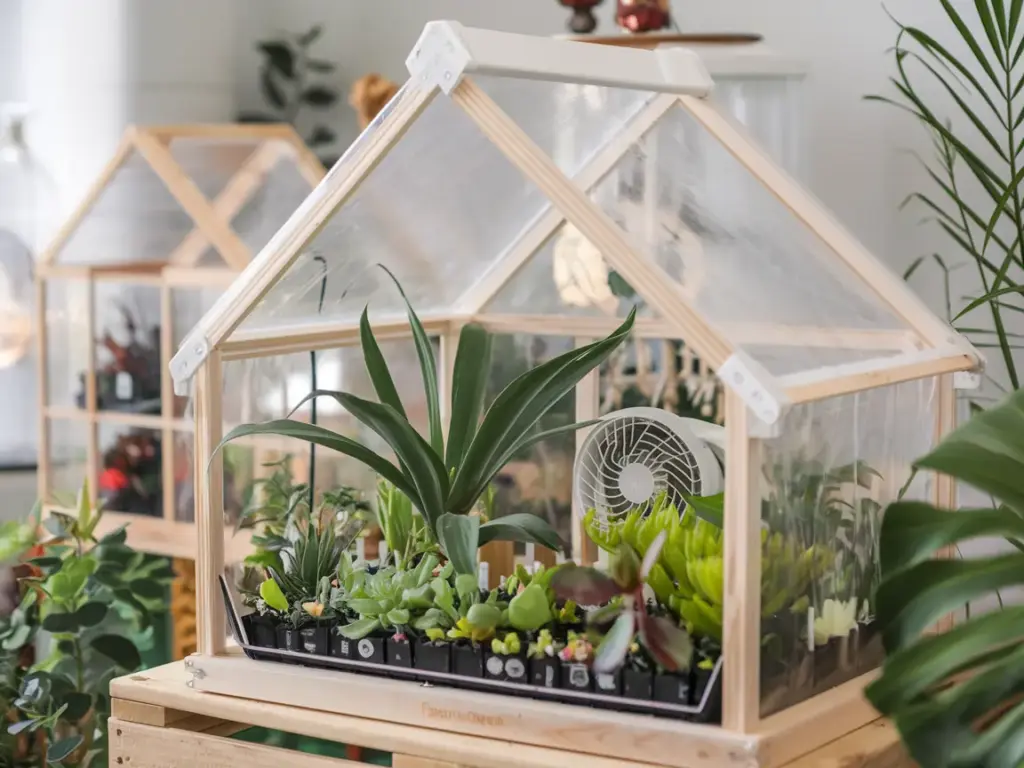
- Small USB fan running 4-6 hours daily
- Adjustable vents near the base
- Top opening for heat escape
- Strategic plant spacing for optimal airflow
Moisture Management Made Easy
Managing moisture levels is like conducting a delicate orchestra. Too much? Hello, mold. Too little? Goodbye, plants. Here’s my foolproof system:
Daily moisture routine:
- Check soil moisture before watering
- Water early in the day
- Maintain proper drainage
- Monitor humidity levels
- Adjust ventilation as needed
I use this super simple trick with a moisture meter – it’s seriously been a life-saver. Your plants will tell you what they need if you know how to listen.
Ready to fill your greenhouse with thriving plants? Click that “next” button below to discover which plants will absolutely love your new setup. I’ll share my top picks for beginners (including the one plant everyone says is difficult, but I’ve found a secret trick to make it flourish!). Plus, I’ll tell you about the $3 seed variety that turned into my most successful greenhouse crop ever!


GIPHY App Key not set. Please check settings