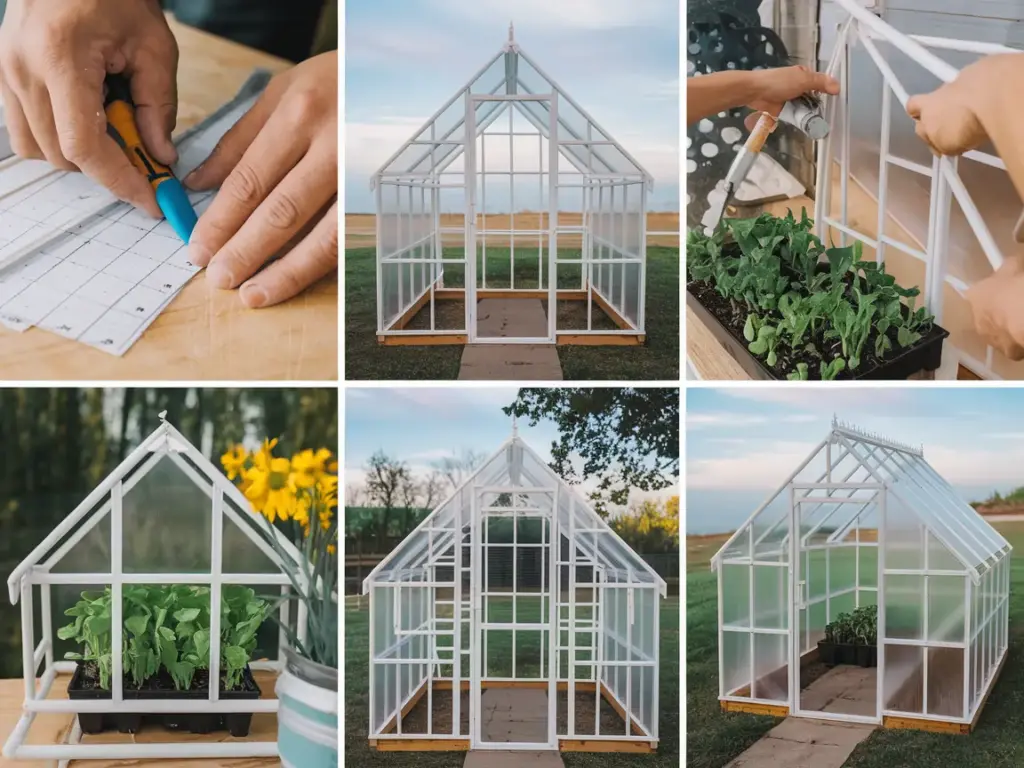
Step-by-Step Building Instructions

Alright, fellow greenhouse enthusiasts! After helping three friends build their own indoor greenhouses (and making plenty of mistakes with my own), I’ve got the construction process down to a science. Let me walk you through exactly how to put together your mini growing paradise without any of the headaches I encountered.
Preparing Your Workspace
First things first – you’ll need a good workspace setup. Clear out an area at least twice the size of your planned greenhouse. I learned this the hard way when I knocked over a lamp trying to maneuver in a tight space!
For measuring, here’s my foolproof method:
- Draw your design on paper first
- Mark your PVC cutting lines with masking tape
- Double-check all measurements (measure twice, cut once isn’t just a saying!)
The standard size I recommend is 4′ wide x 2′ deep x 5′ tall. This fits perfectly in most spaces and gives your plants plenty of growing room.
Frame Assembly Magic
Here comes the fun part! Start with your base frame assembly. The key to a stable greenhouse is all in how you connect those first PVC pieces.
My tried-and-true assembly order:
- Build the base rectangle first
- Add your vertical supports
- Create the top frame
- Install cross-bracing (this was a game-changer for stability)
Pro tip: Use a bit of PVC cement on the main joints. Just don’t go overboard like I did on my first build – you might want to disassemble it someday!
Setting Up Your Shelving System
The shelving installation is where many people get stuck. Here’s my secret: install your shelves before adding the plastic covering. This gives you way better access and makes the whole process smoother.
I recommend:
- Starting from the bottom shelf
- Using zip ties for extra support
- Adding shelf liner for moisture protection
- Leaving enough space between shelves (your plants will thank you)
The Art of Adding Covering Material
Now for the most satisfying part – adding your greenhouse covering! Start from the top and work your way down. Keep the plastic taut but not too tight – you want just enough give to prevent tearing.
My weather-proofing technique:
- Secure top edges first
- Work down the sides
- Leave a small overlap at corners
- Create a simple door flap
- Double-up on high-stress areas
Ventilation: The Secret Sauce
Don’t skip this part! Proper airflow is crucial. I once made a completely sealed greenhouse and… well, let’s just say the resulting humidity was not ideal for my plants!
Add these ventilation points:
- Small gaps near the base
- A flexible door opening
- Optional mesh panels
- Strategic vent placement for optimal air circulation
Here’s something most people don’t realize: good ventilation actually helps prevent plant diseases. I usually add adjustable vents that can be opened or closed depending on the season.
Want to know the real secret to keeping your plants thriving in their new home? Click that “next” button below to discover my tried-and-true tips for optimizing your greenhouse environment. I’ll share my biggest revelation about temperature control (and how a simple $2 item from the dollar store completely transformed my growing success!).


GIPHY App Key not set. Please check settings