Secret #4: Harvesting Hacks for Endless Leaves

Let me tell you about the day I discovered the magic of proper Swiss chard harvesting. I used to just hack away at my plants whenever I needed some greens for dinner, but boy, was I doing it wrong! After years of trial and error (and some pretty sad-looking plants), I’ve mastered the art of getting continuous harvests that keep producing for months.
The “Cut and Come Again” Professional Method
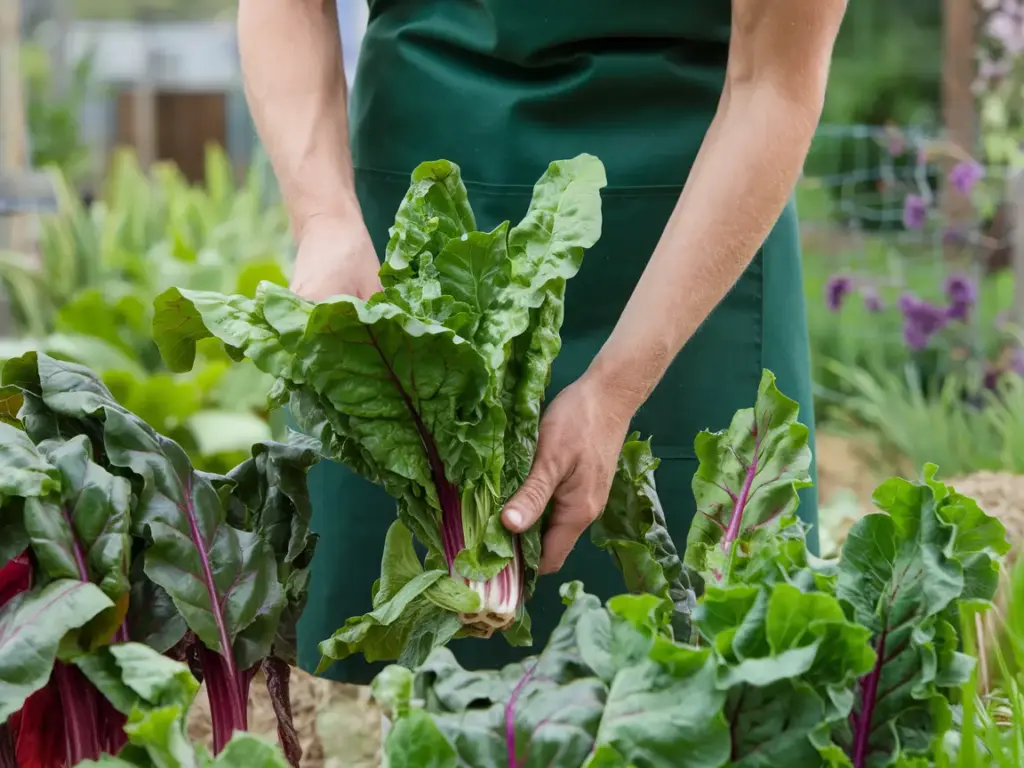
Here’s the game-changing technique that transformed my Swiss chard garden: the cut and come again method. Instead of harvesting whole plants, I learned to select the outer leaves that are at least 8-12 inches tall, cutting them about 2 inches above the soil level. Trust me, this makes a huge difference! The inner leaves will continue growing, and before you know it, you’ll have new outer leaves ready for harvest.
I remember the first time I tried this method – I was skeptical. But within just 10-14 days, my plants were producing new leaves like they were on a mission! The key is to use sharp, clean scissors or pruning shears. Never pull or tear the leaves, as this can damage the central growing point.
Timing Secrets for Maximum Regrowth
The best time to harvest your Swiss chard is early in the morning when the leaves are crisp and full of moisture. Temperature and timing play crucial roles in leaf production. I’ve found that harvesting when leaves reach 8-12 inches gives the best results – any longer and they might get tough, any shorter and you’re not maximizing your yield.
Storage Solutions That Actually Work
Let me share my favorite storage hack that I discovered by accident. After washing your chard leaves, wrap them loosely in slightly damp paper towels, then place them in a perforated plastic bag in the crisper drawer. The key is to maintain humidity without creating excess moisture. This method has kept my leaves fresh for up to three weeks!
Extending Your Growing Season
Want to know how I harvest Swiss chard well into the winter? It’s all about protection and timing. About 4-6 weeks before your first frost date, install row covers or cold frames. I learned this the hard way after losing an entire crop to an early freeze! These plants are surprisingly cold-hardy, and with proper protection, they can survive temperatures down to 25°F (-4°C).
Seed Saving Made Simple
Here’s a pro tip that took me years to figure out: let one or two of your healthiest plants bolt and go to seed. The seeds develop in clusters, and you’ll know they’re ready when they turn brown and dry. I collect them on a sunny day when there’s no moisture in the air, and store them in paper envelopes in a cool, dry place.
Curious about what to do when problems pop up with your Swiss chard? In the next section, I’ll reveal my tried-and-true solutions for common growing issues, including my special technique for dealing with those pesky leaf miners that used to drive me crazy! Click the next button below to discover these problem-solving secrets that will help you maintain healthy, productive plants all season long.
Remember, the key to success with Swiss chard is treating it like the gift that keeps on giving. With these harvesting techniques, you’ll have an endless supply of nutritious leaves for your kitchen. Just be patient, consistent, and gentle with your plants, and they’ll reward you with months of abundant harvests!


GIPHY App Key not set. Please check settings