1. Two-Liter Soda Bottle Planter

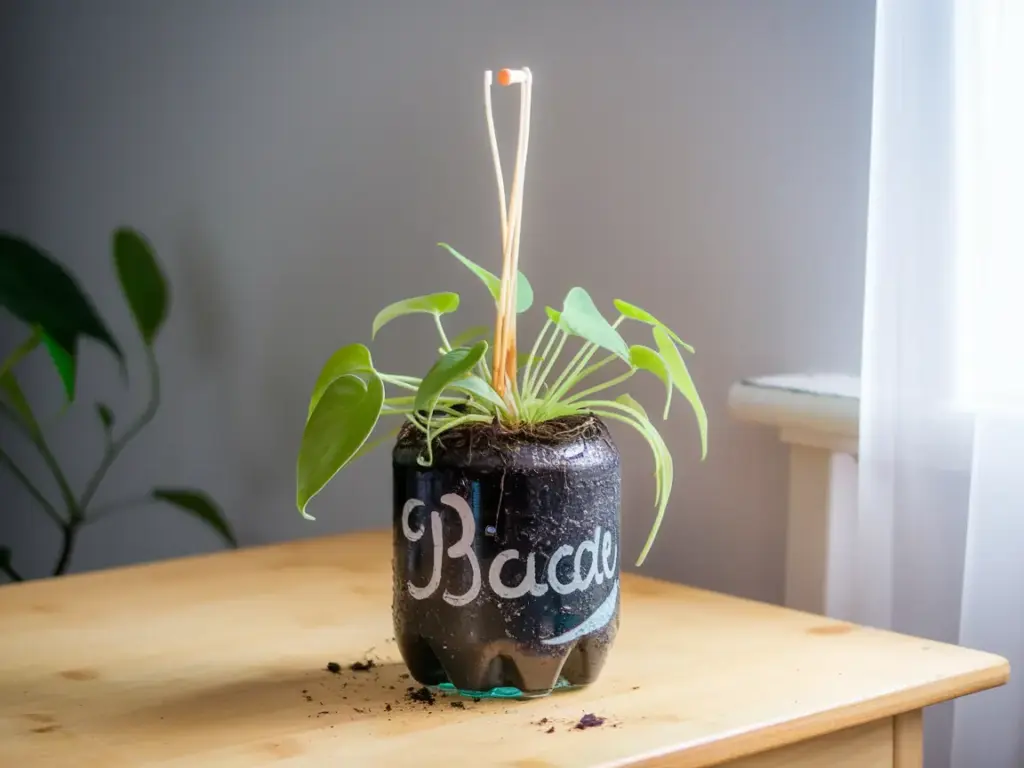
Let me tell you about my first attempt at making a self-watering planter from a soda bottle. I was so proud when I finally got it right! After several tries (and yes, a few minor floods), I’ve perfected this simple but effective design. It’s become my go-to method for starting new plants, and I’ve even taught this technique in my community garden workshops.
Step-by-Step Creation Process
First, gather your materials. You’ll need:
- A clean 2-liter soda bottle
- Sharp scissors
- A heated nail or drill
- Cotton string for wicking
- Good quality potting soil
Here’s the process I’ve refined over dozens of builds:
- Start by removing all labels and washing the bottle thoroughly
- Measure about 1/3 up from the bottom and mark your cutting line
- Carefully cut the bottle at your mark
- Create 3-4 small drainage holes in the bottle cap
- Thread your wicking material through the cap
- Invert the top section and nest it inside the bottom
The trickiest part? Getting the wick length right. I’ve found that about 4 inches of wick above the cap works best for most plants.
Best Plants for Bottle Planters
Through trial and error, I’ve discovered these plants thrive in soda bottle systems:
- Herbs: Basil, mint, parsley
- Small greens: Lettuce, spinach
- Compact flowers: Marigolds, pansies
- Perfect for starting tomato seedlings
My personal favorite is growing kitchen herbs. There’s nothing like fresh basil from your windowsill for making homemade pesto!
Creative Customization Ideas
Want to make your planters look less like, well, soda bottles? Try these tricks:
- Use spray paint designed for plastic
- Create a macramé hanger
- Add decorative stones on top
- Group multiple bottles together for a modern look
I once created a whole herb garden wall using painted bottles. It became quite the conversation starter during dinner parties!
Essential Maintenance Tips
Here’s what I’ve learned about keeping these planters thriving:
- Check the water reservoir weekly
- Clean the wicking system every 3-4 months
- Replace the entire setup yearly
- Watch for algae growth in the reservoir
The biggest mistake I made early on? Forgetting to check for algae. Now I wrap the reservoir section in paper or dark fabric to block light.
Troubleshooting Common Issues
Sometimes you might notice:
- Slow wicking: Usually means it’s time to clean or replace the wick
- Droopy plants: Check if the reservoir is empty
- Root problems: Ensure drainage holes aren’t blocked
- Yellow leaves often mean the wick is too large
Ready to level up your DIY planter game? Click the “next” button below to discover how to transform an old wine bottle into an elegant self-watering planter. Trust me, this next project will seriously impress your friends – it’s like the sophisticated older sister of our soda bottle planter!


GIPHY App Key not set. Please check settings