9. Upside-Down Tomato Planters
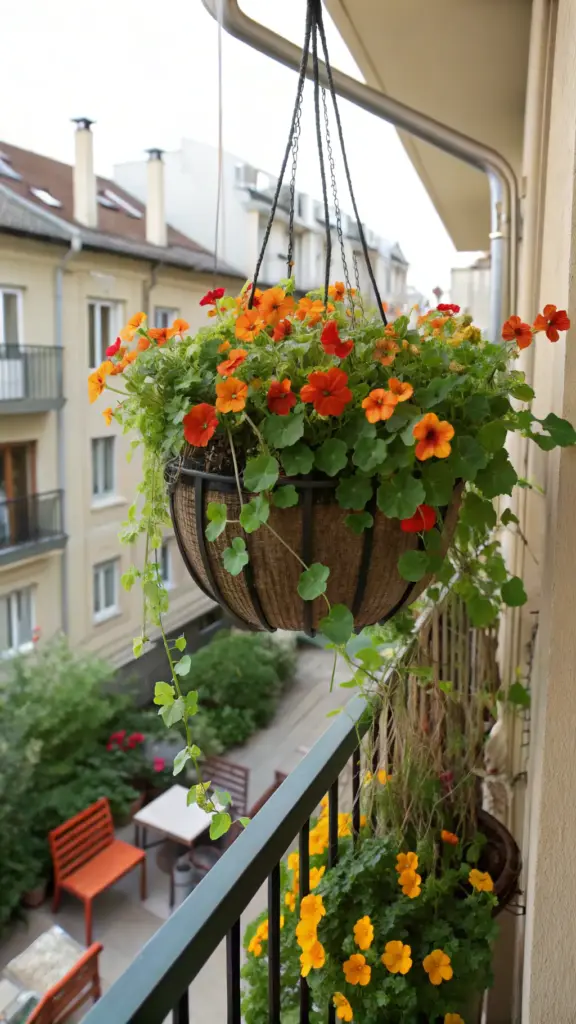
Who says upside-down planters are just for tomatoes? Let’s flip the script—literally—and use them for trailing flowers instead! I’ll never forget the first time I hung an upside-down planter on my balcony. It was filled with vibrant nasturtiums, and their cascading blooms turned my tiny urban space into a lush oasis. If you’re short on space but big on creativity, these planters are your secret weapon. Let’s dive into how you can make your own, why they’re perfect for urban gardeners, and which trailing flowers will thrive in this unique setup.
Why Upside-Down Planters Are Perfect for Urban Gardeners
When you’re working with limited space, every inch counts. That’s where upside-down planters come in—they’re a space-saving solution that lets you grow vertically instead of horizontally. Whether you’re dealing with a small balcony, a compact patio, or even just a sunny wall, these planters help you maximize your gardening potential without sacrificing style.
I once lived in a studio apartment with no outdoor space to speak of. Desperate for some greenery, I hung an upside-down planter near my window, and it completely transformed the vibe. The trailing flowers spilled over beautifully, creating a living curtain of color. Plus, it freed up precious floor space for my other plants.
Instructions for Making Your Own Upside-Down Planter
The best part about upside-down planters? You can DIY them with materials you probably already have at home. Here’s how I made mine:
- Choose your container: A 5-gallon bucket or even a reusable shopping bag works great.
- Cut a hole: Drill or cut a hole in the bottom (which becomes the top when flipped) for your plant to hang through.
- Add drainage: Line the inside with a layer of gravel or small stones to prevent waterlogging.
- Plant your flowers: Gently insert your trailing flowers through the hole from the outside, then fill the container with soil.
- Hang it up: Use sturdy hooks or brackets to hang your planter securely.
Pro tip: Start with young, small plants to make the planting process easier. I once tried using a fully grown lobelia, and let’s just say it was a struggle—not recommended!


Best Flower Choices for Upside-Down Planters
Not all flowers are created equal when it comes to upside-down planters. You’ll want to stick with varieties that trail beautifully and don’t mind growing in a slightly unconventional setup. Nasturtiums, lobelia, and verbena are my top picks.
One summer, I planted purple verbena in an upside-down planter, and it was like having a waterfall of blooms right outside my window. The vibrant colors attracted pollinators, too, which was a bonus. If you’re feeling adventurous, mix in some trailing petunias or ivy for added texture and variety.
Final Thoughts on Upside-Down Planters
Using upside-down planters is a creative way to save space while adding a touch of whimsy to your garden. Whether you’re an urban gardener or just someone who loves trying new things, these planters are both practical and stylish. With the right flowers and a little DIY effort, they’ll become a standout feature in your space.
Ready to see what’s next? Click the “next” button below to discover how tiered wooden shelves can take your gardening game to the next level. Spoiler alert: We’re talking about combining vertical gardening with serious design flair!


GIPHY App Key not set. Please check settings