Tip 7: Master the Hardening Off Process

Let me tell you about the first time I tried hardening off my tomato seedlings. What a disaster! I enthusiastically put all 24 of my precious plants outside on a sunny spring day, only to come home to find them wilted and sunburned. That painful lesson taught me that hardening off isn’t just a suggestion – it’s absolutely crucial for plant survival.
The Perfect 7-Day Hardening Schedule
After years of trial and error, I’ve developed what I call my “foolproof” hardening off schedule. Here’s exactly how I do it:
- Day 1-2: Just 1 hour outside in a sheltered spot with bright, indirect light
- Day 3-4: 2-3 hours with some morning direct sunlight
- Day 5-6: 4-6 hours with morning and early afternoon sun
- Day 7: Full day outside, bringing them in only at night
The key is to be patient and consistent with this schedule. Trust me, rushing this process will only lead to heartbreak!
Temperature and Wind Management
One spring, I lost several seedlings because I didn’t check the weather forecast. Now I’m practically a meteorologist during hardening off week! Never start the process if temperatures are below 50°F (10°C).
I’ve found that placing seedlings next to a south-facing wall creates a perfect microclimate. The wall blocks harsh winds and radiates stored heat, giving my plants the gentle introduction they need.
Smart Sunlight Introduction
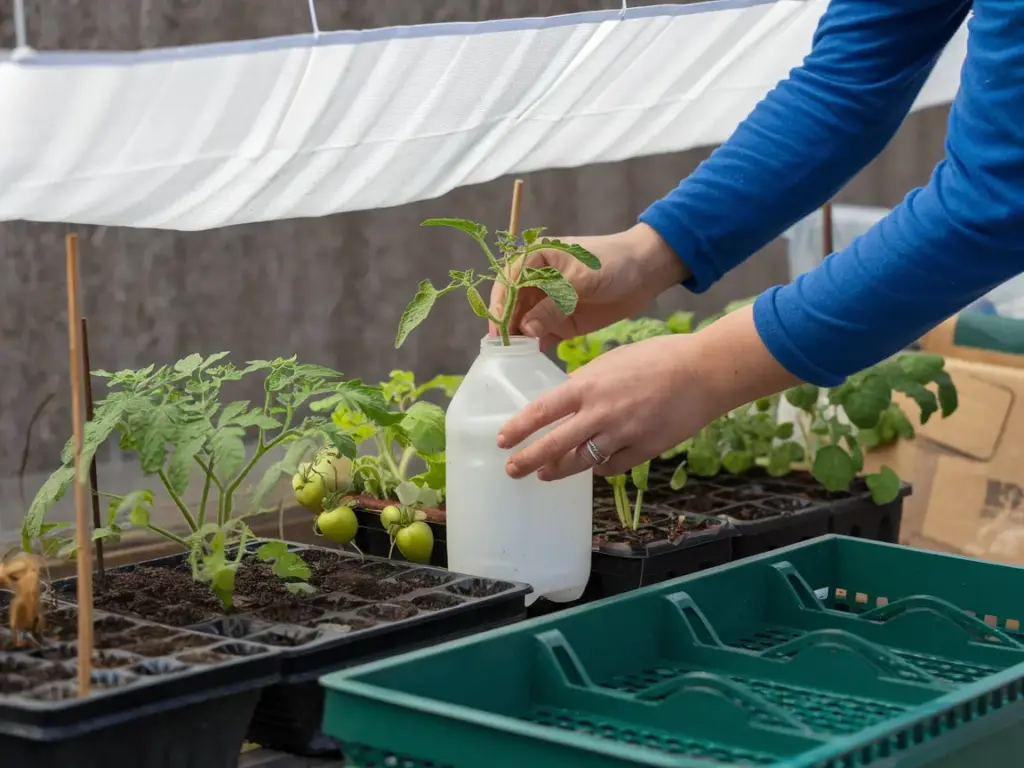
Think of your seedlings like a redhead at the beach – they need serious sun protection at first! I learned this trick from my old gardening mentor: use a white bed sheet suspended above the plants to filter intense sunlight during the first few days. It works like a charm for preventing leaf scorch.
Weather Protection Strategies
Always keep your weather protection tools ready. My emergency kit includes:
- Plastic milk jugs with bottoms cut off (instant mini greenhouses!)
- Row cover fabric
- Large cardboard boxes
- Plant trays for quick transport
The golden rule is to expect the unexpected. Last year, a surprise spring storm rolled in while I was at work. Thankfully, my neighbor knew about my “plant emergency box” and covered everything up!
Monitoring for Success
I can’t stress enough how important it is to watch your plants during this process. Look for these warning signs:
- Leaf curling or wilting
- Color changes, especially yellowing
- Drooping stems
- Dry soil
Getting to know your plants during hardening off is like learning their language. They’ll tell you if they’re happy or stressed – you just need to pay attention!
Ready to learn what happens after your plants are fully hardened off? Click the “next” button below to discover my tried-and-true transplanting techniques that’ll give your tomatoes the best possible start in their permanent home. Trust me, you won’t want to miss my secret method for preventing transplant shock – it’s been a game-changer for my garden!


GIPHY App Key not set. Please check settings